Essa tradução foi gerada por um programa e ainda não foi revisada por uma pessoa. Falas essa língua? Dá uma olhada.

Recarga do Geek Bar Pulse

Jerry Wheeler e um outro colaborador
Última atualização em 21 de jul de 2026
Visualizações: 12 mil
Visualizar Estatísticas:
- Últimas 24 horas:
- 55
- Últimos 7 dias:
- 324
- Últimos 30 dias:
- 1.588
- Ao todo:
- 11.676
Comentários: 8
2 comments on steps, 6 guide comments.
Go to guide commentsConcluído: 5 6
5 pessoas marcaram este guia como "concluído". Será você o próximo?
6· pessoas marcaram este guia como "concluído". Incluindo você — ótimo trabalho!
Favorites: 1 2
1 pessoa favoritou (e se inscreveu) neste guia. Você será o próximo?
2 pessoas marcaram como favorito (e assinaram) este guia - incluindo você!
Guia colaborativo
Foi um incrível membro de nossa comunidade quem criou este guia. Não foi ninguém da equipe iFixit, não.
Introdução
Ir para o passo 1 ↓Embora esses dispositivos sejam bem feitos e funcionem de forma surpreendente, é decepcionante que eles simplesmente acabem no lixo assim que ficam vazios.
No entanto, é possível recarregá-los com o seu sabor favorito de e-juice, e este guia mostrará a maneira correta de fazer isso.
Recomendam-se apenas três ou quatro recargas; depois disso, as bobinas de aquecimento ficam muito obstruídas com carbono e o algodão queima, resultando em um sabor ruim e baixa produção de vapor.
Se você está pensando em recarregar seu vape pela primeira vez, certifique-se de parar de usá-lo assim que começar a sentir um gosto de queimado. Algumas puxadas com gosto de queimado não causarão danos, mas se você continuar, queimará o algodão e possivelmente queimará a bobina.
O que você precisa
Ferramentas


-
-
-
Segure o bocal com um alicate.
-
Gire o bocal firmemente para a esquerda ou para a direita; o sentido não importa.
 Pergunte ao FixBot
-
-
-
Esperamos que a vedação do bocal permaneça no lugar ao remover o bocal, mas nem sempre isso acontece. Se ela tiver se soltado, você precisa saber como substituí-la.
-
Ela é inserida no bocal com a parte de feltro virada para cima. Colocá-la de outra forma impedirá uma vedação hermética entre o tanque e o bocal.
-
-
-
Observe que o bocal possui uma aba que permite a montagem em apenas uma orientação. A seta aponta para a aba que você deve alinhar com a da carcaça.
-
Aqui você pode ver o interior da carcaça, onde a aba do bocal se alinha.
-
-
-
-
-
Coloque o botão liga/desliga na posição Desligado; nenhum orifício de ar deve estar visível.
-
-
-
Use o seu estilete para alavancar o botão LIGA/DESLIGA. Ele é apenas encaixado sob pressão, portanto, não há adesivos ou clipes com os quais se preocupar.
-
Remova o botão LIGA/DESLIGA.
-
-
-
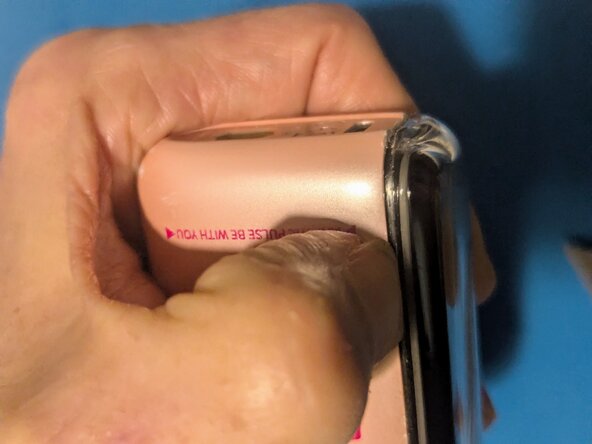
Posicione sua unha na emenda perto da parte inferior do vape.
-
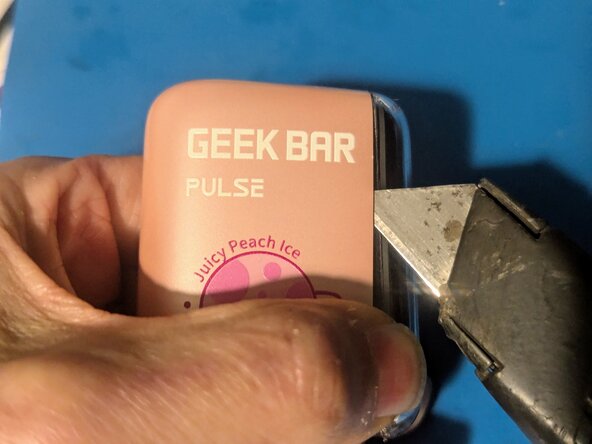
Insira seu estilete nos dois pontos altos da carcaça na parte inferior.
-
Force o lado próximo da carcaça até que abra o suficiente para inserir a unha na abertura e mantê-la aberta.
-
-
-
Insira a faca e deslize-a para baixo, em seguida, use-a para alavancar a parte superior do vape para fora da carcaça.
-
Usando a faca, volte à parte inferior e alavanque o lado oposto para fora.
-
Do outro lado, insira a faca e use-a para soltar os clipes desse lado.
-
-
-
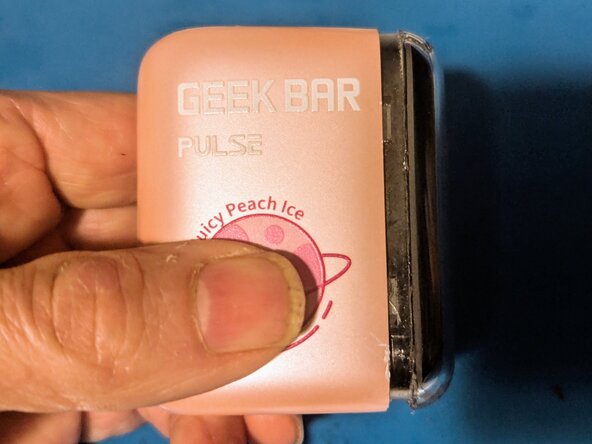
Os clipes devem estar soltos em toda a volta neste momento.
-
Puxe o vape para fora da carcaça.
-
-
-
-
-
-
Comece pressionando a ponta da sua garrafa ou seringa no topo da espuma. Aponte para o lado e encha até que o topo do vaporizador esteja preenchido com líquido, então pare.
-
Na segunda imagem, você pode ver o líquido se espalhando pela espuma e preenchendo o espaço entre a espuma e a carcaça transparente.
-
-
-
Vá para um dos lados para continuar o preenchimento.
-
...E continue para o próximo lado.
-
E, finalmente, o último lado.
-
-
-
Aqui você pode ver o líquido sendo absorvido pela espuma.
-
Continue preenchendo os quatro lados.
-
Pare ao chegar a cerca de 2/3 da profundidade; o líquido continuará a se espalhar pela espuma. O excesso acabará escorrendo novamente.
-
-








Para a remontagem de seu dispositivo, siga estas instruções na ordem inversa.
Cancelar: não concluí este guia.
5 outras pessoas executaram este guia.

6Comentários do guia
It's not burning out it's the counter ran out so now it does the light instead of the electricity like it only we could reset the counter... Once it runs down even though it worked perfect 2 seconds before, poof. Lights of death as they call them on xbox with the ring of light.... I loved the crap out of mine it's too bad! Ill still use the cotton somehow in another device I guess. Maybe if I disconnect the screen altogether and just have the battery on it isnt that he black cord their always colorful but it's bound to work like a screenless counter less draw activated....or is it the electricity were enjoying eating on ha. Yum.
Based on my experience with the Pulse vapes, you've got a burnt out coil. I've noted two different conditions where the outer ring flashes red; the first is after you've taken a hit when the counter is at zero; it flashes red for a moment after you've finished drawing, but that doesn't seem to affect the operation in any way.
The second condition where it flashes red is when one or both of the coils is reading wildly out of spec. I've seen them measure on the order of 30 ohms when they should be showing somewhere between 1.2 and 1.5 ohms. When that happens, the flashing will happen as you're drawing air, and it won't heat during that time. The fix for that is to rebuild the coils; usually it's the lower one that goes out first, since that's the one that's used when you're in the normal rather than pulse mode.
Geek Bar Pulse Mesh Coil Rebuild - iFixit Repair Guide
As far as the counter, I haven't found or heard of a way to reset it, but I've refilled a Pulse several times and it doesn't affect anything.
Hi! My vape rapidly starts and stops after I refilled it. Im positive that some liquid got into its electronics. Is there any way to fix it? It also won't start when im sucking on the mouthpiece. It does releace smoke if I keep sucking on it while it keeps quickly turning on the heater for a split second.
I’m not sure how I got here… but might as well ask a question…. I have a vape that still has visible liquid in the tank thing, draw on the vape… no smoke, no lights, blow into the opposite end like where the charger goes and smoke comes out of the top/mouthpuece. 🤷🏽♀️🤷🏽♀️🤷🏽♀️
@tiffanycar26507 in my opinion, it sounds like an improper seal. Try reseating the mouth piece to see if that helps
