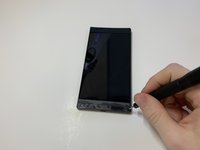
Ir para o conteúdo principal
Participe da comunidade de reparos - Criar conta

Razer Phone Motherboard Replacement

O que você precisa

  1. Razer Phone Motherboard Replacement, Display Assembly: passo 1, imagem 1 %32 Razer Phone Motherboard Replacement, Display Assembly: passo 1, imagem 2 %32 Razer Phone Motherboard Replacement, Display Assembly: passo 1, imagem 3 %32
    • Remove the plastic speaker grills by using the metal spudger to pry underneath the strips.

    • Peel off the plastic speaker grill to reveal the screws.

    • Heating up the plastic grills make them easier to remove.

    • Peeling off the plastic speaker grill will ruin the adhesive used to keep it in place. A new adhesive must be used to put the grill back on the device.

    Pergunte ao FixBot
  2. Razer Phone Motherboard Replacement: passo 2, imagem 1 %32 Razer Phone Motherboard Replacement: passo 2, imagem 2 %32
    • Pry the top plastic grill off with the metal spudger and reveal the screws.

    Pergunte ao FixBot
  3. Razer Phone Motherboard Replacement: passo 3, imagem 1 %32 Razer Phone Motherboard Replacement: passo 3, imagem 2 %32 Razer Phone Motherboard Replacement: passo 3, imagem 3 %32
    • Remove five (two bottom, three top) 2.5 mm screws with the Phillips #000 screwdriver.

    • Remove five (four bottom, one top) 5.5 mm screws with the Torx Head T5 screwdriver.

    Pergunte ao FixBot
  4. Razer Phone Motherboard Replacement: passo 4, imagem 1 %32 Razer Phone Motherboard Replacement: passo 4, imagem 2 %32
    • Remove the display assembly by using the Jimmy to separate the assembly from the phone's frame.

    • Lift the display assembly away from the other half of the phone.

    Pergunte ao FixBot
  5. Razer Phone Motherboard Replacement: passo 5, imagem 1 %32 Razer Phone Motherboard Replacement: passo 5, imagem 2 %32 Razer Phone Motherboard Replacement: passo 5, imagem 3 %32
    Ferramenta utilizada neste passo:
    Tweezers
    $4.99
    • Remove one 2.5 mm screw holding down the metal bracket connector using the Phillips #000 screwdriver.

    • Peel back the metallic shielding over the connector using tweezers.

    • Remove the metal bracket connector.

    Pergunte ao FixBot
  6. Razer Phone Motherboard Replacement: passo 6, imagem 1 %32 Razer Phone Motherboard Replacement: passo 6, imagem 2 %32
    • Grab hold of the the screen ribbon with the tweezers and remove it from the rest of the phone to free the assembly display.

    Pergunte ao FixBot
  7. Razer Phone Motherboard Replacement, Battery: passo 7, imagem 1 %32 Razer Phone Motherboard Replacement, Battery: passo 7, imagem 2 %32 Razer Phone Motherboard Replacement, Battery: passo 7, imagem 3 %32
    Ferramenta utilizada neste passo:
    Tweezers
    $4.99
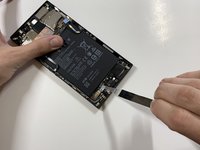
    • Grab hold of the connector on the right side of the phone (just above the battery) using the tweezers.

    • Remove the connector.

    Pergunte ao FixBot
  8. Razer Phone Motherboard Replacement: passo 8, imagem 1 %32 Razer Phone Motherboard Replacement: passo 8, imagem 2 %32
    • Remove the 2.5 mm screw holding down the bracket with a Phillips #000 screwdriver.

    • Grab the bracket with the tweezers and remove it.

    Pergunte ao FixBot
  9. Razer Phone Motherboard Replacement: passo 9, imagem 1 %32 Razer Phone Motherboard Replacement: passo 9, imagem 2 %32 Razer Phone Motherboard Replacement: passo 9, imagem 3 %32
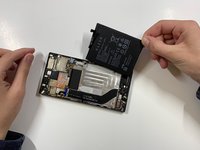
    • Peel off and pull out the elastic tabs at the bottom of the battery.

    Pergunte ao FixBot
  10. Razer Phone Motherboard Replacement: passo 10, imagem 1 %32 Razer Phone Motherboard Replacement: passo 10, imagem 2 %32
    • Carefully use the Jimmy to wedge the battery out of the phone.

    Pergunte ao FixBot
  11. Razer Phone Motherboard Replacement, Rear Camera: passo 11, imagem 1 %32 Razer Phone Motherboard Replacement, Rear Camera: passo 11, imagem 2 %32
    • Remove the one 2.5 mm screw with the Phillips #000 screwdriver.

    Pergunte ao FixBot
  12. Razer Phone Motherboard Replacement: passo 12, imagem 1 %32 Razer Phone Motherboard Replacement: passo 12, imagem 2 %32 Razer Phone Motherboard Replacement: passo 12, imagem 3 %32
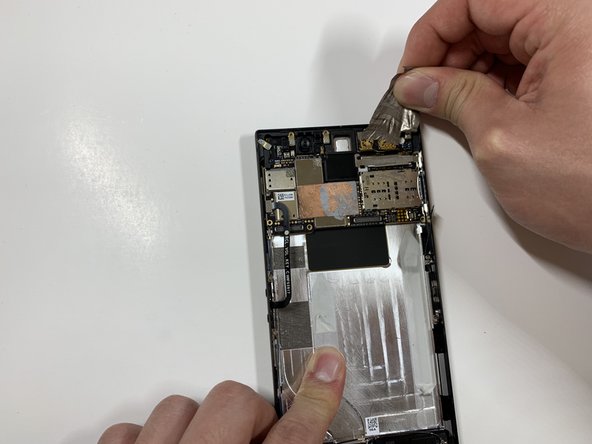
    • Remove the protective peel covering the rear cameras using your hands.

    Pergunte ao FixBot
  13. Razer Phone Motherboard Replacement: passo 13, imagem 1 %32
    Ferramenta utilizada neste passo:
    Tweezers
    $4.99
    • Use the tweezers to remove the white tab connector.

    Pergunte ao FixBot
  14. Razer Phone Motherboard Replacement: passo 14, imagem 1 %32
    • Grab and remove the metal tab with the tweezers.

    Pergunte ao FixBot
  15. Razer Phone Motherboard Replacement: passo 15, imagem 1 %32 Razer Phone Motherboard Replacement: passo 15, imagem 2 %32 Razer Phone Motherboard Replacement: passo 15, imagem 3 %32
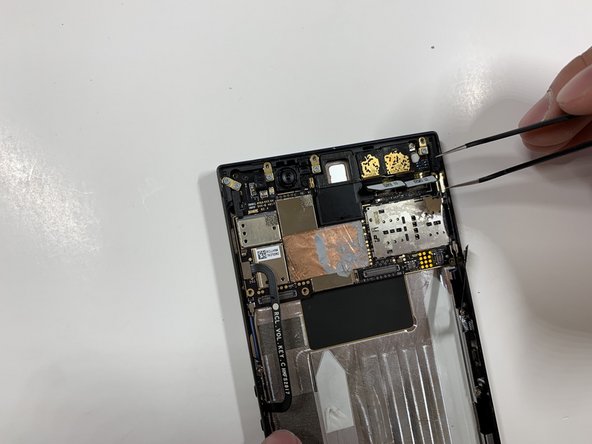
    • Grab the connectors with the tweezers and gently lift the connectors loose.

    Pergunte ao FixBot
  16. Razer Phone Motherboard Replacement: passo 16, imagem 1 %32 Razer Phone Motherboard Replacement: passo 16, imagem 2 %32
    • Remove the one 2.5 mm screw with the Phillips #000 screwdriver.

    Pergunte ao FixBot
  17. Razer Phone Motherboard Replacement: passo 17, imagem 1 %32
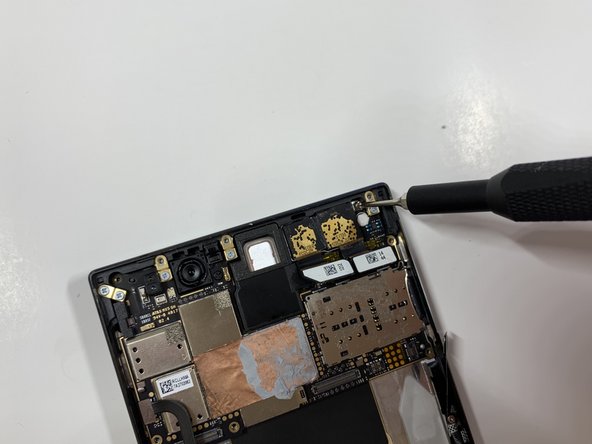
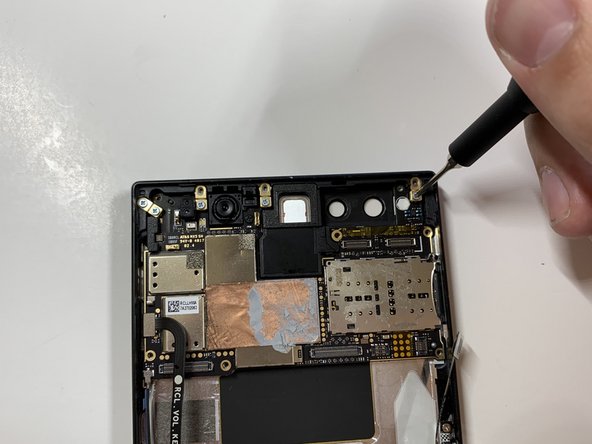
    • Remove the one 2.5 mm screw underneath the connectors with the Phillips #000 screwdriver.

    Pergunte ao FixBot
  18. Razer Phone Motherboard Replacement: passo 18, imagem 1 %32 Razer Phone Motherboard Replacement: passo 18, imagem 2 %32 Razer Phone Motherboard Replacement: passo 18, imagem 3 %32
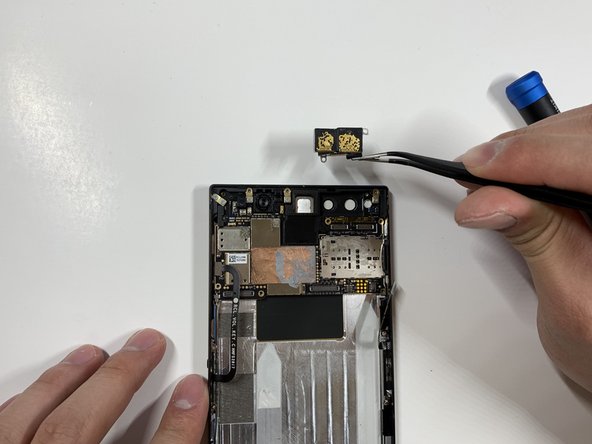
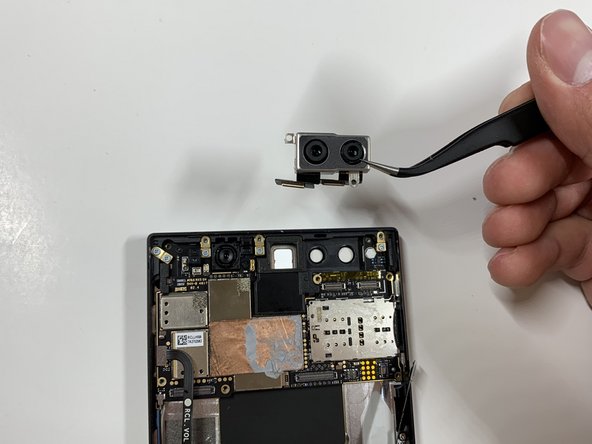
    • Grab the loose connectors with a tweezer and gently remove the rear camera unit from the phone.

    Pergunte ao FixBot
  19. Razer Phone Motherboard Replacement, Motherboard: passo 19, imagem 1 %32
    Ferramenta utilizada neste passo:
    Tweezers
    $4.99
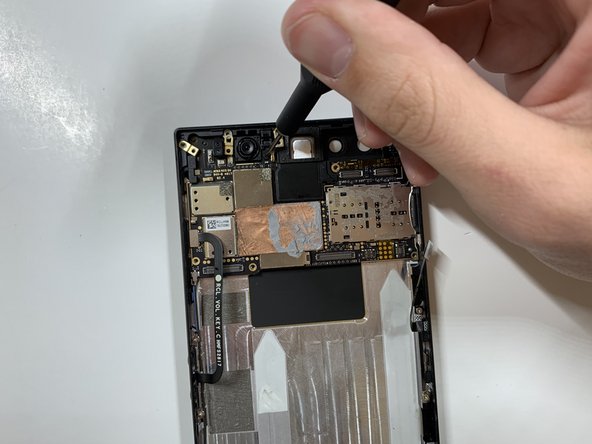
    • Grab and remove the blue connector with the tweezers.

    Pergunte ao FixBot
  20. Razer Phone Motherboard Replacement: passo 20, imagem 1 %32 Razer Phone Motherboard Replacement: passo 20, imagem 2 %32
    • Remove the five 1 mm screws holding down the gold antenna line brackets to the motherboard using the Phillips #000 screwdriver.

    Pergunte ao FixBot
  21. Razer Phone Motherboard Replacement: passo 21, imagem 1 %32 Razer Phone Motherboard Replacement: passo 21, imagem 2 %32
    • Remove the 2.5 mm screw next to the front-facing camera with the Phillips #000 screwdriver.

    Pergunte ao FixBot
  22. Razer Phone Motherboard Replacement: passo 22, imagem 1 %32 Razer Phone Motherboard Replacement: passo 22, imagem 2 %32
    • Remove the four gold antenna line brackets with the tweezers.

    Pergunte ao FixBot
  23. Razer Phone Motherboard Replacement: passo 23, imagem 1 %32
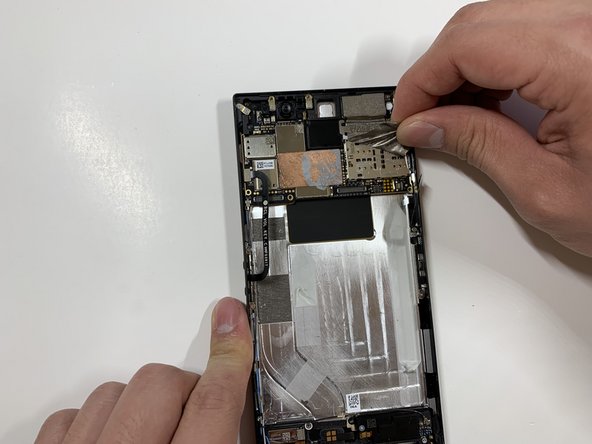
    • Using the tweezers remove the SIM card tray from the body of the phone.

    Pergunte ao FixBot
  24. Razer Phone Motherboard Replacement: passo 24, imagem 1 %32
    • Carefully lift up the motherboard away from the device.

    Pergunte ao FixBot
Conclusão

To reassemble your device, follow these instructions in reverse order.

Uma outra pessoa concluiu este guia.

David Todd

Membro desde: 01/25/19

188 Reputação

Autoria de 1 guia

Equipe

Cal Poly, Team S19-G6, White Winter 2019 Membro de Cal Poly, Team S19-G6, White Winter 2019

CPSU-WHITE-W19S19G6

4 Membros

Autoria de 10 guias

0Comentários do guia

Comentar

Visualizações:

Últimas 24 horas: 1

Últimos 7 dias: 10

Últimos 30 dias: 87

Ao todo: 2,020