Ir para o conteúdo principal
Participe da comunidade de reparos - Criar conta

Razer DeathAdder Chroma Motherboard Replacement Guide

O que você precisa

    1. Razer DeathAdder Chroma Motherboard Replacement Guide, Outer Casing: passo 1, imagem 1 %32
      • Opening the mouse casing will void any warranty that exists for the mouse.

      • Turn the mouse over so the bottom is facing up.

      Pergunte ao FixBot

      Comentar

    2. Razer DeathAdder Chroma Motherboard Replacement Guide: passo 2, imagem 1 %32 Razer DeathAdder Chroma Motherboard Replacement Guide: passo 2, imagem 2 %32
      • Use the blunt end of the spudger to pry the adhesive rubber pads from the top left and right edges.

      Pergunte ao FixBot

      Comentar

    3. Razer DeathAdder Chroma Motherboard Replacement Guide: passo 3, imagem 1 %32 Razer DeathAdder Chroma Motherboard Replacement Guide: passo 3, imagem 2 %32
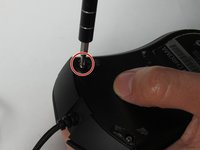
      • Use a Phillips #0 screwdriver to remove two 6.7 mm screws.

      Pergunte ao FixBot
      Comentar

    4. Razer DeathAdder Chroma Motherboard Replacement Guide: passo 4, imagem 1 %32
      • Use your fingers to identify the location of the screw under the bottom label.

      Pergunte ao FixBot
      Comentar

    5. Razer DeathAdder Chroma Motherboard Replacement Guide: passo 5, imagem 1 %32
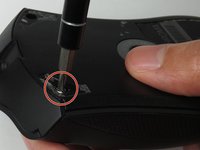
      • Use a Phillips #0 screwdriver to remove one 6.7 mm screw.

      • Clear the label away from around the screw for easier removal.

      Pergunte ao FixBot

      Comentar

    6. Razer DeathAdder Chroma Motherboard Replacement Guide: passo 6, imagem 1 %32 Razer DeathAdder Chroma Motherboard Replacement Guide: passo 6, imagem 2 %32 Razer DeathAdder Chroma Motherboard Replacement Guide: passo 6, imagem 3 %32
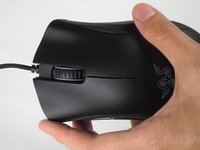
      • Turn the mouse over so the bottom is facing down.

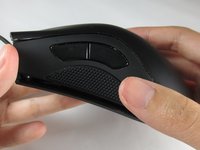
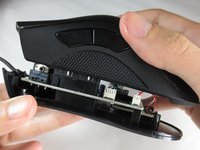
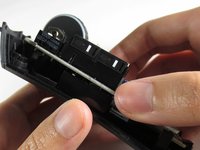
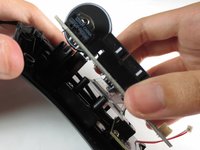
      • Separate the top casing from the bottom base by pulling the top casing upwards.

      • Separating the casing too quickly could damage the ribbon connector between the motherboard and the LED lights.

      Pergunte ao FixBot

      Comentar

    7. Razer DeathAdder Chroma Motherboard Replacement Guide: passo 7, imagem 1 %32 Razer DeathAdder Chroma Motherboard Replacement Guide: passo 7, imagem 2 %32
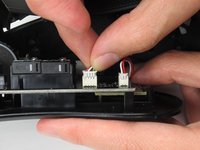
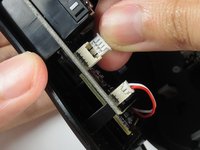
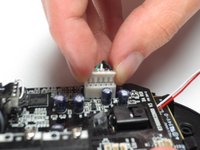
      • Disconnect the ribbon connector between the motherboard and the LED lights by pulling upward.

      • Pulling too hard could damage the wire connections.

      Pergunte ao FixBot
      Comentar

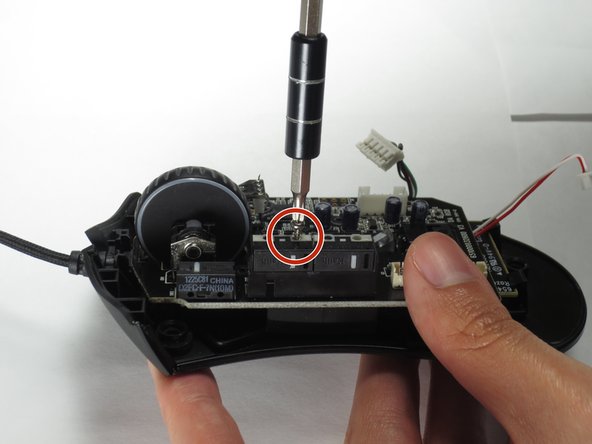
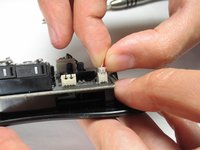
    1. Razer DeathAdder Chroma Motherboard Replacement Guide, Motherboard: passo 8, imagem 1 %32 Razer DeathAdder Chroma Motherboard Replacement Guide, Motherboard: passo 8, imagem 2 %32
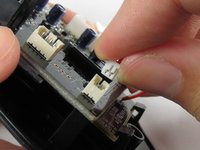
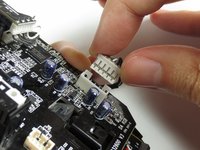
      • Disconnect the ribbon connector between the motherboard and the USB cable by pulling upward.

      Pergunte ao FixBot
      Comentar

    2. Razer DeathAdder Chroma Motherboard Replacement Guide: passo 9, imagem 1 %32
      • Use a Phillips #0 screwdriver to remove three 5.5 mm screws.

      Pergunte ao FixBot
      Comentar

    3. Razer DeathAdder Chroma Motherboard Replacement Guide: passo 10, imagem 1 %32 Razer DeathAdder Chroma Motherboard Replacement Guide: passo 10, imagem 2 %32
      • Use a Phillips #0 screwdriver to remove two 11.5 mm screws on the side buttons.

      Pergunte ao FixBot

      Comentar

    4. Razer DeathAdder Chroma Motherboard Replacement Guide: passo 11, imagem 1 %32
      • Use a Phillips #000 screwdriver to remove one 5.0 mm screw.

      Pergunte ao FixBot

      Comentar

    5. Razer DeathAdder Chroma Motherboard Replacement Guide: passo 12, imagem 1 %32 Razer DeathAdder Chroma Motherboard Replacement Guide: passo 12, imagem 2 %32
      • Disconnect the ribbon connector between the motherboard and the optical sensor.

      Pergunte ao FixBot

      Comentar

    6. Razer DeathAdder Chroma Motherboard Replacement Guide: passo 13, imagem 1 %32 Razer DeathAdder Chroma Motherboard Replacement Guide: passo 13, imagem 2 %32
      • Remove the motherboard by grasping the sides and gently pulling upward.

      Pergunte ao FixBot
      Comentar

Conclusão

To reassemble your device, follow these instructions in reverse order.

Cancelar: não concluí este guia.

5 outras pessoas executaram este guia.

Equipe

Baylor, Team S5-G2, Williams Spring 2017 Membro de Baylor, Team S5-G2, Williams Spring 2017

BU-WILLIAMS-S17S5G2

3 Membros

Autoria de 36 guias

0Comentários do guia

Comentar

Visualizações:

Últimas 24 horas: 0

Últimos 7 dias: 11

Últimos 30 dias: 74

Ao todo: 11,853