Essa tradução foi gerada por um programa e ainda não foi revisada por uma pessoa. Falas essa língua? Dá uma olhada.
Introdução
Siga estes passos para desmontar a carcaça de plástico da furadeira RIDGID R84015 X2.
O que você precisa
-
-
-
Remova a placa traseira.
-
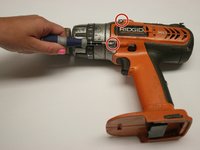
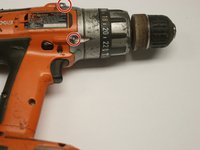
Usando uma chave Torx T20, remova os quatro parafusos que prendem a placa traseira.
 Pergunte ao FixBot
-
-
-
Remova o punho da furadeira.
-
Com a chave Phillips #2, remova os cinco parafusos Phillips que prendem o punho da furadeira ao corpo.
-
-
-
Remova a caixa de engrenagens do corpo.
-
Com a chave Phillips #2, remova os quatro parafusos que prendem a caixa de engrenagens ao corpo.
-
-
-
-
-
-
Com a furadeira desmontada, direcione sua atenção para o gatilho e para a chave de avanço e reverso.
-
-
-
Verifique se o interruptor de avanço e reversão não está quebrado.
-
NOTA: a pequena aba no gatilho encaixa na ranhura do interruptor de avanço e reversão
-
-
-
Com a bateria conectada, verifique se a fiação funciona ao puxar o gatilho.
-
Coloque as pontas de prova do multímetro aqui.
-
Se a fiação estiver funcionando e a furadeira não, o problema está no motor.
-
-
-
Certifique-se de que o plástico não esteja quebrado e que o interruptor não esteja travado.
-
-




Cancelar: não concluí este guia.
2 outras pessoas executaram este guia.

Equipe

Cal Poly, Team 15-48, Garner Spring 2010 Membro de Cal Poly, Team 15-48, Garner Spring 2010
CPSU-GARNER-S10S15G48
6 Membros
Autoria de 60 guias
1Comentário do guia
I was able to diagnose and fix my problem with my black and decker following your instructions. TY
