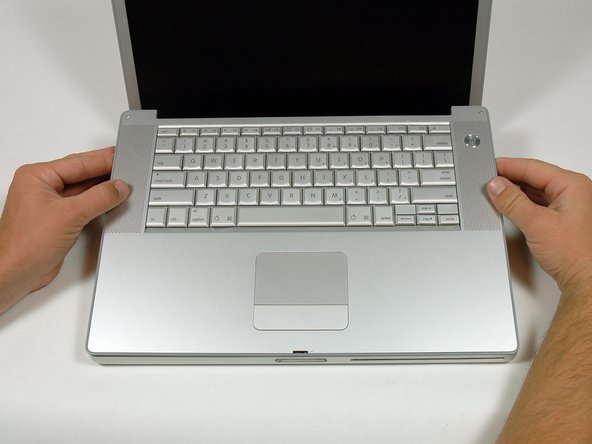
Ir para o conteúdo principal

PowerBook G4 Aluminum 15" 1.67 GHz Logic Board Replacement

O que você precisa

  1. PowerBook G4 Aluminum 15" 1.67 GHz Logic Board Replacement, Battery: passo 1, imagem 1 %32
    • Use a coin to turn the battery locking screw 90 degrees clockwise.

    • Lift the battery out of the computer.

  2. PowerBook G4 Aluminum 15" 1.67 GHz Logic Board Replacement, Upper Case: passo 2, imagem 1 %32
    • Remove the following 10 screws:

    • Two 3 mm Phillips in the battery compartment, on either side of the battery contacts.

    • Four 3 mm Phillips around the memory compartment.

    • Four 16 mm Phillips along the hinge.

  3. PowerBook G4 Aluminum 15" 1.67 GHz Logic Board Replacement: passo 3, imagem 1 %32
    • Remove the memory compartment cover.

    • Remove the two 12 mm Phillips screws on the Aluminum bracket at the top of the memory compartment.

  4. PowerBook G4 Aluminum 15" 1.67 GHz Logic Board Replacement: passo 4, imagem 1 %32
    • Rotate the computer 90 degrees clockwise so the power receptacle faces you.

    • Remove the three 3 mm Phillips screws along the edge of the lower case.

    • When replacing these screws, you must install them in the correct order. Begin by installing the screw closest to the display hinge, then work your way toward the front of the computer.

  5. PowerBook G4 Aluminum 15" 1.67 GHz Logic Board Replacement: passo 5, imagem 1 %32
    • Turn the computer 90 degrees clockwise so the hinge faces you.

    • Remove the lower 5 mm Phillips screw on each side of the hinge (two total).

  6. PowerBook G4 Aluminum 15" 1.67 GHz Logic Board Replacement: passo 6, imagem 1 %32
    • Rotate the computer 90 degrees clockwise so the ports face you.

    • Remove the three 3 mm Phillips screws along the edge of the lower case.

    • When replacing these screws, you must install them in the correct order. Begin by installing the screw closest to the display hinge, then work your way toward the front of the computer. Also, be careful not to put the screws in the two holes on either side of the video out port.

  7. PowerBook G4 Aluminum 15" 1.67 GHz Logic Board Replacement: passo 7, imagem 1 %32
    • Turn the computer over and open the display.

    • Remove the two 4.2 mm long, 1.5 mm hex screws at the top corners of the upper case (two total).

    • A T6 Torx driver will work, but repeated use will strip the screws.

  8. PowerBook G4 Aluminum 15" 1.67 GHz Logic Board Replacement: passo 8, imagem 1 %32
    • Grasp the back corners of the upper case and pull up.

    • Do not pull the upper case off yet; you still need to disconnect the keyboard and trackpad cable.

    • Lift the back of the case up and work your fingers along the sides, freeing the case as you go. Once you have freed the sides, you may need to rock the case up and down to free the front of the upper case.

  9. PowerBook G4 Aluminum 15" 1.67 GHz Logic Board Replacement: passo 9, imagem 1 %32
    • Rotate the upper case up and toward the screen, so that the upper case rests against it.

  10. PowerBook G4 Aluminum 15" 1.67 GHz Logic Board Replacement: passo 10, imagem 1 %32
    • Remove the amber tape securing the trackpad ribbon to the logic board.

    • Disconnect the trackpad ribbon from the logic board by pulling up on the connector.

    • Remove the upper case from the computer.

  11. PowerBook G4 Aluminum 15" 1.67 GHz Logic Board Replacement, Right Speaker: passo 11, imagem 1 %32
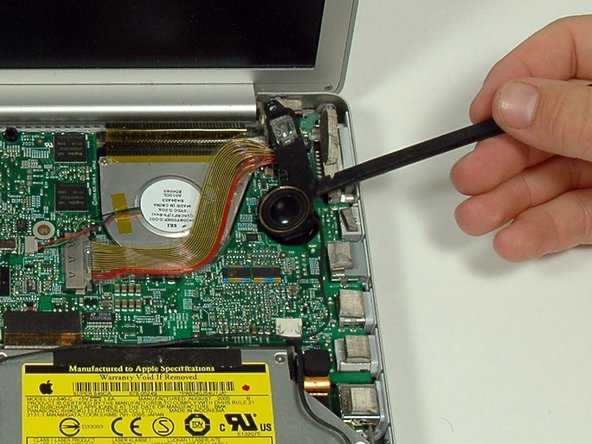
    • Remove the 12 mm Phillips screw holding the right speaker assembly to the lower case.

  12. PowerBook G4 Aluminum 15" 1.67 GHz Logic Board Replacement: passo 12, imagem 1 %32
    • Use a spudger to gently pry the speaker out of its housing.

    • The right ambient light sensor cover is connected to the speaker and should not be removed.

  13. PowerBook G4 Aluminum 15" 1.67 GHz Logic Board Replacement: passo 13, imagem 1 %32 PowerBook G4 Aluminum 15" 1.67 GHz Logic Board Replacement: passo 13, imagem 2 %32
    • Disconnect the hard drive and optical drive connectors from the logic board.

    • Disconnect the right speaker cable connector.

    • De-route the right speaker cable and remove the speaker from the computer.

    • The right speaker cable may be trapped under the hard drive cable connector. If this is the case, the hard drive will have to be removed in order to de-route the cable and remove the right speaker.

  14. PowerBook G4 Aluminum 15" 1.67 GHz Logic Board Replacement, Logic Board: passo 14, imagem 1 %32
    • Disconnect the 11 remaining cable connectors, removing tape as necessary.

    • Some red boxes include two cable connectors.

  15. PowerBook G4 Aluminum 15" 1.67 GHz Logic Board Replacement: passo 15, imagem 1 %32
    • Remove the following 9 Phillips screws from the logic board:

    • Three 6.5 mm in the upper left corner.

    • Six remaining 4.5 mm.

  16. PowerBook G4 Aluminum 15" 1.67 GHz Logic Board Replacement: passo 16, imagem 1 %32
    • Lift up the left side of the logic board enough to disconnect the black and red power cable from the left side of the logic board.

    • While the logic board is lifted, also disconnect the battery connector.

  17. PowerBook G4 Aluminum 15" 1.67 GHz Logic Board Replacement: passo 17, imagem 1 %32 PowerBook G4 Aluminum 15" 1.67 GHz Logic Board Replacement: passo 17, imagem 2 %32
    • Remove the single black Phillips screw from the top of the left speaker housing.

    • Remove the 4 mm hex nut from the left speaker housing.

    • Lift the left speaker housing from the lower case and disconnect the microphone/speaker connector.

  18. PowerBook G4 Aluminum 15" 1.67 GHz Logic Board Replacement: passo 18, imagem 1 %32
    • Lift the left side of the logic board and disconnect the modem cable from the underside of the logic board. A spudger is useful for freeing the connector from its adhesive.

  19. PowerBook G4 Aluminum 15" 1.67 GHz Logic Board Replacement: passo 19, imagem 1 %32
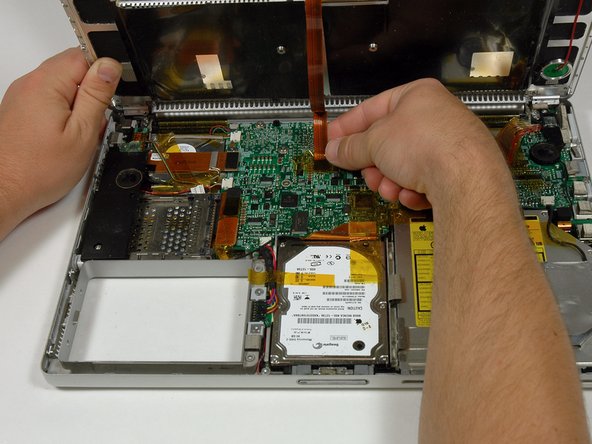
    • Very gently lift up the left side of the logic board.

    • If the logic board does not immediately come free, it may be necessary to soften the thermal paste between the logic board and heat sink. You can soften the thermal compound using a hairdryer. Move the hairdryer back and forth between the two fans about one inch above the logic board for one minute. At this point, the logic board should now come free easily.

    • Lift the left edge of the board up to approximately a 30 degree angle (if you don't have your protractor handy, just lift until the DVI port clears the right hinge).

    • Once the logic board clears the ports, slide it out to the left.

  20. PowerBook G4 Aluminum 15" 1.67 GHz Logic Board Replacement: passo 20, imagem 1 %32
    • Important! When you reinstall a logic board, you'll need to replace the thermal paste that goes between the processor on the logic board and the heat sink. Failure to remove the old paste and apply a new layer can cause the computer to overheat and sustain damage. The following steps refer to replacing the thermal paste between the processor and heat sink; follow these steps only when you are ready to place the logic board in the computer.

    • Use a firm plastic edge to scrape the thermal material off the heat sink.

    • Apply a new layer of thermal paste to the heat sink.

    • The PC Card cage needs to be removed before installing your new logic board. The modem cable runs from the modem to the logic board, but connects to the modem underneath the PC Card Cage. After removing the PC card cage, you will need to disconnect the modem cable from the modem, plug it into the bottom of the logic board, and then plug it back into the modem. The PC Card cage can then be reinstalled by following the instructions backwards.

Conclusão

To reassemble your device, follow these instructions in reverse order.

15 outras pessoas executaram este guia.

Documentos anexados

Um comentário

Is is possible to upgrade the logic board from a slower CPU to the 1.67GHz model? I see you can buy the logic boards online?

Caleb - Responder

Adicione um comentário

Exibir estatísticas:

Últimas 24 horas: 1

Últimos 7 dias: 5

Últimos 30 dias: 16

Duração total: 21,647