Ir para o conteúdo principal
Participe da comunidade de reparos - Criar conta

Panasonic ARC ES-LT3N Battery Replacement

O que você precisa

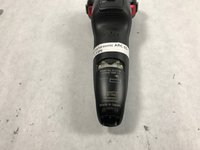
    1. Panasonic ARC ES-LT3N Battery Replacement, Back Casing: passo 1, imagem 1 %32 Panasonic ARC ES-LT3N Battery Replacement, Back Casing: passo 1, imagem 2 %32
      • Flip the razor over so the back is facing you.

      Pergunte ao FixBot

      Comentar

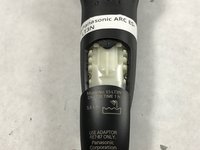
    2. Panasonic ARC ES-LT3N Battery Replacement: passo 2, imagem 1 %32 Panasonic ARC ES-LT3N Battery Replacement: passo 2, imagem 2 %32
      • Using a Phillips #00 screwdriver, remove the 6 mm screw just above the charger port.

      Pergunte ao FixBot

      Comentar

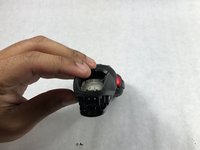
    3. Panasonic ARC ES-LT3N Battery Replacement: passo 3, imagem 1 %32 Panasonic ARC ES-LT3N Battery Replacement: passo 3, imagem 2 %32
      • Slide the plastic cover at the bottom of the razor downward to remove.

      Pergunte ao FixBot

      Comentar

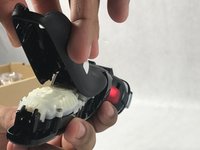
    4. Panasonic ARC ES-LT3N Battery Replacement: passo 4, imagem 1 %32 Panasonic ARC ES-LT3N Battery Replacement: passo 4, imagem 2 %32
      • Lift up the rear casing from the bottom of the razor.

      • This may require you to gently pry it apart with you fingers.

      • Lift up the rear casing from the sides of the razor.

      • Pull rear casing up and off razor.

      • Be careful not to break any plastic!

      Pergunte ao FixBot

      Comentar

    1. Panasonic ARC ES-LT3N Battery Replacement, Battery: passo 5, imagem 1 %32
      • Using the Phillips 00 driver bit, remove six screws (12mm) from the battery case.

      Pergunte ao FixBot

      Comentar

    2. Panasonic ARC ES-LT3N Battery Replacement: passo 6, imagem 1 %32
      • Remove battery case.

      Pergunte ao FixBot

      Comentar

    3. Panasonic ARC ES-LT3N Battery Replacement: passo 7, imagem 1 %32 Panasonic ARC ES-LT3N Battery Replacement: passo 7, imagem 2 %32
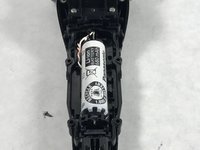
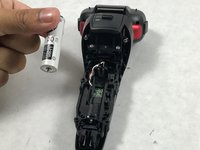
      • Remove old battery by lifting the battery up and left.

      • There are plastic brackets holding the battery on the right. Removing up and left ensures that the brackets will not be damaged and the battery will not come loose.

      Pergunte ao FixBot

      Comentar

Conclusão

To reassemble your device, follow these instructions in reverse order.

Cancelar: não concluí este guia.

2 outras pessoas executaram este guia.

Equipe

1Comentário do guia

Where does one actually find the replacement batteries though?

WooKstah - Responder Compartilhar

Comentar

Visualizações:

Últimas 24 horas: 1

Últimos 7 dias: 6

Últimos 30 dias: 47

Ao todo: 2,449