Ir para o conteúdo principal
Participe da comunidade de reparos - Criar conta

Oculus Rift Development Kit 2 Camera Motherboard Replacement

O que você precisa

  1. Oculus Rift Development Kit 2 Camera Motherboard Replacement, Camera Motherboard: passo 1, imagem 1 %32 Oculus Rift Development Kit 2 Camera Motherboard Replacement, Camera Motherboard: passo 1, imagem 2 %32
    • Remove the filter from the camera as shown.

  2. Oculus Rift Development Kit 2 Camera Motherboard Replacement: passo 2, imagem 1 %32 Oculus Rift Development Kit 2 Camera Motherboard Replacement: passo 2, imagem 2 %32
    • Remove the cover plate from the front face of the camera using the iFixit Opening Pick.

  3. Oculus Rift Development Kit 2 Camera Motherboard Replacement: passo 3, imagem 1 %32 Oculus Rift Development Kit 2 Camera Motherboard Replacement: passo 3, imagem 2 %32
    • Remove the two 3/16" J #000 screws.

    • Lift the back plate off.

  4. Oculus Rift Development Kit 2 Camera Motherboard Replacement: passo 4, imagem 1 %32
    • Gently tug on the wires to free them from the motherboard.

  5. Oculus Rift Development Kit 2 Camera Motherboard Replacement: passo 5, imagem 1 %32 Oculus Rift Development Kit 2 Camera Motherboard Replacement: passo 5, imagem 2 %32 Oculus Rift Development Kit 2 Camera Motherboard Replacement: passo 5, imagem 3 %32
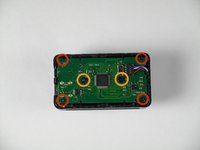
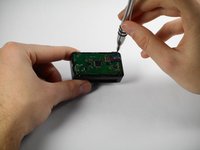
    • Remove the four 3/16" Phillips #000 from the four corners of the motherboard.

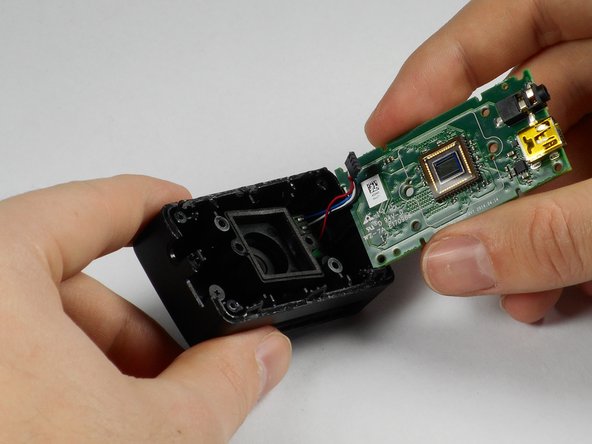
    • Remove the two 1/4" Phillips #0 screws shown to release the motherboard from the enclosure.

Conclusão

To reassemble your device, follow these instructions in reverse order.

Uma outra pessoa concluiu este guia.

Equipe

Cal Poly, Team 18-5, Maness Winter 2015 Membro de Cal Poly, Team 18-5, Maness Winter 2015

CPSU-MANESS-W15S18G5

4 Membros

Autoria de 6 guias

0Comentários do guia

Comentar

Visualizações:

Últimas 24 horas: 2

Últimos 7 dias: 10

Últimos 30 dias: 58

Ao todo: 945