Introdução
If you have cracked or damaged your screen, this guide will provide you with a step by step instructions on how to take the device apart to access it.
O que você precisa
-
-
Using the thumbtab molded on the bottom of the phone, pry the back cover off using either a fingernail or a plastic opening tool.
 Pergunte ao FixBot
-
-
-
There is a molded notch in the white frame of the phone near the top right of the battery. Using either a finger or a plastic opening tool, utilize the notch to lift up on the battery, and remove it from the device.
-
-
-
-
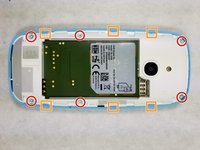
Using a T5 screwdriver bit, remove the (6) 5.0 mm screws along the outside edge of the frame.
-
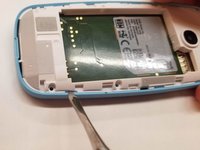
Using a metal spudger, wedge the 6 plastic tabs molded into the outer shell away from the frame to lift up and remove it.
-
-
-
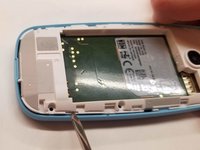
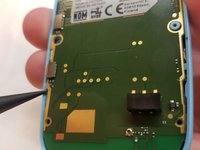
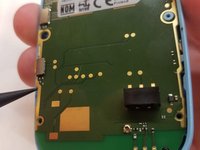
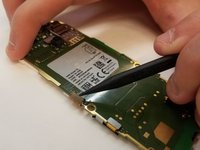
Use a spudger to simultaneously leverage the shell away and the motherboard up from the body of the shell.
-
-
-
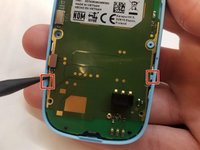
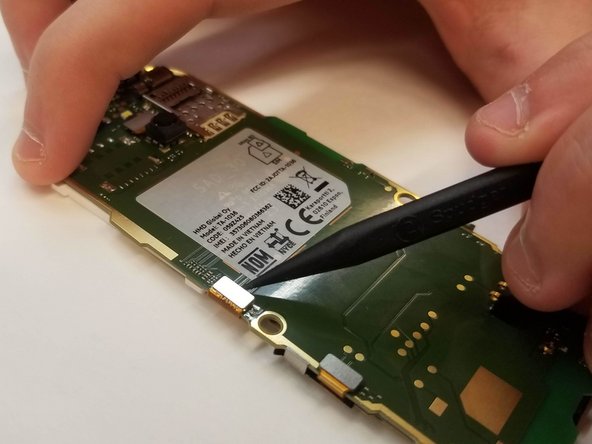
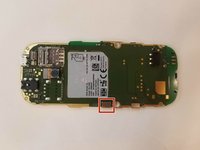
With the motherboard removed, the only thing holding the screen into place is the snap plug on the back of the motherboard.
-
Using a spudger, leverage the top snap up to disconnect it (photo shows motherboard rotated 90 degrees counterclockwise).
-


To reassemble your device, follow these instructions in reverse order.
Cancelar: não concluí este guia.
6 outras pessoas executaram este guia.
Equipe

UMass Dartmouth, Team S3-G3, Peak Fall 2018 Membro de UMass Dartmouth, Team S3-G3, Peak Fall 2018
UMASSD-PEAK-F18S3G3
3 Membros
Autoria de 16 guias
4Comentários do guia
If you can break the screen without taking it apart, then you must not be human
The Cylons are greeting you.
Thank you!
I dont have cash for a new one,
but i could fix my old one.
There was soup on the display inside,
cleaned it, screen is clear now.
Yeay!
Where could I get a replacement screen?