Introdução
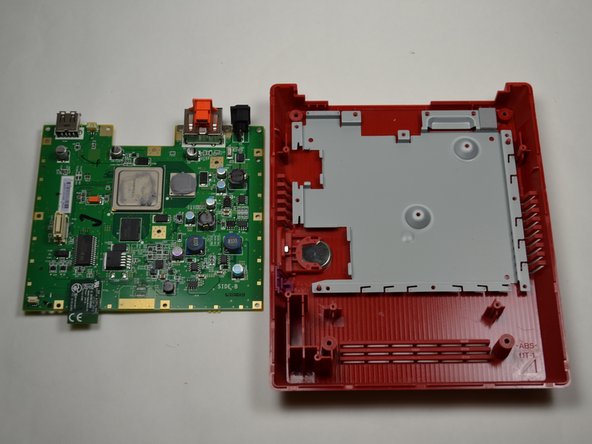
Este guia detalha a substituição da placa-mãe de um Nintendo Wii mini. Os passos mostrados nas imagens referem-se ao processo de desmontagem, sendo que a substituição e a remontagem são tão simples quanto realizar os passos na ordem inversa.
Recomenda-se o uso de uma pulseira antiestática ao manusear componentes eletrônicos sensíveis.
A substituição da placa-mãe pode ser necessária quando ocorrem estes sintomas no seu Wii mini: o Wii não liga ou não inicia após verificar que a fonte de alimentação está funcionando.
O que você precisa
-
-
-
Remova os dois pés de borracha na parte traseira do console para revelar os parafusos ocultos.
-
Remova os quatro parafusos Phillips de 6 mm.
 Pergunte ao FixBot
-
-
-
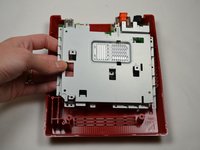
Vire o Wii mini com o lado certo para cima. Em seguida, passe uma Ferramenta de abertura de plástico ao redor da borda central do console para soltar a tampa superior.
-
Levante delicadamente a tampa superior do console e coloque-a de lado.
-
-
-
-
Ferramenta utilizada neste passo:Tweezers$4.99
-
Vire o Wii mini de forma que a parte traseira do dispositivo esteja voltada para você.
-
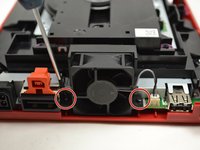
Com uma chave Phillips #0, desparafuse os dois parafusos Phillips de 6 mm em cada lado da ventoinha.
-
-
-
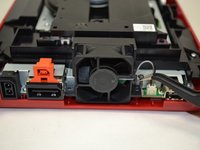
Com os dedos, puxe suavemente a parte superior do conector de pinos para cima para desconectar a ventoinha do console.
-
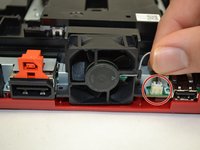
Remova a peça da ventoinha e coloque-a de lado.
-
-
-
-
-
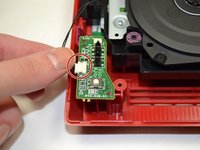
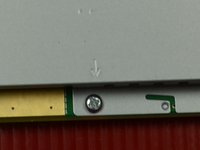
Com os dedos, deslize o cabo plano azul para fora da parte superior da placa de alimentação.
-
Com uma chave Phillips #0, desaparafuse os dois parafusos Phillips de 4 mm na parte superior e inferior da placa de alimentação.
-
-
-
-
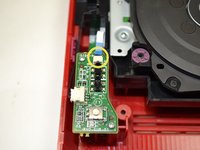
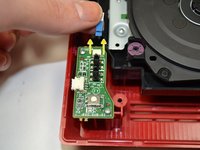
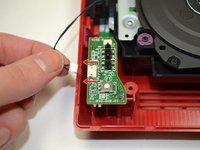
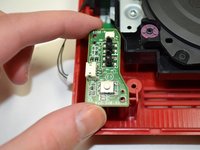
Com os dedos, puxe suavemente o conector de pino para desconectar a placa de conexões do leitor de disco.
-
-
-
-
-
Com uma chave Phillips #0, desparafuse os quatro parafusos de 6 mm.
-
-
-
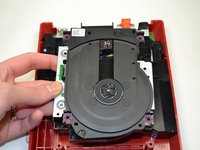
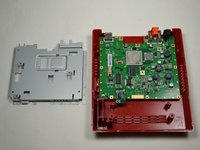
Levante a unidade de disco para fora do console e coloque-a de lado.
-
-
-
-
-
Usando uma chave Phillips #0, desparafuse o parafuso Phillips de 6 mm no topo da bandeja preta.
-
-
-
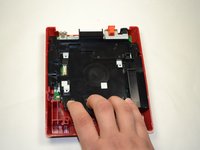
Com os dedos, puxe a bandeja de plástico preta na sua direção para soltá-la do console.
-
Certifique-se de que as peças quadradas pretas estejam separadas das peças quadradas de metal antes de tentar retirar a bandeja.
-
Uma vez separadas, levante a bandeja de plástico para fora do console e reserve-a.
-
-
-
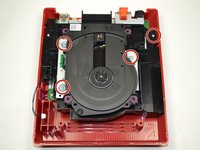
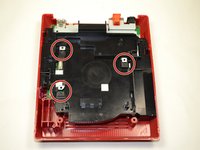
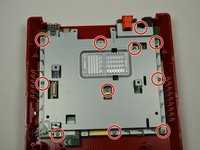
Com uma chave Phillips #0, remova os 11 parafusos de 5 mm que prendem a placa metálica prateada ao console.
-
-
-
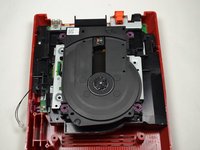
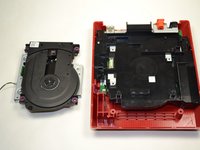
Levante a placa de metal e reserve-a.
-
-


Para a remontagem de seu dispositivo, siga estas instruções na ordem inversa.
Cancelar: não concluí este guia.
11 outras pessoas executaram este guia.
Um agradecimento especial a esses tradutores:
100%

Translation Bot está nos ajudando a consertar o mundo! Quer contribuir?
Comece a traduzir ›
Equipe

1Comentário do guia
Can you fit a Wii Motherboard inside this casing, and use the dvd drive, if so I have a few wiis with broken DVD drives I would like to repair and this would be a cheap solution.