Introdução
Use this guide to replace a worn-out fan.
O que você precisa
-
-
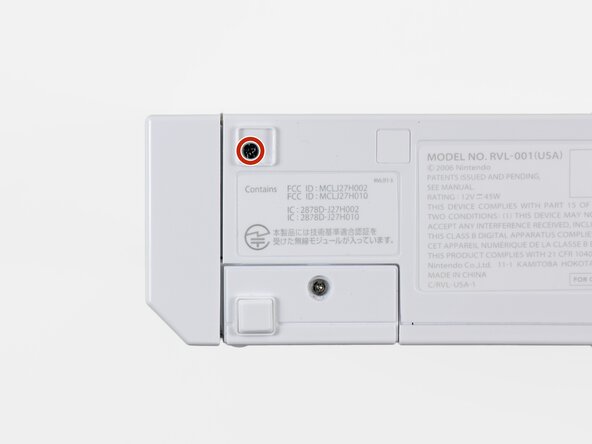
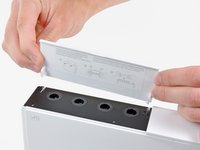
Use a metal spudger to remove the white plastic screw covers stuck to the lower case near the front of the Wii.
 Pergunte ao FixBot
-
-
-
Remove the two 8.3 mm Tri-Point screws hidden under the covers you just removed.
-
-
-
Remove the single 5.9 mm Phillips screw under the controller port door nearest the faceplate.
-
-
-
Use a metal spudger to remove the rubber foot stuck to the side of the Wii near the DVD drive opening.
-
-
-
Remove the single 5.9 mm Phillips screw hidden under the foot you just removed.
-
-
Ferramenta utilizada neste passo:Tweezers$4.99
-
-
-
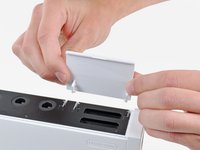
Open the controller port cover until it is perpendicular to the black controller port bezel.
-
Pull the controller port cover straight up to release it from the outer case.
-
-
-
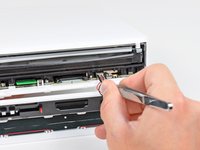
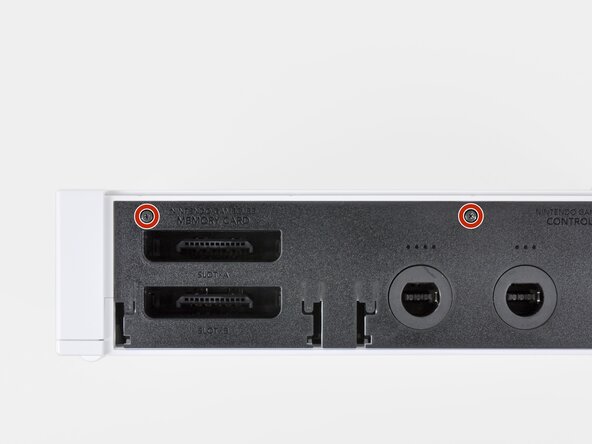
Remove the two remaining 4.1 mm Phillips screws along the top edge of the black plastic controller port bezel.
-
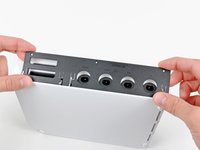
Lift the bezel from the long edge furthest away from the controller ports and remove it from the Wii.
-
-
-
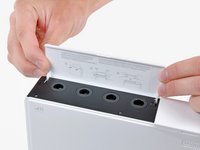
Use a metal spudger to remove the three highlighted screw covers stuck to the side of the Wii.
-
-
-
Remove the following screws:
-
Two 5 mm Phillips screws
-
One 8.2 mm Tri-Point screw
-
-
-
Use a metal spudger to remove the two rubber feet stuck to the bottom face of the Wii near the rear ports.
-
-
Ferramenta utilizada neste passo:iFixit Precision 4 mm Screwdriver Bit$2.99
-
Remove the two 8.2 mm Tri-Point screws hidden under the feet you just removed.
-
-
Ferramenta utilizada neste passo:Tweezers$4.99
-
Grab the fan connector with a pair of tweezers and lift it straight up and out of its socket on the motherboard.
-
-
-
Remove the two 10 mm Phillips screws securing the fan to the fan shroud.
-


To reassemble your device, follow these instructions in reverse order.
Cancelar: não concluí este guia.
36 outras pessoas executaram este guia.

10Comentários do guia
Awesome guide, just replaced faulty fan unit in my 9 year old wii. Should hopefully keep it going for another 9 years :)
Super easy and great instructions! I feel a little guilty that my Wii sat in the garage for 4 years! Now it'll be a great birthday present for my 2 boys.
Does anyone have a diagram for the Wii’s airflow? I’m looking to install a booster fan at the bottom to help blow air in but I want to make sure it is effective.
nice¡¡¡¡¡¡¡¡¡¡¡¡¡¡
Thanks! Wii Quarantine’n in 2021!