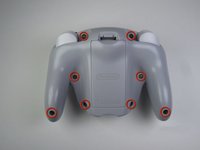
Ir para o conteúdo principal
Participe da comunidade de reparos - Criar conta

Nintendo WaveBird Wireless Controller Channel Wheel Replacement

O que você precisa

  1. Nintendo WaveBird Wireless Controller Channel Wheel Replacement, Batteries: passo 1, imagem 1 %32 Nintendo WaveBird Wireless Controller Channel Wheel Replacement, Batteries: passo 1, imagem 2 %32
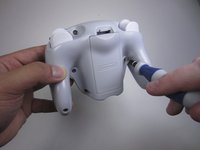
    • Pull down on the battery cover release lever and pull back to remove the cover.

    Pergunte ao FixBot

    Comentar

  2. Nintendo WaveBird Wireless Controller Channel Wheel Replacement: passo 2, imagem 1 %32
    • Remove both batteries from the device.

    Pergunte ao FixBot

    Comentar

  3. Nintendo WaveBird Wireless Controller Channel Wheel Replacement, Front Panel: passo 3, imagem 1 %32 Nintendo WaveBird Wireless Controller Channel Wheel Replacement, Front Panel: passo 3, imagem 2 %32
    • Remove the eight 9 mm screws from the back panel using the Tri-point Y1 screwdriver.

    • During reassembly, firmly hold the panels of the controller together while replacing the screws so the panels do not separate.

    Pergunte ao FixBot

    Comentar

  4. Nintendo WaveBird Wireless Controller Channel Wheel Replacement: passo 4, imagem 1 %32 Nintendo WaveBird Wireless Controller Channel Wheel Replacement: passo 4, imagem 2 %32
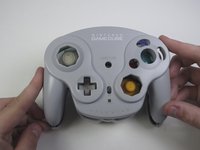
    • Carefully turn over the controller and place it on a flat surface.

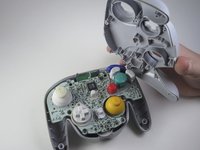
    • Slowly separate the top panel from the bottom panel.

    • The buttons are loose and may fall off the motherboard.

    • Once separated, set aside the top panel.

    • During reassembly, make sure the front panel lines up with the buttons so they slide back into place.

    Pergunte ao FixBot

    Comentar

  5. Nintendo WaveBird Wireless Controller Channel Wheel Replacement, Buttons: passo 5, imagem 1 %32 Nintendo WaveBird Wireless Controller Channel Wheel Replacement, Buttons: passo 5, imagem 2 %32 Nintendo WaveBird Wireless Controller Channel Wheel Replacement, Buttons: passo 5, imagem 3 %32
    Ferramenta utilizada neste passo:
    Tweezers
    $4.99
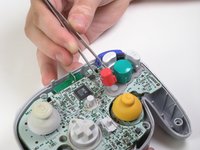
    • Use tweezers to remove the buttons.

    • It may be easier to remove the A button off of the pad by lifting it with your fingers.

    • During reassembly, make sure all buttons are in their respective sockets so they match up with the front panel.

    Pergunte ao FixBot

    Comentar

  6. Nintendo WaveBird Wireless Controller Channel Wheel Replacement, Motherboard: passo 6, imagem 1 %32
    Ferramenta utilizada neste passo:
    Tweezers
    $4.99
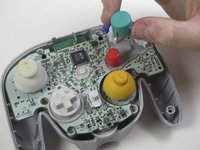
    • Using tweezers remove the three grey button pads from the motherboard.

    Pergunte ao FixBot

    Comentar

  7. Nintendo WaveBird Wireless Controller Channel Wheel Replacement: passo 7, imagem 1 %32
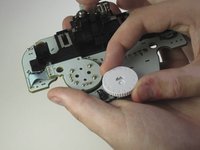
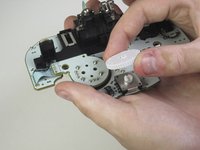
    • With your fingers gently grip the motherboard on both sides and lift it away from the back panel.

    • To put the motherboard back into place, align the two metal clips under the motherboard with the slots in the back panel. The motherboard should fall into place.

    Pergunte ao FixBot

    Comentar

  8. Nintendo WaveBird Wireless Controller Channel Wheel Replacement, Channel Wheel: passo 8, imagem 1 %32
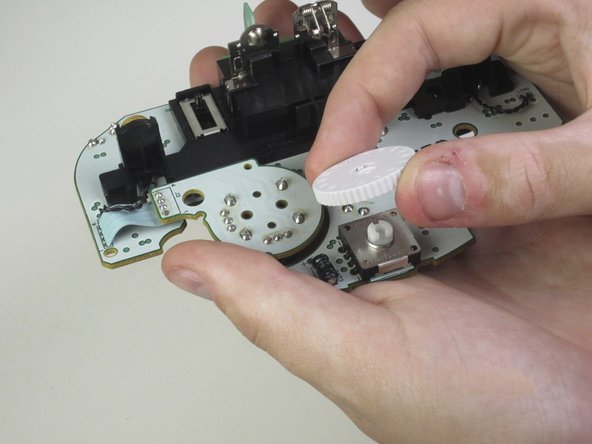
    • Turn the motherboard over so the channel wheel is facing up.

    Pergunte ao FixBot

    Comentar

  9. Nintendo WaveBird Wireless Controller Channel Wheel Replacement: passo 9, imagem 1 %32 Nintendo WaveBird Wireless Controller Channel Wheel Replacement: passo 9, imagem 2 %32
    • Pinch the wheel and pull it away from the motherboard.

    Pergunte ao FixBot

    Comentar

Conclusão

To reassemble your device, follow these instructions in reverse order.

Cancelar: não concluí este guia.

Uma outra pessoa concluiu este guia.

Equipe

Cal Poly, Team 10-40, Amido Spring 2013 Membro de Cal Poly, Team 10-40, Amido Spring 2013

CPSU-AMIDO-S13S10G40

4 Membros

Autoria de 37 guias

0Comentários do guia

Comentar

Visualizações:

Últimas 24 horas: 0

Últimos 7 dias: 12

Últimos 30 dias: 46

Ao todo: 2,728