Introdução
Is your battery having issues and need to be replaced? This guide will take you through the steps necessary to have a new battery in your Nintendo 3DS XL in no time!
O que você precisa
-
-
Use a JIS 00 screwdriver to loosen the 4.2 mm‑long screws on the top edge of the back cover.
 Pergunte ao FixBot
-
-
-
-
Use a plastic opening tool to pry off the clips securing the back cover, starting at the top corners and working your way down.
-
Use your hands to remove the back cover.
-
-
-
Insert the plastic opening tool into the opening located on the right side of the battery.
-
Pry the battery out of its recess and remove it.
-


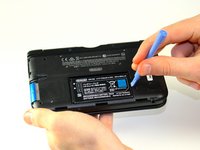
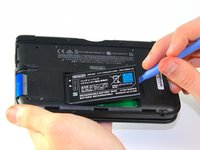
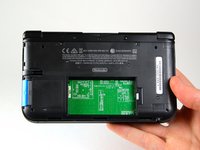
After completing these steps, you can insert the new battery.
To reassemble your device, follow these instructions in reverse order.
Cancelar: não concluí este guia.
63 outras pessoas executaram este guia.

Equipe

Cal Poly, Team 9-13, Regan Spring 2014 Membro de Cal Poly, Team 9-13, Regan Spring 2014
CPSU-REGAN-S14S9G13
5 Membros
Autoria de 56 guias
6Comentários do guia
Time estimate: 3 - 9 hours Difficulty: Very difficult ??????
More like 30-90 seconds, and that's if you have to search for a screwdriver.
机器无法开机怎么办?是电池的问题吗?
It should be noted that the bottom three clips on the bottom of the backplate can’t just be snapped in, they need to be slipped in, so when removing the backplate, it should be tiled away from the system and then pulled up from the bottom, and those three clips on the bottom should be the first clips in when you’re putting it back together, sliding them in with the backplate at an angle, and then the rest of the clips just snap in.
Nice tip. Ty.
Just did this. For reasmbly I recommend putting the bottom/lower part of the case on first before you screw it back on.
