Introdução
The motherboard is located behind the LCD and rear panel of the camera. It is relatively accessible but does require the use of a soldering iron to completely disconnect it from the rest of the camera.
O que você precisa
-
-
-
Remove six 3 mm x 2.5 mm Phillips head screws from the bottom right of the camera bottom.
-
Remove three 3 mm x 5.5 mm Phillips head screws from the bottom left of the camera bottom
-
Lift the battery cover and remove two 3 mm x 5 mm Phillips head screws.
 Pergunte ao FixBot
-
-
-
Remove the two 3 mm x 5.5 mm Phillips head screws from the either side of the viewfinder.
-
Remove four 3 mm x 5.5 mm Phillips head screws from the sides of the camera.
-
Remove two 3 mm x 4 mm Phillips head screws from under the SD card door.
-
-
-
-
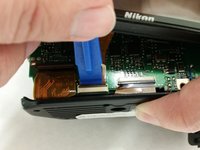
Lift the back of the camera and, using the blue prying tool, lift the tab from the LCD ribbon connector.
-
Slide the ribbon connector away from the bottom of the camera and remove the back cover containing the LCD to expose the motherboard.
-
-
-
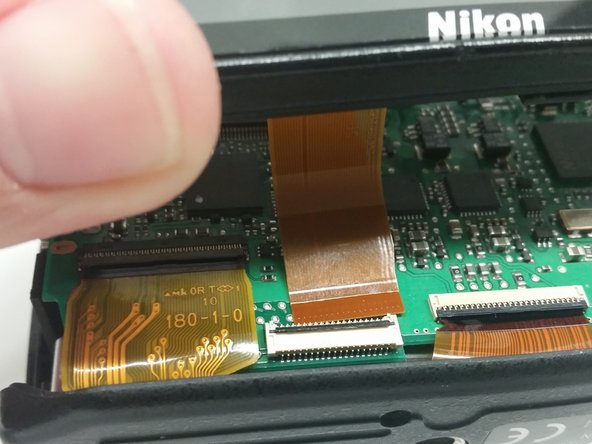
Lift the tab on the ribbon connector and pull away the ribbon to expose a 4 mm x 4 mm Phillips head screw.
-
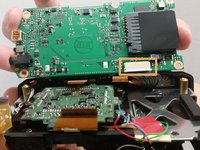
De-solder the red (upper), two grey (lower), red (lower), and blue (lower) wires from the motherboard.
-
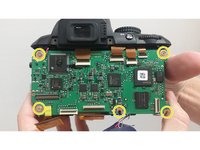
Remove five 4 mm x 4 mm Phillips head screws holding the motherboard to the camera frame.
-
-
-
Lift the tabs and pull away the ribbon connectors shown .
-
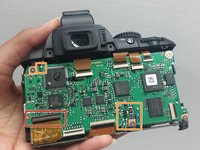
Lift the motherboard and disconnect the grey connector from the bottom.
-
Disconnect and remove the motherboard.
-
-


To reassemble your device, follow these instructions in reverse order.
Cancelar: não concluí este guia.
3 outras pessoas executaram este guia.
Equipe

USF Tampa, Team 14-7, Meier Fall 2015 Membro de USF Tampa, Team 14-7, Meier Fall 2015
USFT-MEIER-F15S14G7
4 Membros
Autoria de 6 guias