Introdução
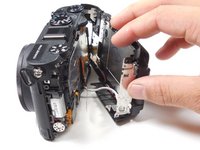
By following these nine simple steps, one can successfully replace the multi selector wheel of the Nikon COOLPIX P7700 camera after having removed the casing.
O que você precisa
-
-
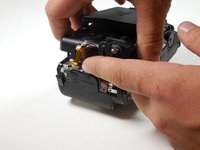
Turn camera to the left side and remove the two 4.3 mm black side screws using the Phillips #00 screwdriver.
-
Remove the side panel.
-
-
-
-
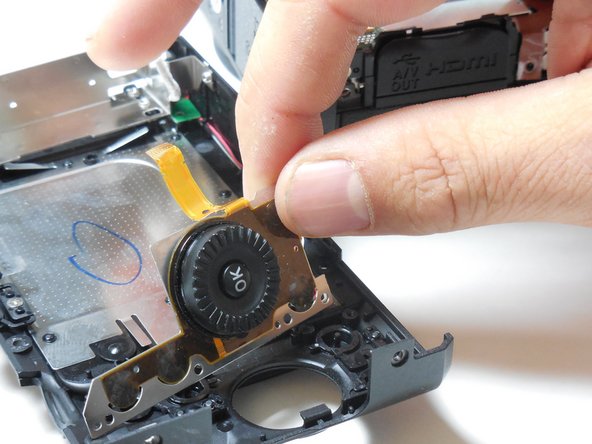
Remove the four 4.3 mm screws located on the far right metal plate. Use the Phillips #00 screwdriver.
-


To reassemble your device, follow these instructions in reverse order.
Cancelar: não concluí este guia.
8 outras pessoas executaram este guia.
Equipe

Colorado Springs, Team 2-7, Panko Spring 2015 Membro de Colorado Springs, Team 2-7, Panko Spring 2015
UCCS-PANKO-S15S2G7
3 Membros
Autoria de 10 guias
8Comentários do guia
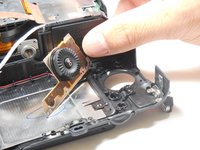
Step 9: I believe that the multi-selector wheel component is soldered, 3 wires just visible in the photo for step 8. This will surely add to the time taken and difficulty.
I have a problem with this component. Firstly it's almost impossible to obtain the replacement parts, but if I could this guide would be invaluable; pictures are worth a thousand words! Thanks.
where can I get the item ( wheel ) ?
Best regards and thank you for the good explanation
Where i can find this wheel for replacement?
See my comment above, for spray cleaning the wheel without any replacement. Unless your wheel is brokwn, you can try my suggestion. It works.
Please see my comment on the "general" method of fixing the wheel (using fast-drying contact cleaner) without ANY component replacement or unscrewing. It works really well but you may have to do it 1-3 times until all the dirt inside the wheel mechanism is removed. I have managed to restore my P7700 (after "fixing" the erratic Control Wheel and the dis-obedient Play button). Since then I have used the same method to fix the control wheel on my Samsung EX-1 camera (the control wheel was replaced twice by Samsung but the problem came back after a year or so). The root cause is probably a weak control wheel design (maybe tiny metal springs rotating over a base-plate with printed circuits). Now I know how to save money and trouble (for any compact camera with a similar control wheel design).