Ir para o conteúdo principal
Participe da comunidade de reparos - Criar conta

Nespresso Pixie Internal Diffuser Replacement

O que você precisa

  1. Nespresso Pixie Internal Diffuser Replacement, Internal Diffuser: passo 1, imagem 1 %32
    • Unplug the machine from any outlets.

    • Remove the water tank by pressing the top button and pulling outwards.

    • Make sure there is no fluid left in any part of the machine.

    Pergunte ao FixBot

    Comentar

  2. Nespresso Pixie Internal Diffuser Replacement: passo 2, imagem 1 %32 Nespresso Pixie Internal Diffuser Replacement: passo 2, imagem 2 %32
    • Use a Torx T5 screwdriver to detach the lever of the machine on both sides.

    Pergunte ao FixBot

    Comentar

  3. Nespresso Pixie Internal Diffuser Replacement: passo 3, imagem 1 %32
    • Remove the drip tray using your hand.

    Pergunte ao FixBot

    Comentar

  4. Nespresso Pixie Internal Diffuser Replacement: passo 4, imagem 1 %32
    • Use your hand to remove the black drip tray grill behind the drip tray.

    Pergunte ao FixBot

    Comentar

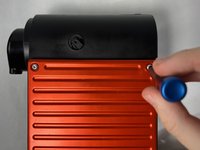
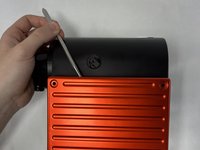
  5. Nespresso Pixie Internal Diffuser Replacement: passo 5, imagem 1 %32 Nespresso Pixie Internal Diffuser Replacement: passo 5, imagem 2 %32
    • Use a Torx T4 screwdriver to unscrew each screw on the faceplates.

    • Remove the faceplate using a metal spudger.

    • Be sure to start in both corners to separate the pieces.

    Pergunte ao FixBot

    Comentar

  6. Nespresso Pixie Internal Diffuser Replacement: passo 6, imagem 1 %32
    Ferramenta utilizada neste passo:
    Tweezers
    $4.99
    • Locate the two springs in each top right corner and use a set of tweezers to remove them.

    • Be sure to set the machine in an enclosed container when this is done so as to not to lose the springs.

    Pergunte ao FixBot

    Comentar

  7. Nespresso Pixie Internal Diffuser Replacement: passo 7, imagem 1 %32
    • Take off the white plastic bits using a metal spudger.

    Pergunte ao FixBot

    Comentar

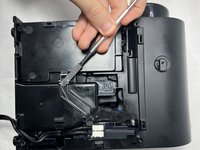
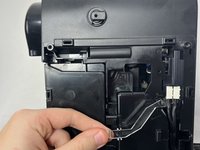
  8. Nespresso Pixie Internal Diffuser Replacement: passo 8, imagem 1 %32 Nespresso Pixie Internal Diffuser Replacement: passo 8, imagem 2 %32
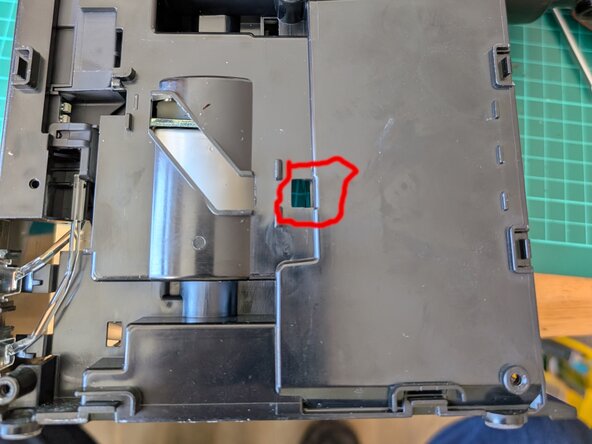
    • Remove the clear plastic bits using a metal spudger.

    • Be sure to pull it out using the hole in which it is indented.

    Pergunte ao FixBot

    Comentar

  9. Nespresso Pixie Internal Diffuser Replacement: passo 9, imagem 1 %32
    • Use your hands to remove the cables that give power to the machine.

    Pergunte ao FixBot

    Comentar

  10. Nespresso Pixie Internal Diffuser Replacement: passo 10, imagem 1 %32
    • Use your hands to remove the water spout.

    Pergunte ao FixBot

    Comentar

  11. Nespresso Pixie Internal Diffuser Replacement: passo 11, imagem 1 %32 Nespresso Pixie Internal Diffuser Replacement: passo 11, imagem 2 %32
    • Seperate both halves of the machine using both a spudger and your hands.

    • Once you have unclipped the side at the top, middle of the side and base. You can push with a screw driver through the hole on the reverse side to help remove the plastic side.

    • Be sure to take your time and start in the middle. Note that it is incredibly well secured.

    Pergunte ao FixBot

    Comentar

  12. Nespresso Pixie Internal Diffuser Replacement: passo 12, imagem 1 %32
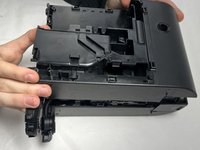
    • Use your hands to pull out the first lever housing in the spot shown in the picture.

    Pergunte ao FixBot

    Comentar

  13. Nespresso Pixie Internal Diffuser Replacement: passo 13, imagem 1 %32
    • Pull the brewing mechanism apart from the remaining plastic barrier.

    • Once it is separated, pull off the other lever housing in the same way as was described in the previous step.

    Pergunte ao FixBot

    Comentar

  14. Nespresso Pixie Internal Diffuser Replacement: passo 14, imagem 1 %32 Nespresso Pixie Internal Diffuser Replacement: passo 14, imagem 2 %32
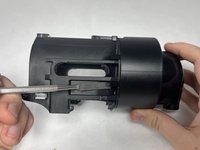
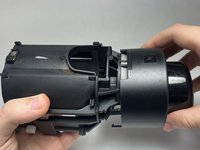
    • Use a spudger to unclip the clips holding the black case in place.

    • Pull the brewing chamber outwards from the machine and then pull it downwards to detach it.

    Pergunte ao FixBot

    Comentar

  15. Nespresso Pixie Internal Diffuser Replacement: passo 15, imagem 1 %32 Nespresso Pixie Internal Diffuser Replacement: passo 15, imagem 2 %32
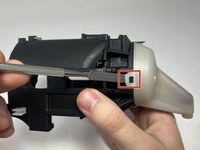
    • Pry off the clips holding the inner white chamber in place in the machine.

    Pergunte ao FixBot

    Comentar

  16. Nespresso Pixie Internal Diffuser Replacement: passo 16, imagem 1 %32
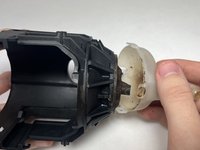
    • Use a spudger to take off your diffuser plate.

    • Insert your new diffuser plate.

    Pergunte ao FixBot

    Comentar

Conclusão

To reassemble your device, follow these instructions in reverse order.

Cancelar: não concluí este guia.

Uma outra pessoa concluiu este guia.

Drew

Membro desde: 11/05/23

281 Reputação

Autoria de 1 guia

Equipe

UMass Dartmouth, Team 2-2, Gulbrandsen Fall 2023 Membro de UMass Dartmouth, Team 2-2, Gulbrandsen Fall 2023

UMASSD-GULBRANDSEN-F23S2G2

4 Membros

Autoria de 16 guias

1Comentário do guia

I’m sorry but this tutorial should be removed. You’ll just going to broke parts by following that.

biorn - Responder Compartilhar

Comentar

Visualizações:

Últimas 24 horas: 7

Últimos 7 dias: 60

Últimos 30 dias: 194

Ao todo: 5,421