Introdução
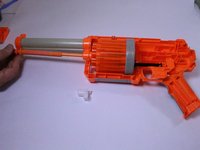
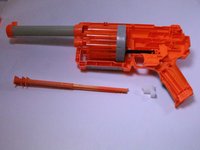
In this guide you will learn how to remove and readjust the trigger of the device. Learning to do so will assist you with trouble shooting problems such as the sticking of the trigger when operating the device. This problem is usually caused by clogging of foreign objects within the device, spring malfunction, or misaligned pieces.
O que você precisa
-
-
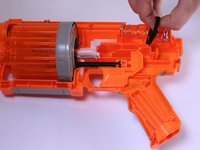
Using a 00 Phillips screwdriver, remove all screws from the front panel. The screws have a length of .95 cm.
 Pergunte ao FixBot
-
-
-
After the screws have been removed, gently lift the panel from the gun and set it aside.
-
-
-
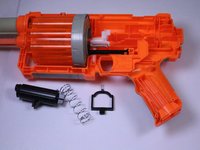
Locate the black cylinder connected to the large spring near the top of the device.
-
Once located, push the black cylinder against the spring and lift it out of the device.
-
-
-
Using your hand, lift the large spring and attached plastic stabilizing piece out of the gun and set aside.
-
-
-
-
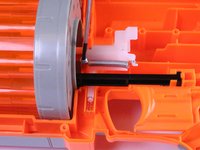
Remove the two screws circled in blue. They are .95 cm in length.
-
Remove the three screw circled in green. They are .7 cm in length.
-
-
-
Once all of the screws have been removed lift the pump handle off and set it aside.
-
-
-
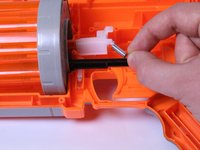
In order to remove the white plastic holder, you must remove the spring that keeps it in place. Using a 00 Phillips screwdriver, carefully remove the screw while holding the spring in place.
-
-
-
Using a plastic opening tool, lift the white piece out of the gun and set it aside.
-
-
-
Using your hand, slide the track out of the gun by pulling it away form the device.
-
-
-
Using a plastic opening tool, detach the black piece from the trigger. You do not need to remove the black piece from the gun.
-
-
-
Once the black piece has been detached, the trigger can be lifted out of the device.
-


To reassemble your device, follow these instructions in reverse order. Ensure that the spring located behind the trigger is attached to the limb on the backside of the trigger.
Equipe

USF Tampa, Team 11-2, Blackwell Fall 2014 Membro de USF Tampa, Team 11-2, Blackwell Fall 2014
USFT-BLACKWELL-F14S11G2
4 Membros
Autoria de 5 guias