Ir para o conteúdo principal
Participe da comunidade de reparos - Criar conta

NABI XD Screen Replacement

O que você precisa

  1. NABI XD Screen Replacement, Rear panel: passo 1, imagem 1 %32 NABI XD Screen Replacement, Rear panel: passo 1, imagem 2 %32
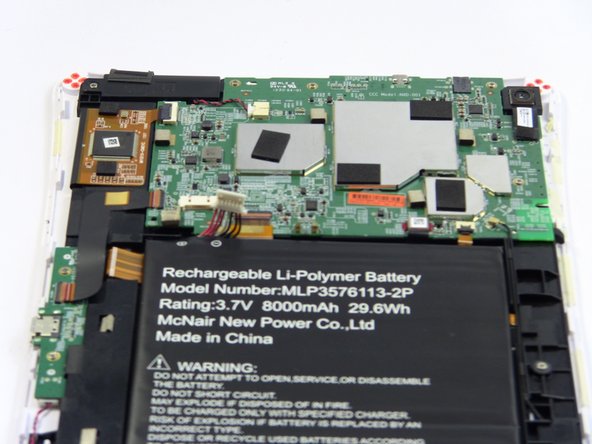
    • Use the plastic opening tool at the top left corner seam, then pry the corner apart.

    Pergunte ao FixBot
  2. NABI XD Screen Replacement: passo 2, imagem 1 %32
    • Next slide the plastic opening tool across the sides of the Nabi. It will slowly open.

    • There are small plastic clips that need to be release. Gently apply outwards pressure until the clips give.

    • Go around the NABI XD and separate the rear panel from the device.

    Pergunte ao FixBot
  3. NABI XD Screen Replacement, Battery: passo 3, imagem 1 %32 NABI XD Screen Replacement, Battery: passo 3, imagem 2 %32
    • Place your fingernails on both sides of the connector and pull it straight back away from the holder.

    Pergunte ao FixBot
  4. NABI XD Screen Replacement: passo 4, imagem 1 %32
    • Battery is glued to the base, lift carefully.

    • To remove battery, lift the battery up from the motherboard.

    Pergunte ao FixBot
  5. NABI XD Screen Replacement, Charging port: passo 5, imagem 1 %32 NABI XD Screen Replacement, Charging port: passo 5, imagem 2 %32
    Ferramenta utilizada neste passo:
    Tweezers
    $4.99
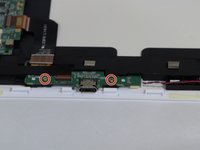
    • Remove the two 4mm Phillips screws with the PH#0 screwdriver.

    • Disconnect the left (L) speaker wire from the charging port by grabbing it on both sides with the tweezers and pulling straight back.

    Pergunte ao FixBot
  6. NABI XD Screen Replacement: passo 6, imagem 1 %32
    • Use your fingernails or a spudger to flip up the small retaining flap, then pull the ribbon straight back to remove

    • Lift the charging port from the NABI XD.

    Pergunte ao FixBot
  7. NABI XD Screen Replacement, Motherboard: passo 7, imagem 1 %32 NABI XD Screen Replacement, Motherboard: passo 7, imagem 2 %32 NABI XD Screen Replacement, Motherboard: passo 7, imagem 3 %32
    Ferramenta utilizada neste passo:
    Tweezers
    $4.99
    • To remove the marked ribbons, use your fingernails or a spudger to lift up small tab

    • Use the Precision Tweezers to gently pull the ribbons straight out of the connectors.

    • You need to remove 4 ribbons

    Pergunte ao FixBot
  8. NABI XD Screen Replacement: passo 8, imagem 1 %32 NABI XD Screen Replacement: passo 8, imagem 2 %32 NABI XD Screen Replacement: passo 8, imagem 3 %32
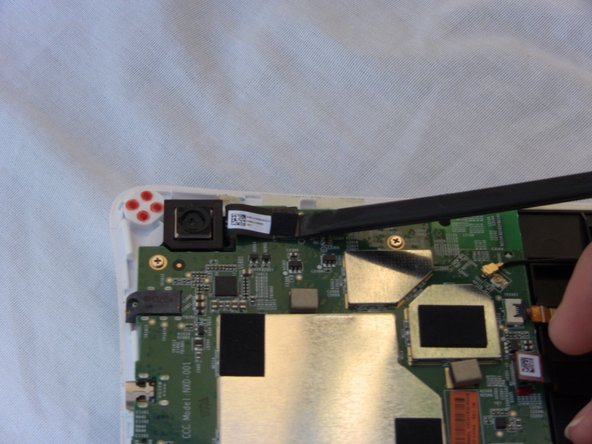
    • Disconnect the camera by lifting the ribbon straight up. Also disconnect the remaining ribbon by lifting up gently.

    • To disconnect antenna wire, use the tweezers to pry connector straight from the board.

    Pergunte ao FixBot
  9. NABI XD Screen Replacement: passo 9, imagem 1 %32 NABI XD Screen Replacement: passo 9, imagem 2 %32
    • Disconnect the Right speaker by grabbing the wire head by its sides and pulling it back from the connector.

    Pergunte ao FixBot
  10. NABI XD Screen Replacement: passo 10, imagem 1 %32 NABI XD Screen Replacement: passo 10, imagem 2 %32
    • Remove the four 4mm Phillips screws with the PH#0 screwdriver.

    Pergunte ao FixBot
  11. NABI XD Screen Replacement: passo 11, imagem 1 %32
    • Lift the motherboard up away from the Nabi XD.

    Pergunte ao FixBot
  12. NABI XD Screen Replacement, Speakers: passo 12, imagem 1 %32 NABI XD Screen Replacement, Speakers: passo 12, imagem 2 %32 NABI XD Screen Replacement, Speakers: passo 12, imagem 3 %32
    • Right (R) speaker removal:

    • Remove one 4mm Phillips screw.

    • Use the metal spudger to separate the speaker from the frame.

    • The speaker is glued to the Nabi XD it will require some force to separate them.

    Pergunte ao FixBot
  13. NABI XD Screen Replacement: passo 13, imagem 1 %32 NABI XD Screen Replacement: passo 13, imagem 2 %32
    • Remove the left (L) speaker wire from the frame by pulling it to the side and up.

    • The wire in this step, is connected to the charging port. Removing it, is shown in detail on step 6.

    Pergunte ao FixBot
  14. NABI XD Screen Replacement: passo 14, imagem 1 %32 NABI XD Screen Replacement: passo 14, imagem 2 %32 NABI XD Screen Replacement: passo 14, imagem 3 %32
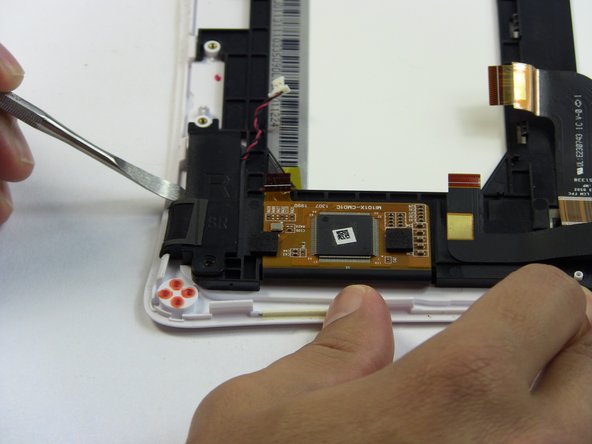
    • Left (L) speaker removal:

    • Remove two 4mm Phillips screws.

    • Use the metal spudger to separate the speaker from the frame.

    Pergunte ao FixBot
  15. NABI XD Screen Replacement, Screen: passo 15, imagem 1 %32 NABI XD Screen Replacement, Screen: passo 15, imagem 2 %32 NABI XD Screen Replacement, Screen: passo 15, imagem 3 %32
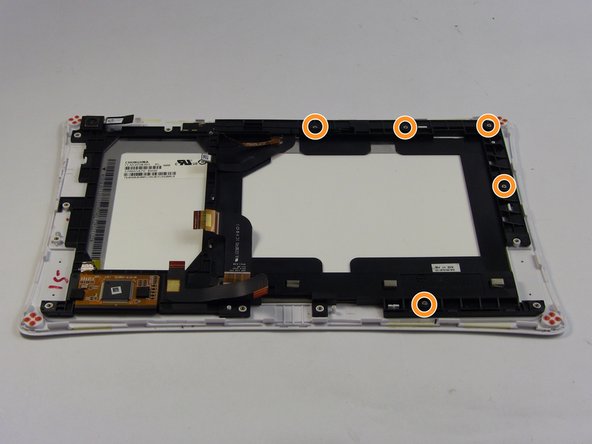
    • The ribbons are glued to the frame so gently lift them up without ripping them.

    • Lightly lift the marked wires and ribbons from the frame by gently pulling them in the direction of the arrows and up.

    • Remove five 4mm Phillips screws from the frame.

    Pergunte ao FixBot
  16. NABI XD Screen Replacement: passo 16, imagem 1 %32 NABI XD Screen Replacement: passo 16, imagem 2 %32
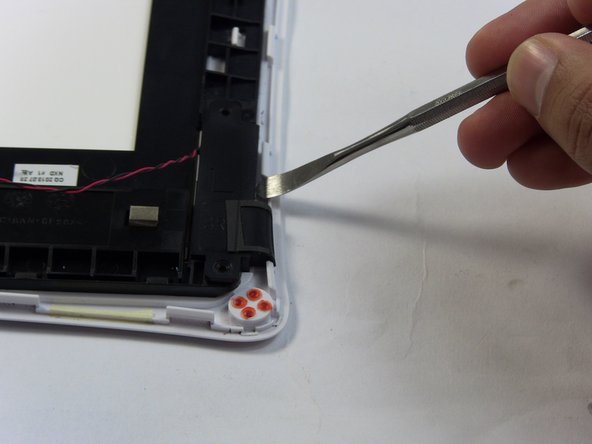
    • Use the Plastic Opening tools to lift the frame up.

    • The ribbons need to be detangled from the frame while you are lifting it up.

    • Do not yank the frame away from the Nabi XD it is connect to it by a ribbon. Gently lift.

    Pergunte ao FixBot
  17. NABI XD Screen Replacement: passo 17, imagem 1 %32 NABI XD Screen Replacement: passo 17, imagem 2 %32
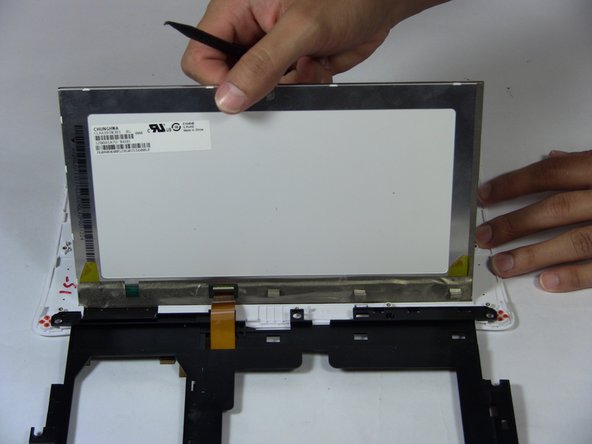
    • Lift the screen up with the black spudger.

    • Lift the frame up slowly and place it to the side.

    Pergunte ao FixBot
Conclusão

To reassemble your device, follow these instructions in reverse order.

Uma outra pessoa concluiu este guia.

Equipe

USF Tampa, Team 17-2, Blackwell Fall 2016 Membro de USF Tampa, Team 17-2, Blackwell Fall 2016

USFT-BLACKWELL-F16S17G2

3 Membros

Autoria de 12 guias

1Comentário do guia

Will the screen from an A or C model work with a B model?

Kevin Fifer - Responder Compartilhar

Comentar

Visualizações:

Últimas 24 horas: 1

Últimos 7 dias: 11

Últimos 30 dias: 64

Ao todo: 1,004