Introdução
This guide will walk you through the process of replacing a faulty LCD screen and digitizer assembly in a Motorola Moto G4 Plus phone.
Before you begin, download the Rescue and Smart Assistant app to backup your device and diagnose whether your problem is software or hardware related.
This guide is for replacing a complete display assembly, which includes the display frame. Your replacement part should look like this. If you purchased a bare display, you must complete additional disassembly steps, which are not covered by this guide.
For your safety, discharge your battery below 25% before disassembling your phone. This reduces the risk of a dangerous thermal event if the battery is accidentally damaged during the repair.
O que você precisa
-
-
Insert a fingernail or a spudger into the notch on bottom edge of the phone near the charging port.
-
Pry the back cover away from the body of the phone.
-
-
-
-
Peel away the yellow tape over the T3 screw next to the SIM card slot.
-
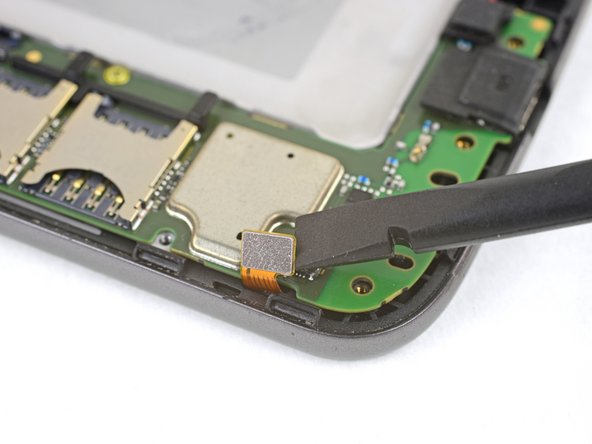
Peel away the copper tape covering the display connector.
-
-
-
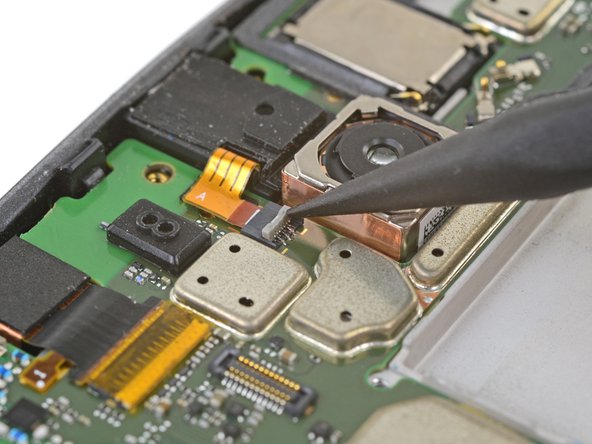
Insert the point of a spudger into a groove at the bottom of the motherboard.
-
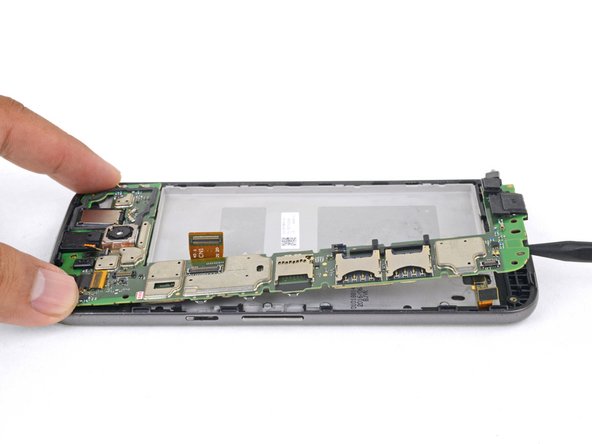
Gently pry up to loosen the motherboard from the frame and from the edge clips.
-
Use a spudger to move any flex cables out of the way, as well as making sure that any modules attached to the motherboard (such as the front-facing camera) are loose from the frame.
-
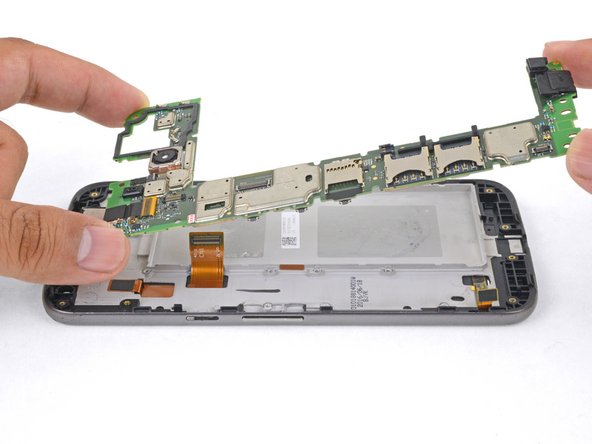
Lift the motherboard up from the frame and remove it.
-


To reassemble your device, follow these instructions in reverse order.
Take your e-waste to an R2 or e-Stewards certified recycler.
Repair didn’t go as planned? Check out our Motorola Moto G4 Plus Answers community for troubleshooting help.
To reassemble your device, follow these instructions in reverse order.
Take your e-waste to an R2 or e-Stewards certified recycler.
Repair didn’t go as planned? Check out our Motorola Moto G4 Plus Answers community for troubleshooting help.
Cancelar: não concluí este guia.
27 outras pessoas executaram este guia.


Um comentário
Why are the display/ LCD screen of any smartphone damaged?