Ir para o conteúdo principal

Motorola Moto 360 LCD Display Replacement

O que você precisa

  1. Motorola Moto 360 LCD Display Replacement, Rear Cover: passo 1, imagem 1 %32
    • Set the watch face down on a flat surface.

    • Place the heated iOpener on the face of the rear cover to loosen the adhesive underneath.

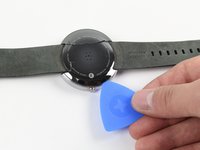
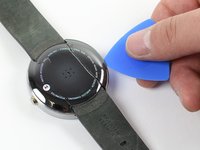
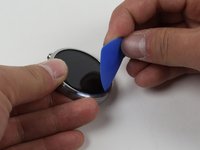
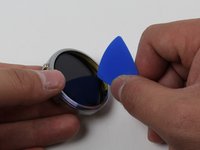
  2. Motorola Moto 360 LCD Display Replacement: passo 3, imagem 1 %32 Motorola Moto 360 LCD Display Replacement: passo 3, imagem 2 %32
    • Gently slide the blue opening pick between the rear cover and the metal casing.

    • The rear cover is extremely fragile. Be very delicate when using the opening pick.

    • Work your way entirely around the rear cover.

    • It may take several attempts of reheating the adhesive to get the rear cover loose enough to pull off.

  3. Motorola Moto 360 LCD Display Replacement: passo 4, imagem 1 %32
    • Once the adhesive has been successfully loosened, gently pull the rear cover off.

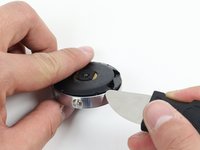
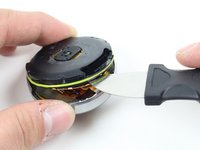
  4. Motorola Moto 360 LCD Display Replacement, O-Ring: passo 5, imagem 1 %32 Motorola Moto 360 LCD Display Replacement, O-Ring: passo 5, imagem 2 %32
    • To get to the O-Ring, use the Jimmy to gently pry off the rear housing.

  5. Motorola Moto 360 LCD Display Replacement: passo 6, imagem 1 %32
    • Pinch the green rubber O-Ring and slide it off of the watch.

    • The O-Ring is delicate and is easily severed. Use care around sharp objects.

  6. Motorola Moto 360 LCD Display Replacement, LCD Display: passo 7, imagem 1 %32
    • Set the Moto 360 face up on a flat surface.

    • Place the iOpener on the face of the device screen.

  7. Motorola Moto 360 LCD Display Replacement: passo 8, imagem 1 %32 Motorola Moto 360 LCD Display Replacement: passo 8, imagem 2 %32
    • Gently slide the opening pick between the screen and the metal casing.

    • Work your way around the face of the screen, loosening the adhesive.

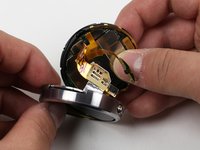
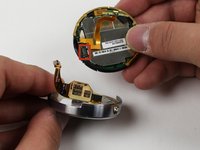
  8. Motorola Moto 360 LCD Display Replacement: passo 9, imagem 1 %32 Motorola Moto 360 LCD Display Replacement: passo 9, imagem 2 %32
    • Detach the copper ribbon connecting the motherboard to the display.

    • For reassembly, attach copper ribbon where it is marked.

    • The copper ribbon is fragile and easily disconnects. Remember where it goes so as to reconnect it properly.

  9. Motorola Moto 360 LCD Display Replacement: passo 10, imagem 1 %32
    • Slide the display out of the metal casing.

Conclusão

To reassemble your device, follow these instructions in reverse order.

15 outras pessoas executaram este guia.

Cole Twitchell

Membro desde: 01/30/15

1.688 Reputação

Autoria de 2 guias

Equipe

Cal Poly, Team 17-32, Amido Winter 2015 Membro de Cal Poly, Team 17-32, Amido Winter 2015

CPSU-AMIDO-W15S17G32

Membros da 4

Autoria de 18 guias

7 comentários

Good morning,

It is possible to replace the display unit for the Moto 360 2nd with 1.56" display?

Thanks in advance and best regards,

Stephan

Stephan Müller - Responder

Were could i buy a new lcd screen for the moto 360 1st gen??

Sebastian Galvan - Responder

hey mate you can buy one from aliexpress aliexpress moto 360 screen see link below

https://goo.gl/ZSMTVW

Faddy Oraha -

Where can I get a LCD display for a Moto 360 2 gen 42mm. Thanks hope you can help

Glenn Patoska - Responder

Bonjour,

Où est-il possible de trouver des pièces détachées ?

Le fond du boitier.

Merci de votre réponse.

DOGUE - Responder

Adicione um comentário

Exibir estatísticas:

Últimas 24 horas: 3

Últimos 7 dias: 5

Últimos 30 dias: 15

Duração total: 21,490