Esta versão pode conter edições incorretas. Mude para o último instantâneo verificado.
O que você precisa
-
Este passo não foi traduzido. Ajude a traduzi-lo
-
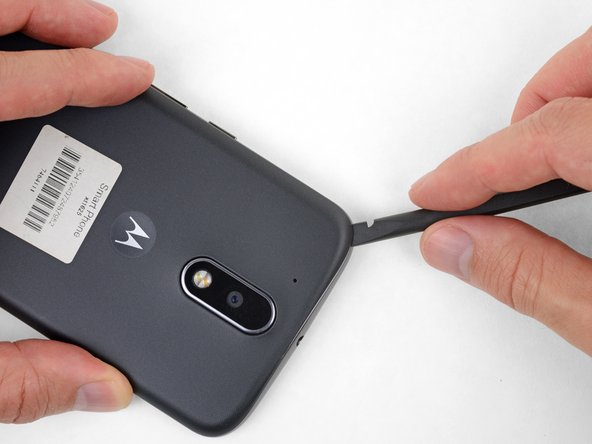
Insert a fingernail or a spudger into the notch on the bottom edge of the phone, near the charge port.
-
Gently twist or pry to open a small gap between the back cover and the body of the phone.
-
While keeping your tool (or fingernail) inserted into the gap between the back cover and the body of the phone, slide it around the corner to begin loosening the plastic clips holding the cover in place.
-
-
Este passo não foi traduzido. Ajude a traduzi-lo
-
Slide your tool all along the side of the phone to separate more of the clips securing the back cover.
-
-
-
Este passo não foi traduzido. Ajude a traduzi-lo
-
Keep your tool inserted slightly under the back cover, and slide it around the top corner.
-
If necessary, continue prying around the remaining edges of the phone until the back cover comes free.
-
Cancelar: não concluí este guia.
2 outras pessoas executaram este guia.


