Esta versão pode conter edições incorretas. Mude para o último instantâneo verificado.
O que você precisa
-
Este passo não foi traduzido. Ajude a traduzi-lo
-
Use a heated iOpener or a heat gun to heat the edges of the display and soften its adhesive.
-
-
Este passo não foi traduzido. Ajude a traduzi-lo
-
Apply a suction cup as close as possible to the edge of the display.
-
Use the suction cup to lift the edge of the display enough to insert an opening pick under the edge.
-
Slide the opening pick all the way around the edges of the display to cut through the adhesive on the bezel.
-
-
Este passo não foi traduzido. Ajude a traduzi-lo
-
Starting from the top edge, lift the display slightly. If you feel any resistance, use heat and an opening pick to slice through any remaining adhesive.
-
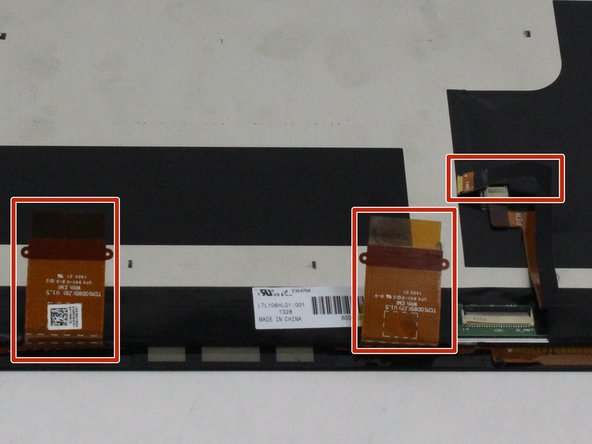
Before completely removing the display, disconnect the three display cables.
-
-
-
Este passo não foi traduzido. Ajude a traduzi-lo
-
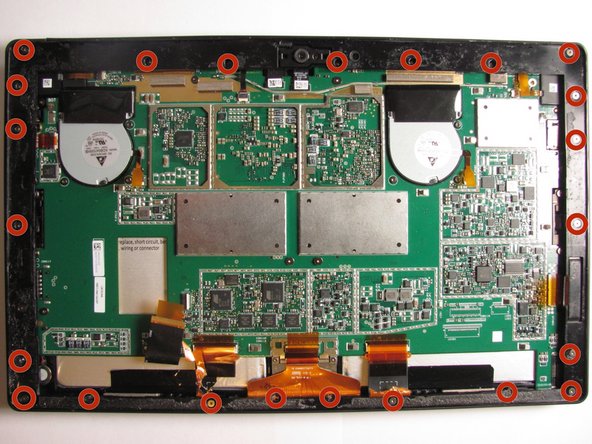
Using a T5 Torx screwdriver, unscrew a total number of 23 screws located on the outside panel of the Surface Pro.
-
-
Este passo não foi traduzido. Ajude a traduzi-lo
-
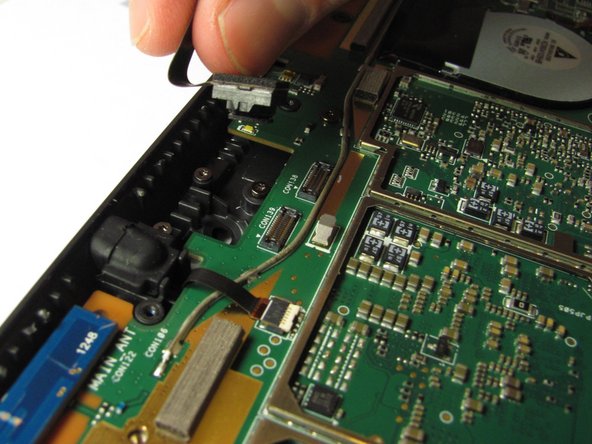
Use the plastic opening tool or fingers to pry out the front camera.
-
-
Este passo não foi traduzido. Ajude a traduzi-lo
-
Use the plastic opening tool to pry out the back camera.
-


Equipe

Cal Poly, Team 8-20, Regan Fall 2013 Membro de Cal Poly, Team 8-20, Regan Fall 2013
CPSU-REGAN-F13S8G20
Membros da 4
Autoria de 16 guias