Ir para o conteúdo principal
Participe da comunidade de reparos - Criar conta

Microsoft Surface Pro 3 SSD Replacement

O que você precisa

  1. Microsoft Surface Pro 3 SSD Replacement, Display: passo 1, imagem 1 %32 Microsoft Surface Pro 3 SSD Replacement, Display: passo 1, imagem 2 %32
    • Before you begin, discharge the Surface Pro's battery below 25%. A charged lithium-ion battery can catch fire and/or explode if accidentally damaged during the repair.

    • The display is strongly glued to the frame of the device.

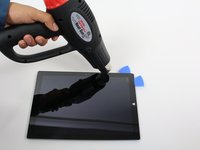
    • To remove the display, first soften the adhesive by applying heat. You can use a heat pad, heat gun, or iOpener. In a pinch, a hair dryer can also work.

    • Be careful when using a heat gun, as too much heat can permanently damage the display and/or battery.

    • Steadily and evenly heat the perimeter of the display until it's too hot to touch, and try to maintain that temperature for several minutes.

    Pergunte ao FixBot

    Comentar

  2. Microsoft Surface Pro 3 SSD Replacement: passo 2, imagem 1 %32 Microsoft Surface Pro 3 SSD Replacement: passo 2, imagem 2 %32
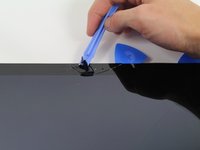
    • Use a suction cup or an iSclack to pull up on the glass and create a slight gap between the glass and the metal frame.

    • If your display is badly cracked, a suction cup may not adhere. It may help to first cover the display with a layer of packing tape. Alternatively, you can superglue your suction cup to the display.

    • Carefully insert an opening pick into the gap between the screen and the device to cut the adhesive.

    • Slide the pick around the sides and bottom of the display to cut the adhesive. Apply more heat as needed.

    • Work carefully—the glass is thin and will crack easily if you try to force it.

    • The wi-fi antennas are glued under the screen border along the top edge (on either side of the camera), and can be damaged easily. Use extra care when separating the top edge, and apply more heat if necessary.

    Pergunte ao FixBot

    Comentar

  3. Microsoft Surface Pro 3 SSD Replacement: passo 3, imagem 1 %32 Microsoft Surface Pro 3 SSD Replacement: passo 3, imagem 2 %32 Microsoft Surface Pro 3 SSD Replacement: passo 3, imagem 3 %32
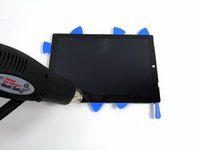
    • Continue to heat sections of the screen with the heat gun.

    • As you make your way around the screen with the heat gun, use the plastic opening tool and the opening picks to pry the screen loose.

    • The screen is extremely thin and very easy to break. Be careful working with broken glass.

    Pergunte ao FixBot

    Comentar

  4. Microsoft Surface Pro 3 SSD Replacement: passo 4, imagem 1 %32 Microsoft Surface Pro 3 SSD Replacement: passo 4, imagem 2 %32
    • Lift the screen up carefully so that no wires are torn.

    Pergunte ao FixBot

    Comentar

  5. Microsoft Surface Pro 3 SSD Replacement: passo 5, imagem 1 %32 Microsoft Surface Pro 3 SSD Replacement: passo 5, imagem 2 %32
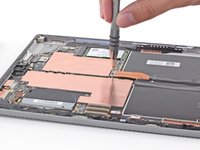
    • Remove the 3 mm T3 Torx screw securing the battery connector, and disconnect the battery connector.

    • Be careful not lose the small, rectangular bridge connector that lies underneath.

    Pergunte ao FixBot

    Comentar

  6. Microsoft Surface Pro 3 SSD Replacement: passo 6, imagem 1 %32 Microsoft Surface Pro 3 SSD Replacement: passo 6, imagem 2 %32 Microsoft Surface Pro 3 SSD Replacement: passo 6, imagem 3 %32
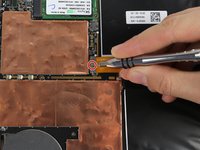
    • Remove the single 4 mm T3 Torx screw securing the display cable.

    • Lift the connector to disconnect the cable.

    • Be careful not lose the small, rectangular bridge connector that lies underneath.

    Pergunte ao FixBot

    Comentar

  7. Microsoft Surface Pro 3 SSD Replacement: passo 7, imagem 1 %32 Microsoft Surface Pro 3 SSD Replacement: passo 7, imagem 2 %32 Microsoft Surface Pro 3 SSD Replacement: passo 7, imagem 3 %32
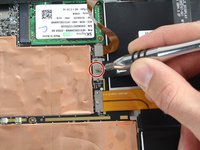
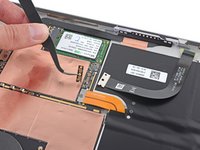
    • Grasp the orange cable connected to the silver connecter.

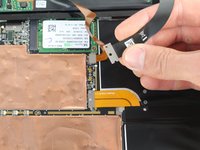
    • Carefully lift the orange cable up until the connecter pops off.

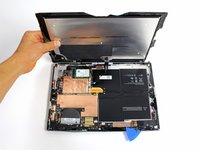
    • The screen will now be completely disconnected.

    • The replacement display may not include all the parts needed for installation. Save all the parts from the original display, and transfer them to the new display as needed.

    Pergunte ao FixBot

    Comentar

  8. Microsoft Surface Pro 3 SSD Replacement, SSD: passo 8, imagem 1 %32 Microsoft Surface Pro 3 SSD Replacement, SSD: passo 8, imagem 2 %32 Microsoft Surface Pro 3 SSD Replacement, SSD: passo 8, imagem 3 %32
    • Remove the two 4 mm T3 Torx screws securing the SSD.

    Pergunte ao FixBot

    Comentar

  9. Microsoft Surface Pro 3 SSD Replacement: passo 9, imagem 1 %32 Microsoft Surface Pro 3 SSD Replacement: passo 9, imagem 2 %32
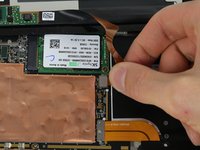
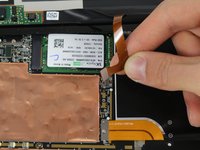
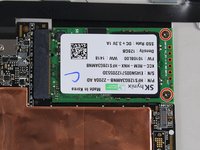
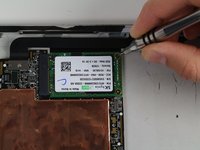
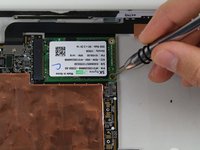
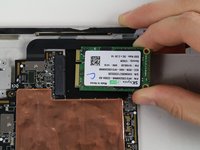
    • Lift up and pull gently on the SSD to remove it from the black connector.

    Pergunte ao FixBot

    Comentar

Conclusão

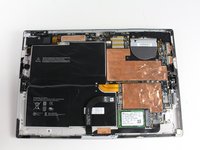
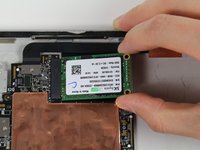
To reassemble your device, follow these instructions in reverse order.

Cancelar: não concluí este guia.

50 outras pessoas executaram este guia.

Erik Snyder

Membro desde: 10/01/15

5.460 Reputação

Autoria de 5 guias

Equipe

Cal Poly, Team 12-18, Maness Fall 2015 Membro de Cal Poly, Team 12-18, Maness Fall 2015

CPSU-MANESS-F15S12G18

5 Membros

Autoria de 31 guias

19Comentários do guia

How do you replace the screen once the glue is melted?

bbhsascha - Responder Compartilhar

would assume you heat and put the screen back...

Assuming you havent shattered the screen to oblivion in the process...

nyalldavis - Responder Compartilhar

Is there a way to copy the files from the ssd card once removed?

Garry Lincoln - Responder Compartilhar

yes, you would need an adapter to connect the msata to regular sata and connect to another computer.

Dan Wooton - Responder Compartilhar

How's does the glass thickness compare to the Surface Pro 2? I've replaced a screen on a 2 without destroying it. Now I'm looking to replace an SSD on a 3. I'm wondering if I can expect the same type of removal.

jwelch414 - Responder Compartilhar

Comentar

Visualizações:

Últimas 24 horas: 19

Últimos 7 dias: 153

Últimos 30 dias: 631

Ao todo: 180,319