Ir para o conteúdo principal
Participe da comunidade de reparos - Criar conta

Microsoft Surface 2 Volume Control Replacement

O que você precisa

    1. Microsoft Surface 2 Volume Control Replacement, Screen: passo 1, imagem 1 %32 Microsoft Surface 2 Volume Control Replacement, Screen: passo 1, imagem 2 %32 Microsoft Surface 2 Volume Control Replacement, Screen: passo 1, imagem 3 %32
      • Begin by using a heat gun or the iOpener (This will take longer.) to melt the adhesive all around the outer edge of the screen.

      • Avoid holding the heat gun too close to the Microsoft Surface 2 so as to not cause any unwanted warping.

      • Avoid touching the metal end of the gun. It will be very hot and can burn you.

      • Insert the opening picks just under the screen and black edging. Be sure to place them evenly on each side.

      • Using the gap created by the picks, slowly pry the screen from the body of the Microsoft Surface 2 with a plastic opening tool. Pry as uniformly as possible.

      Pergunte ao FixBot

      Comentar

    2. Microsoft Surface 2 Volume Control Replacement: passo 2, imagem 1 %32 Microsoft Surface 2 Volume Control Replacement: passo 2, imagem 2 %32 Microsoft Surface 2 Volume Control Replacement: passo 2, imagem 3 %32
      • Once the screen is free from the body, there will be a single ribbon cable connecting the screen to the motherboard.

      • Use a plastic spudger to pry the retaining clip away from the display cable.

      • The ribbon cable may be glued to the motherboard.

      • Carefully pull the ribbon cable from its socket on the motherboard.

      Pergunte ao FixBot

      Comentar

    1. Microsoft Surface 2 Volume Control Replacement, Volume Control: passo 3, imagem 1 %32 Microsoft Surface 2 Volume Control Replacement, Volume Control: passo 3, imagem 2 %32
      • Work close to Magnetic Project Map to avoid losing screws.

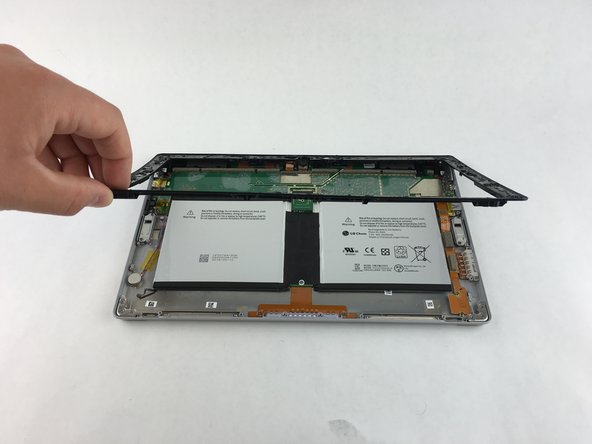
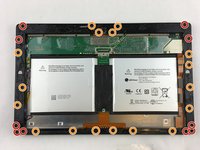
      • Remove ten 3.45 mm T3 screws from the corners of the black plastic bezel.

      • Remove the remaining seventeen 4.4 mm T5 screws from the perimeter of the bezel.

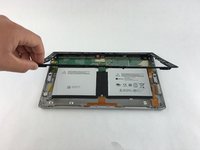
      • Once all screws have been removed, lift and remove the bezel from the rest of the device.

      Pergunte ao FixBot

      Comentar

    2. Microsoft Surface 2 Volume Control Replacement: passo 4, imagem 1 %32
      Ferramenta utilizada neste passo:
      Tweezers
      $4.99
      • Gently peel off the yellow plastic tape using a pair of tweezers.

      Pergunte ao FixBot

      Comentar

    3. Microsoft Surface 2 Volume Control Replacement: passo 5, imagem 1 %32
      • Remove the two 1.70 mm T3 screws from the volume control switch.

      • Work close to Magnetic Project Map to avoid losing screws.

      Pergunte ao FixBot

      Comentar

    4. Microsoft Surface 2 Volume Control Replacement: passo 6, imagem 1 %32
      • Use a spudger to lift up the retaining flap on the volume control cable ZIF connector.

      • Make sure you are prying up on the retaining flap, not the connector itself.

      Pergunte ao FixBot

      Comentar

    5. Microsoft Surface 2 Volume Control Replacement: passo 7, imagem 1 %32
      • Now that the volume control switch is loose, pull it gently away from the motherboard.

      • No force is needed to plug in or remove the ribbon cable.

      Pergunte ao FixBot

      Comentar

Conclusão

To reassemble your device, follow these instructions in reverse order.

Cancelar: não concluí este guia.

oluchianya

Membro desde: 02/04/16

157 Reputação

Autoria de 1 guia

Equipe

USF Tampa, Team 3-1, Wollert Spring 2016 Membro de USF Tampa, Team 3-1, Wollert Spring 2016

USFT-WOLLERT-S16S3G1

4 Membros

Autoria de 40 guias

0Comentários do guia

Comentar

Visualizações:

Últimas 24 horas: 0

Últimos 7 dias: 5

Últimos 30 dias: 64

Ao todo: 2,052