Introdução
Use this guide to replace a faulty trackpad, or to simply remove the trackpad temporarily when servicing the battery.
For your safety, discharge your MacBook Pro's battery below 25% before you begin this procedure. A charged lithium-ion battery can create a dangerous fire if accidentally punctured.
O que você precisa
-
-
Power on your Mac and launch Terminal.
-
Copy and paste the following command (or type it exactly) into Terminal:
-
sudo nvram AutoBoot=%00
-
Press [return]. If prompted, enter your administrator password and press [return] again. Note: Your return key may also be labeled ⏎ or "enter."
-
sudo nvram AutoBoot=%03
-
-
Ferramenta utilizada neste passo:Magnetic Project Mat$19.95
-
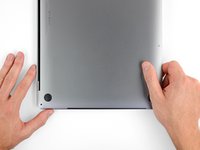
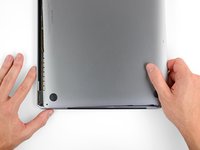
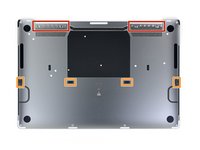
Use a P5 Pentalobe driver to remove six screws securing the lower case, of the following lengths:
-
Four 3.7 mm screws
-
Two 7.3 mm screws
-
-
-
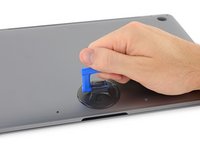
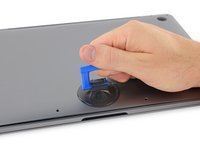
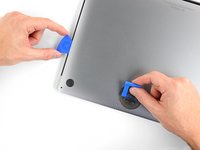
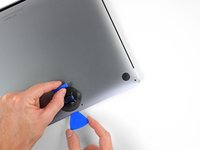
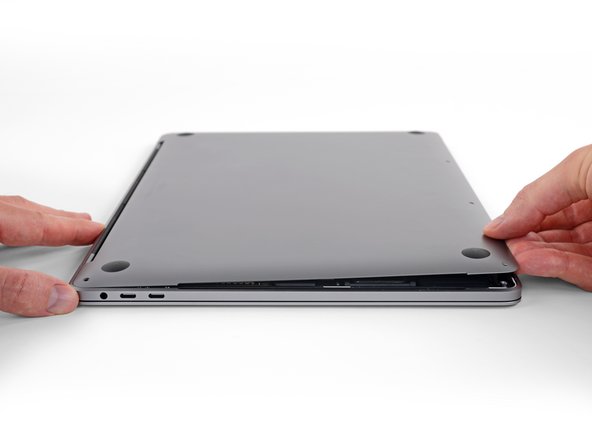
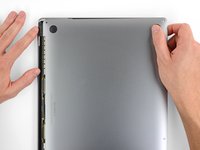
Press a suction handle into place near the front edge of the lower case, between the screw holes.
-
Pull up on the suction handle just enough to open a small gap under the lower case.
-
-
-
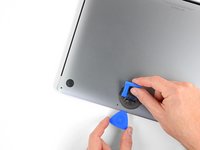
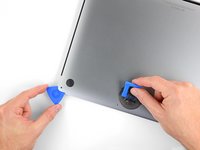
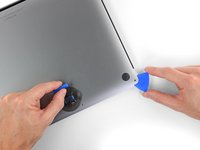
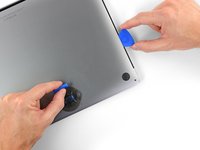
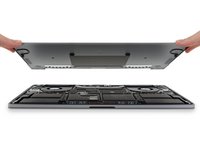
Remove the lower case.
-
Set it in place and align the sliding clips near the display hinge. Press down and slide the cover toward the hinge. It should stop sliding as the clips engage.
-
When the sliding clips are fully engaged and the lower case looks correctly aligned, press down firmly on the lower case to engage the four hidden clips underneath. You should feel and hear them snap into place.
-
-
-
-
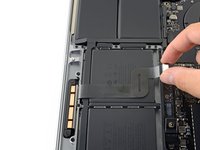
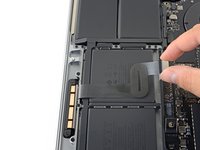
Peel up and remove the insulating sticker covering the battery board, on the edge of the logic board nearest the battery.
-
If the cover doesn't peel up easily, apply mild heat with an iOpener, hair dryer, or heat gun to soften the adhesive underneath, and try again.
-
-
-
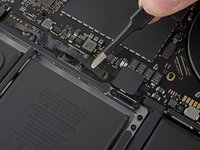
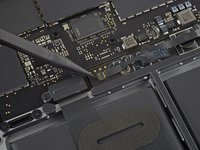
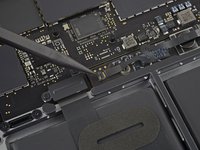
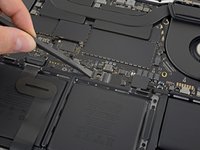
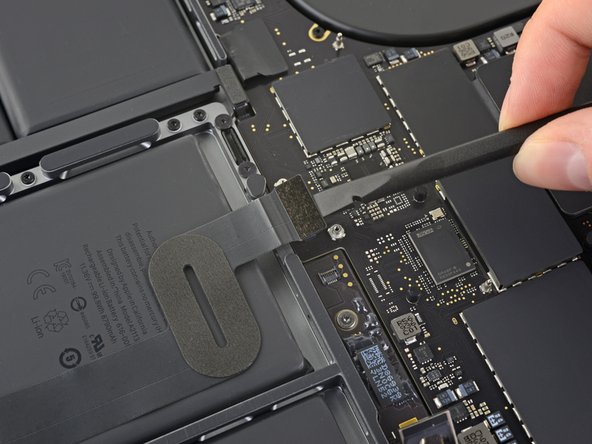
Use a spudger to gently pry up the locking flap on the ZIF connector for the battery board data cable.
-
-
-
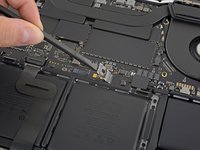
Slide the battery board data cable out of its socket on the battery board, and remove it completely.
-
-
-
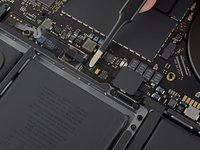
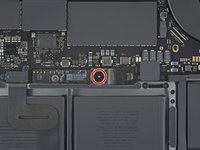
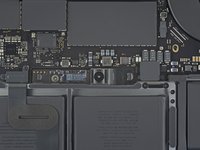
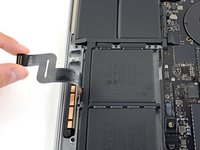
Use a T5 Torx driver to remove the 6.7 mm pancake screw securing the battery power connector.
-
-
-
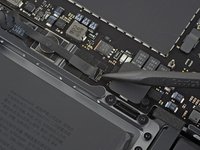
Use a T3 Torx driver to remove the two 1.8 mm screws securing the cover bracket for the keyboard and trackpad cable connectors.
-
Remove the bracket.
-
-
-
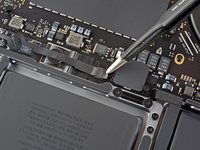
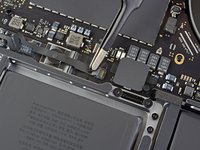
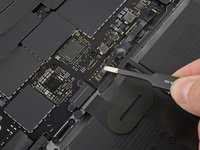
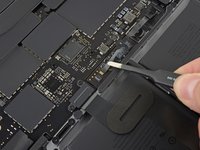
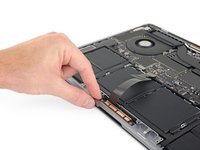
Use a spudger to disconnect the trackpad cable by prying its connector straight up from the logic board.
-
-
-
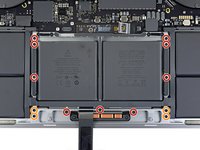
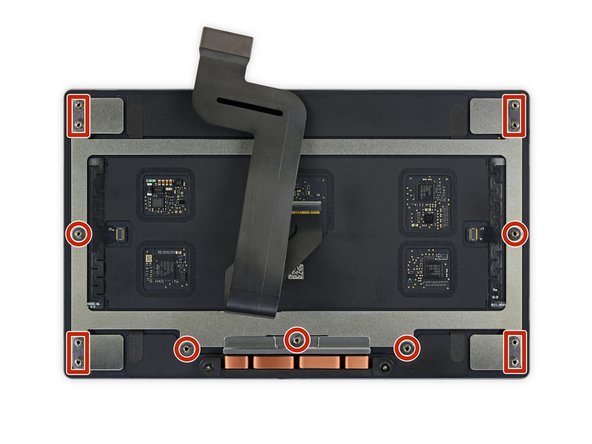
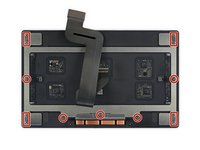
Use a T5 Torx driver to remove the 13 screws securing the trackpad assembly:
-
Nine 5.8 mm screws
-
Four 4.9 mm screws
-
-
-
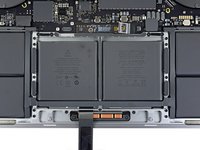
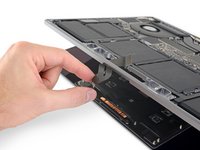
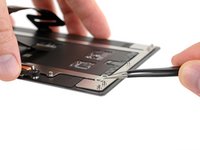
Swing the display open slightly, but keep the MacBook upside-down. The trackpad assembly should separate and lay flat on the display.
-
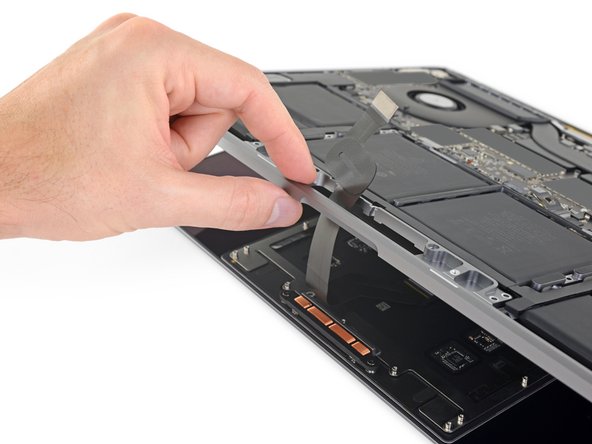
Carefully feed the trackpad's ribbon cable through its slot in the chassis.
-


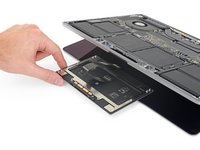
Compare your new replacement part to the original part—you may need to transfer remaining components or remove adhesive backings from the new part before installing.
To reassemble your device, follow the above steps in reverse order.
Take your e-waste to an R2 or e-Stewards certified recycler.
Repair didn’t go as planned? Check out our Answers community for troubleshooting help.
Cancelar: não concluí este guia.
10 outras pessoas executaram este guia.


Um comentário
I have a macbook pro 16" from 2019, it did not give me a haptic response, the Force Touch is sensitive to touch and pressure but there was no sensation of "click" or vibration, I disassembled the mac and the trackpad out of pure curiosity, and when closing and turn on the mac, the trackpad was completely unusable as well as the keyboard and the fans at full, I already tried to restore PRAM and SMC with an external keyboard and nothing worked, I already started in safe mode and neither. I reopen it to verify all the grants but there is nothing visibly wrong. Please Help...