Esta versão pode conter edições incorretas. Mude para o último instantâneo verificado.
O que você precisa
-
-
Remova os seguintes parafusos pentalobe P5 que prendem a estrutura inferior ao MacBook Pro:
-
Oito de 3,1 mm
-
Dois de 2,3 mm
-
-
-
Este passo não foi traduzido. Ajude a traduzi-lo
-
Peel the rubber cover up off the right fan and fold it out of the way.
-
-
Este passo não foi traduzido. Ajude a traduzi-lo
-
Peel the rubber cover up off the left fan and fold it out of the way.
-
-
Este passo não foi traduzido. Ajude a traduzi-lo
-
Remove the small rubber cap from the screw at the end of the heat sink.
-
-
Este passo não foi traduzido. Ajude a traduzi-lo
-
Remove the following screws securing the heat sink to the logic board:
-
One 3.8 mm T5 Torx screw
-
Two 3.4 mm T5 Torx screws
-
One 5.6 mm T5 Torx screw
-
-
Este passo não foi traduzido. Ajude a traduzi-lo
-
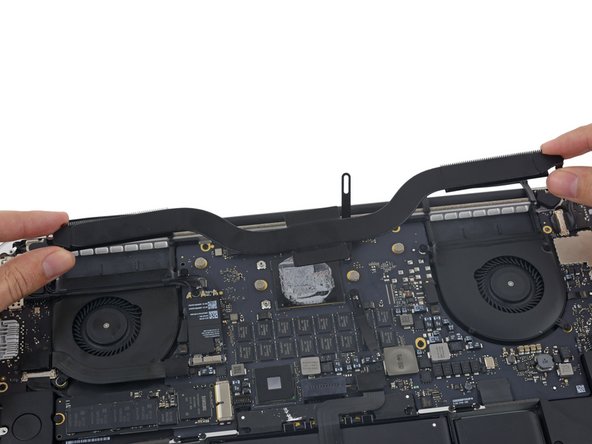
Flip the two spring clamps out of the way of the heat sink.
-
Remove the heat sink from the MacBook Pro.
-
Cancelar: não concluí este guia.
87 outras pessoas executaram este guia.
12 comentários
On my macbook Pro 2015 it has an extra Square on the heatsink to cover the graphics card. So the Pictures does not look right on this guide. I would share my pictures but it’s not possible in the comments.
I don’t have much to add other than that these squares on the GPU and CPU were hindering my ability to completely clean off the previous thermal paste. I actually would like to remove the squares, but would like to hear from folks who might have a sense of how essential it is for thermal transfer (or any other purpose it serves).
Rahul S -
Hey guys when I refreshed the thermal paste on my 2015 15” (top spec) mbp, I noticed four little metallic sponges in that area, one of those came off… I still have it, how critical is it? Should I replace it? If so are there any guides?
Many thanks
I have the same issue as well— 2 of mine came off, and I just stuck them back where they were before and let the pressure of the heat sink hold it in place for now. But any expertise on this issue is appreciated!
Rahul S -
I too am missing some of those "little metallic sponges". Has anyone found a good replacement for them. I cannot find them online. I'm sure it's because I don't know their "official" name. Maybe I can make my own from thermal pads?
rfmorrow -


