Esta versão pode conter edições incorretas. Mude para o último instantâneo verificado.
O que você precisa
-
-
Remova os seguintes parafusos pentalobe P5 que prendem a estrutura inferior ao MacBook Pro:
-
Oito de 3,0 mm
-
Dois de 2,3 mm
-
-
-
Com uma espátula ou uma pinça, retire os três cabos da antena do AirPort, desconectando-os de seus soquetes na placa do AirPort.
-
-
-
Com a parte plana de uma espátula, levante o conector da placa de E/S em linha reta de seu soquete na placa lógica.
-
De maneira semelhante, remova o conector do cabo da placa de E/S de seu soquete na placa de E/S.
-
Remova o cabo da placa de E/S do MacBook Pro.
-
-
-
Remova o único parafuso Torx T5 (às vezes T6) de 2,9 mm que prende a placa do AirPort à placa lógica.
-
-
-
Com a ponta plana de uma espátula, levante a capa de borracha do dissipador de calor da ventoinha esquerda.
-
-
-
Com a ponta pontiaguda de uma espátula, levante a aba de retenção do soquete ZIF do cabo plano da ventoinha esquerda.
-
Começando pela parte superior do cabo, deslize uma ferramenta de abertura de plástico sob o cabo da ventoinha esquerda para liberá-lo da placa lógica.
-
Levante a ventoinha esquerda para fora do dispositivo.
-
-
-
-
Com a ponta pontiaguda de uma espátula, levante a trava do cabo de dados da placa de E/S e gire-a em direção ao lado da bateria do computador.
-
Com a ponta plana de uma espátula, deslize o cabo de dados da placa de E/S em linha reta para fora de seu soquete na placa lógica.
-
-
-
Remova os dois parafusos Torx T5 de 3,1 mm que prendem a placa de E/S à placa lógica.
-
Em alguns modelos, a remoção do parafuso Torx T5 prateado de 3,5 mm do dissipador de calor também pode ajudar na remoção da placa de E/S.
-
Levante cuidadosamente a placa de E/S e remova-a da estrutura inferior.
-
-
-
Com a ponta plana de uma espátula, erga o conector de entrada do fone de ouvido do seu soquete na placa lógica.
-
-
-
Levantando o lado mais próximo da bateria, gire a placa lógica em direção à parte superior do MacBook Pro.
-
Com a ponta plana de uma espátula, empurre cuidadosamente o conector MagSafe 2 para fora de seu soquete na parte inferior da placa lógica.
-
No sentido horário, de cima para baixo: teclado, trackpad, bateria, alto-falante direito, retroiluminação do teclado, tela, microfone, entrada para fone de ouvido, alto-falante esquerdo.
-
-
-
Remova os três parafusos a seguir que prendem o alto-falante esquerdo à estrutura superior:
-
Um parafuso Torx T5 de 5,6 mm
-
Um parafuso Torx T5 de 6,9 mm
-
Um parafuso Torx T5 de 2,6 mm
-
Retire o alto-falante esquerdo da estrutura superior e reserve-o.
-
-
Este passo não foi traduzido. Ajude a traduzi-lo
-
Remove the two 3.9 mm T5 Torx screws securing the battery board.
-
-
Este passo não foi traduzido. Ajude a traduzi-lo
-
To protect your display, place a sheet of aluminum foil between the display and keyboard and leave it there while you work.
-
-
Este passo não foi traduzido. Ajude a traduzi-lo
-
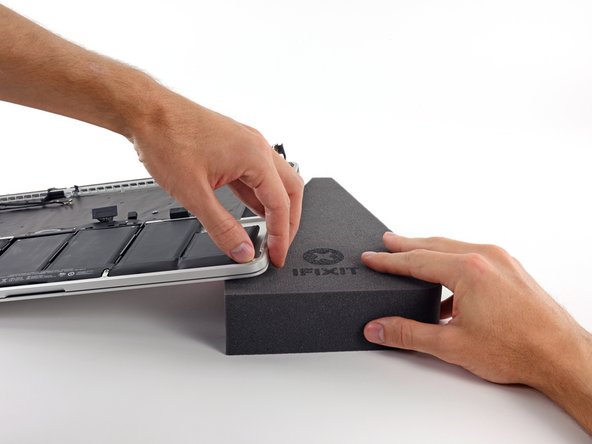
With the front edge of the MacBook Pro facing you, lift the right side and prop it up at a slight angle, using a sturdy foam block or book.
-
-
Este passo não foi traduzido. Ajude a traduzi-lo
-
Now that your MacBook Pro is fully prepped, it's time to prep yourself.
-
Wear eye protection when handling and applying the adhesive remover. (Eye protection is included in your kit.)
-
Do not wear contact lenses without eye protection.
-
Protective gloves are also included in your kit. If you are concerned about possible skin irritation, put your gloves on now.
-
-
Este passo não foi traduzido. Ajude a traduzi-lo
-
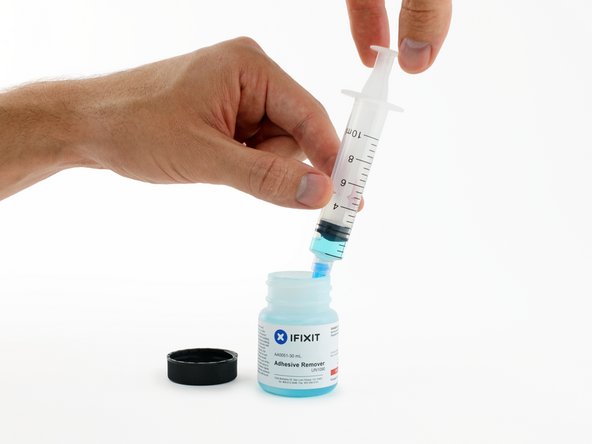
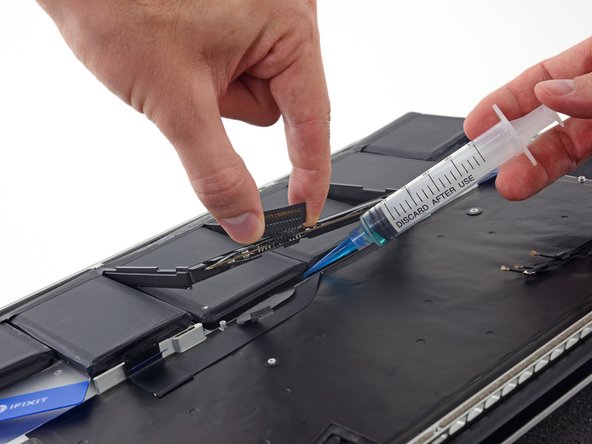
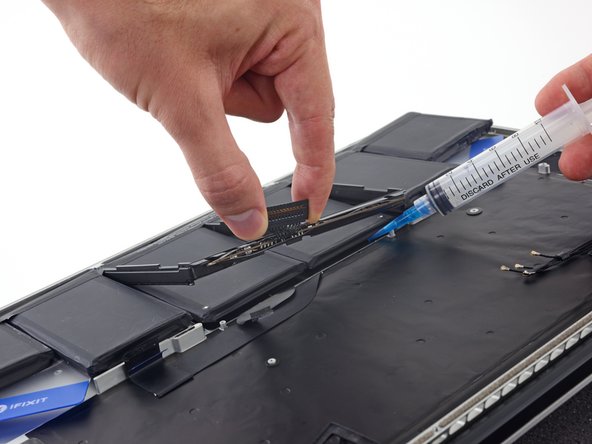
Open your container of adhesive remover.
-
Fill the syringe included in your kit with a small amount (approximately 1-2 milliliters) of adhesive remover.
-
Refill your syringe as needed throughout the rest of this procedure.
-
-
Este passo não foi traduzido. Ajude a traduzi-lo
-
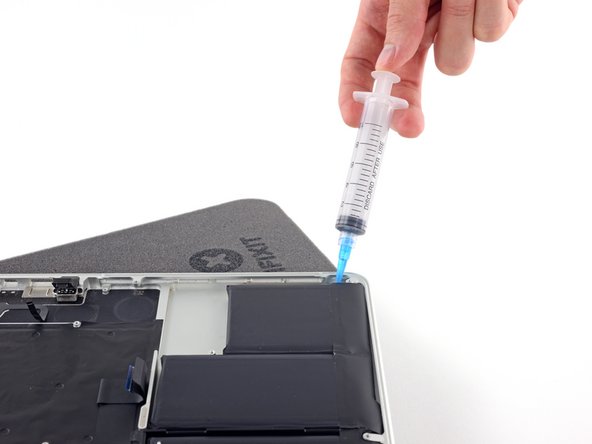
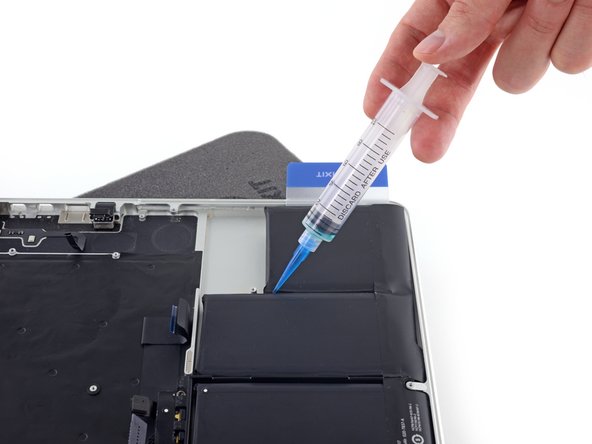
Apply a small amount of adhesive remover (approximately 1 ml) evenly along the elevated edge of the outer right battery cell.
-
Wait 2-3 minutes for the liquid adhesive remover to penetrate underneath the battery cell before you proceed to the next step.
-
-
Este passo não foi traduzido. Ajude a traduzi-lo
-
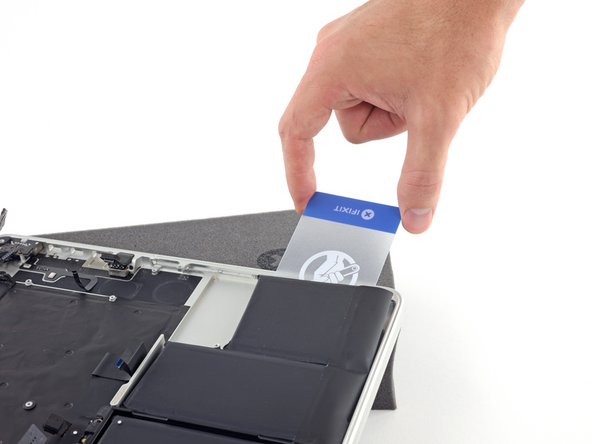
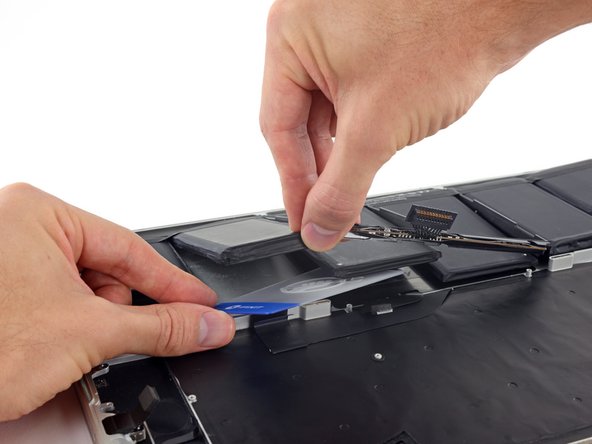
Slide one corner of a plastic card under the outer edge of the battery cell.
-
Slide the card farther underneath the battery cell to separate it from the adhesive securing it to the MacBook Pro's upper case.
-
-
Este passo não foi traduzido. Ajude a traduzi-lo
-
Lift the battery cell to separate it from the MacBook Pro's upper case, but don't try to remove it.
-
Leave the plastic card underneath the battery cell to prevent it from re-adhering as you proceed to the next step.
-
-
Este passo não foi traduzido. Ajude a traduzi-lo
-
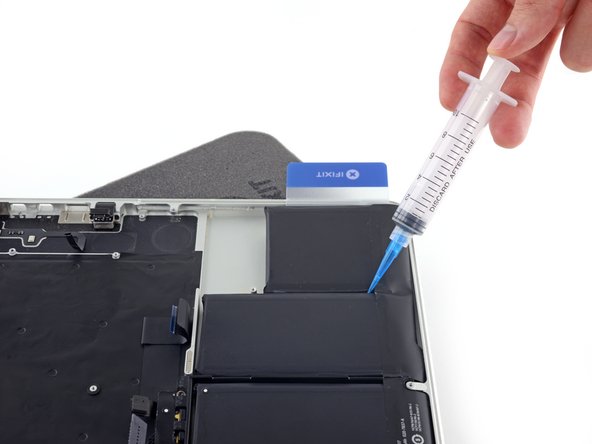
Apply a small amount of adhesive remover (approximately 1 ml) evenly along the elevated edge of the next battery cell.
-
Wait 2-3 minutes for the liquid adhesive remover to penetrate underneath the battery cell before you proceed to the next step.
-
-
Este passo não foi traduzido. Ajude a traduzi-lo
-
Slide one corner of your plastic card underneath the second battery cell.
-
Push the card underneath the second battery cell, and slide it side to side to separate the adhesive underneath.
-
Leave the plastic card underneath both battery cells (or flip them over) to prevent them from re-adhering as you proceed to the next step.
-
-
Este passo não foi traduzido. Ajude a traduzi-lo
-
It's time to switch sides. Remove your book or foam block and place it under the opposite side of your MacBook Pro.
-
Repeat the procedure from the prior steps to separate the two battery cells on this side:
-
Apply your adhesive remover to the elevated edge of the outer battery cell, and wait 2-3 minutes for it to penetrate.
-
Work one corner of a plastic card underneath the battery cell, and slide the card fully underneath the battery cell to separate it.
-
Do the same for the adjacent cell.
-
Leave your plastic card in place or flip the battery cells over to prevent them from re-adhering during the following steps.
-
-
Este passo não foi traduzido. Ajude a traduzi-lo
-
Remove your book or foam block and place it under the rear edge of your MacBook Pro, near the display hinges.
-
-
Este passo não foi traduzido. Ajude a traduzi-lo
-
Grab the battery connector or the top edge of the plastic battery frame and lift it slightly, exposing the top edge of the two center battery cells.
-
-
Este passo não foi traduzido. Ajude a traduzi-lo
-
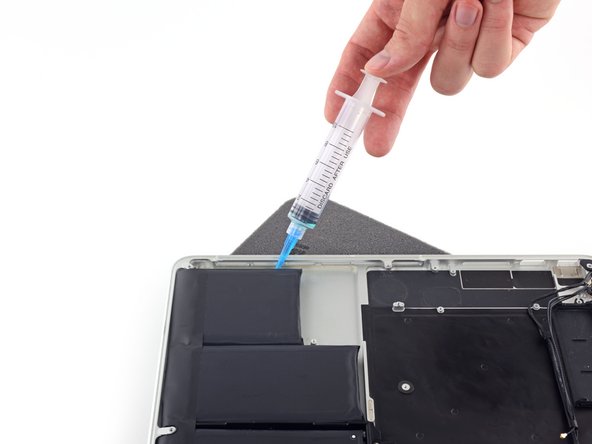
While lifting the plastic battery frame out of the way, apply a small amount (about 1-2 ml) of adhesive remover underneath the top edge of the two remaining battery cells.
-
Wait 2-3 minutes for the adhesive remover to penetrate before you continue.
-
-
Este passo não foi traduzido. Ajude a traduzi-lo
-
While lifting the plastic frame out of the way, push one corner of your plastic card underneath the outside edge of the first center battery cell.
-
Slide your card all the way under the battery cell, and leave it to prevent the battery cell from re-adhering.
-
-
Este passo não foi traduzido. Ajude a traduzi-lo
-
Repeat the above procedure to separate the last remaining battery cell from the MacBook Pro's upper case.
-
-
Este passo não foi traduzido. Ajude a traduzi-lo
-
Lift the battery with the plastic frame and slide it back toward the MacBook Pro’s hinge until it clears the screw posts holding it to the upper case.
-
-
Este passo não foi traduzido. Ajude a traduzi-lo
-
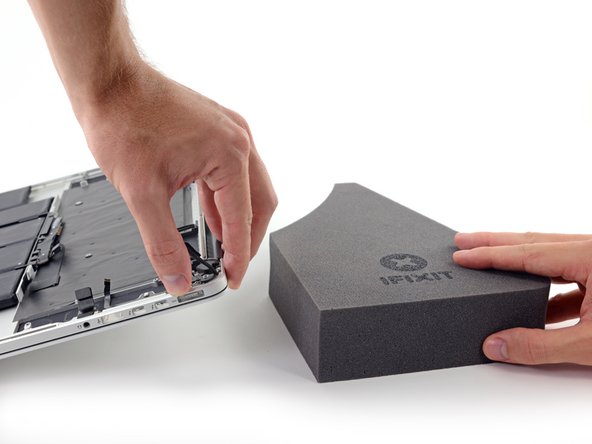
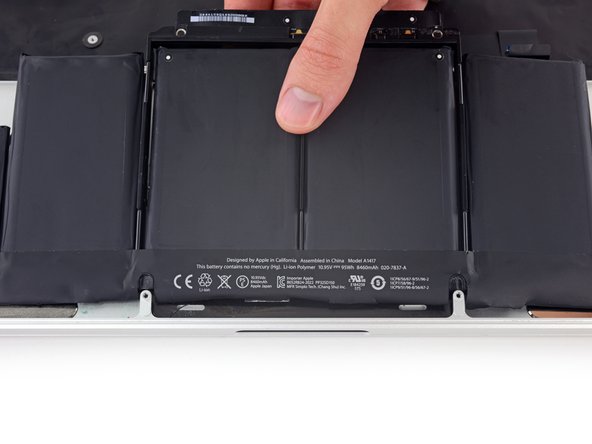
Lift and remove the battery.
-
With a little luck, you can slowly pull out each strip of adhesive with your fingers.
-
Otherwise, soak each strip of adhesive with a bit of adhesive remover for 2-3 minutes, and then scrape it out with a plastic tool. This can take quite a bit of work, so be patient.
-
Mop up any remaining adhesive remover and give your MacBook Pro a few minutes to air dry.
-
Calibrate your battery before using it: allow it to drain overnight, then charge it to 100% and drain it again until your MacBook Pro shuts down automatically. Charge it again and use it normally.
-


Cancelar: não concluí este guia.
2 outras pessoas executaram este guia.


2 comentários
Thank you! Really good, easy to follow instructions with good informative pictures.
Why does this guide insist on removing the logic board when it does not block removal of the battery? It’s not necessary to add those 30-40 steps to this process: this replacement can be done without taking out the logic board and all of the various risky wire pulls that it requires.