Essa tradução foi gerada por um programa e ainda não foi revisada por uma pessoa. Falas essa língua? Dá uma olhada.
Introdução
Use este guia para substituir uma placa MagSafe DC-In danificada.
O que você precisa
-
-
-
Remova os dez parafusos a seguir:
-
Três parafusos Phillips #00 de 14,4 mm
-
Três parafusos Phillips #00 de 3,5 mm
-
Quatro parafusos Phillips #00 com ressalto de 3,5 mm
 Pergunte ao FixBot
-
-
-
Use os dedos para afastar a estrutura inferior do corpo do MacBook perto da saída de ar.
-
Remova a estrutura inferior.
-
-
-
-
-
Com a borda de uma espátula, levante o conector da bateria de seu soquete na placa lógica.
-
-
-
Dobre o cabo da bateria ligeiramente para fora de seu soquete na placa lógica para que ele não se conecte acidentalmente enquanto você trabalha.
-
-
-
-
-
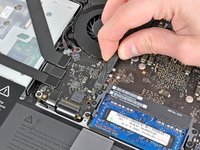
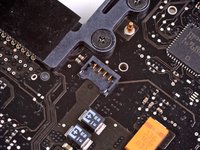
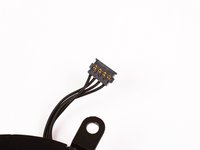
Use a ponta de uma espátula para levantar suavemente o conector do ventilador para fora do seu soquete na placa lógica.
-
-
-
Remova os três parafusos a seguir que prendem a ventoinha à placa lógica:
-
Um parafuso Torx T6 de 7,2 mm
-
Dois parafusos Torx T6 de 5,3 mm
-
-
-
Retire a ventoinha do seu encaixe na placa lógica, tomando cuidado com o cabo que pode ficar preso.
-
-
-
-
-
-
Use a ponta de uma espátula para puxar o cabo do alto-falante direito/subwoofer de baixo da trava moldada na carcaça superior.
-
Puxe o cabo do alto-falante direito/subwoofer para cima para retirar o conector de seu soquete na placa lógica.
-
-
-
Desconecte o cabo da câmera da placa lógica.
-
-
-
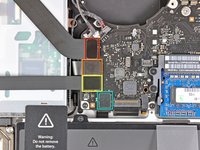
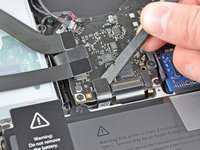
Desconecte os quatro cabos a seguir:
-
Cabo do AirPort/Bluetooth
-
Cabo da unidade de disco óptico
-
Cabo do disco rígido
-
Cabo do Trackpad
-
-
-
Use a ponta do dedo para levantar a aba de retenção no soquete ZIF do cabo plano do teclado.
-
Use a ponta de uma espátula para puxar o cabo plano do teclado para fora do seu soquete.
-
-
-
Se houver, remova a pequena fita preta que cobre o soquete do cabo da retroiluminação do teclado.
-
-
-
Use a ponta de uma espátula ou a sua unha para levantar a aba de retenção no soquete ZIF do cabo plano da luz de fundo do teclado.
-
Puxe o cabo plano da luz de fundo do teclado para fora do seu soquete.
-
-
-
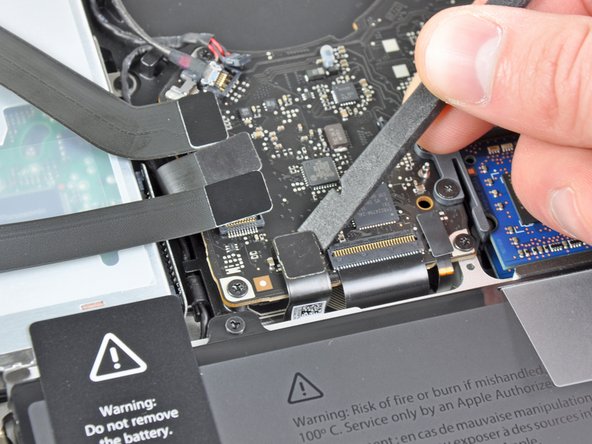
Use a ponta chata da espátula para desconectar o conector do sensor de repouso/indicador de bateria do seu soquete na placa lógica.
-
-
-
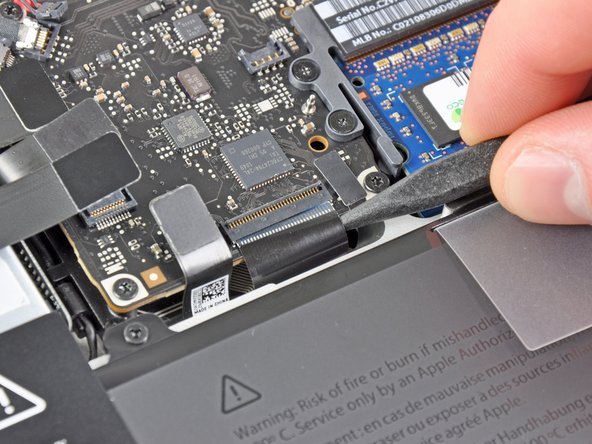
Segure a aba de puxar de plástico presa à trava do cabo de dados da tela e gire-a em direção ao lado da entrada CC do computador.
-
Puxe o cabo de dados da tela para fora do seu soquete na placa lógica.
-
-
-
Remova os nove parafusos a seguir:
-
Cinco parafusos Torx T6 de 3,6 mm
-
Dois parafusos Torx T6 de 4,3 mm
-
Dois parafusos Torx T6 de 7,2 mm
-
Cinco parafusos Torx T6 de 3,0 mm
-
Dois parafusos Torx T6 de 3,6 mm
-
Dois parafusos Torx T6 de 6,7 mm
-
-
-
Remova os dois parafusos a seguir:
-
Um parafuso Phillips de 8,6 mm
-
Um parafuso Phillips de 5,5 mm
-
Remova o retentor do cabo de dados da tela da caixa superior.
-
-
-
Use a ponta de uma espátula para soltar delicadamente o microfone do adesivo que o prende à carcaça superior.
-
-
-
Com atenção aos vários conectores próximos às suas bordas, levante a placa lógica pela extremidade mais próxima da unidade de disco óptico.
-
Sem dobrar a placa, manobre-a para fora da estrutura superior, com atenção à conexão flexível com a placa de conexões que pode ficar presa na estrutura superior.
-
Remova a placa lógica.
-
-
-
-
-
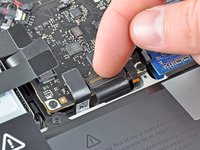
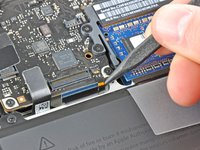
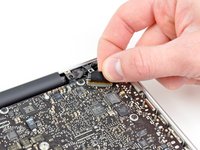
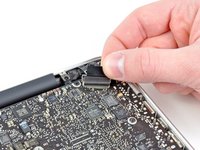
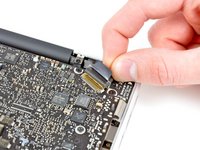
Puxe o cabo da Placa MagSafe DC-In em direção ao dissipador de calor para desconectá-lo da placa lógica.
-
Remova a Placa MagSafe DC-In.
-
-






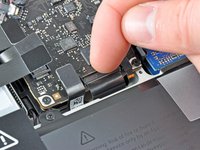
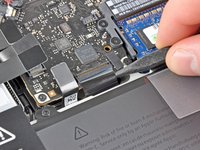


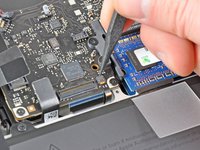
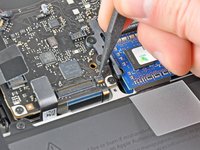




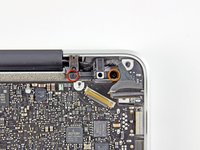
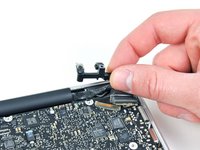


Para a remontagem de seu dispositivo, siga estas instruções na ordem inversa.
Cancelar: não concluí este guia.
129 outras pessoas executaram este guia.
Um agradecimento especial a esses tradutores:
100%

Sandra Hiller está nos ajudando a consertar o mundo! Quer contribuir?
Comece a traduzir ›

19Comentários do guia
It's worth noting that the two ribbon cables held in place by ZIF connectors are a real pain to put back in - it's very hard to get any force pushing them back into the ZIF connector. It took two small tweezers and a bit of luck on the keyboard cable.
To get back the keyboard ribbon I put the piece of Anti-Static Kapton Tape to enter it.
As stated the keyboard connector is a nightmare to get back in, how I finally did it is, I presented the cable to the socket and using a sticky label pressing down pulled the label towards the centre of the mainboard
The magsafe connector is not under the mainboard and it would be easy for apple to have designed it so that the socket was on the top not the underside of the mainboard
I was using my Laptop (literally in my lap), with the charger connected when it felt very warm on my pant leg. Felt the bottom of the case by the Mag Safe connector and it was very hot, almost burnt my hand. Surprisingly hot. Wouldn't charge right after that, kept getting hot, intermittent charging. Looked at the contacts with a jewelers loupe; the gold contacts were burnt and blistered, plastic melted so it wouldn't make full contact with the AC charger. Charger contacts OK. Replaced DC in board, works like new, saved a bundle of cash. Laid all the screws out in related groups on table top. e.g. All 10 cover screws in a square. MoBo Screws in MoBo pattern, or, you could use a small metric/millimeter ruler to tell which screw goes where.
This is a terrific guide. My project, a mid-2009 13" MacBook Pro 5,5, was a little different, and the biggest challenges I experienced were places where my computer's connections were different than the model illustrated. So I'll share how that computer differed for those who might come up against the same challenges. I'll add those notes and illustrations in the sections that apply.
I lucked out with the two keyboard ribbon cables. I simply nudged them into place with two different spudgers—one to pry gently upward from underneath, the other to redirect that force to press the cable directly into its slot. I was anticipating a struggle, but it was a nothing.
Thanks for the great work, Andrew Bookholt, and everyone else!
