Introdução
If your Logitech G27's shifter stops responding, you may need to replace the potentiometer inside it. The potentiometer is the electrical component that keeps track of which gear the shifter is on. The replacement isn't too difficult, you mostly just have to unscrew lots of screws.
O que você precisa
-
-
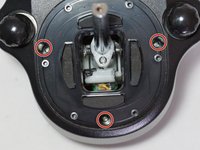
Remove the six 9.0mm allen screws with a 2.5mm hex key.
 Pergunte ao FixBot
-
-
-
Either use the plastic opening tools or a flat screwdriver to pry and pop off the cap on the shifter.
-
-
-
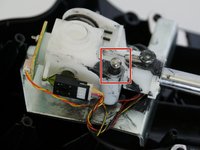
Remove the black 12.3mm screw inside the shifter with a Phillips #1 screwdriver.
-
After, remove the shifter top and shifter boot cover by pulling straight up.
-
Remove the three 15.6mm screws with a Phillips #1 screwdriver.
-
-
-
Flip the device over and four 15.6mm screws with a Phillips #1 screwdriver.
-
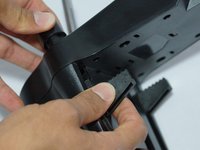
Pull the lower clamp up and out of the shifter assembly.
-
-
-
-
Remove the two 10mmm hex nuts with a 10mm socket and a ratchet.
-
Next, unscrew the clamps by holding the lower portion of the shifter and unscrewing the top part.
-
Also remove the nut on the screw if it wasn't removed with the lower clamp.
-
-
-
Remove the eight black 11.9mm screws from the bottom housing with a Phillips #1 screwdriver.
-
-
-
Carefully remove the two plastic connectors with a plastic opening tool or your hands.
-
-
-
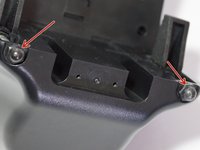
Go to the lower portion of the shifter; remove two black screws and four silver 15.9mm screws with a Phillips #1 screwdriver.
-
-
-
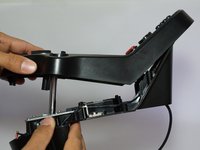
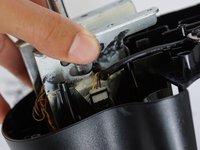
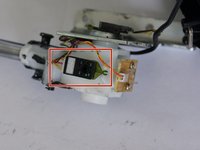
Squeeze the two metal plates together and slowly pull up. The assembly is spring loaded and will fall apart if it is not squeezed.
-
-
-
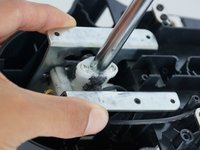
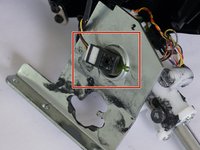
Remove the shifter assembly and place it on a flat surface. Then remove the metal plate with the spring and ball bearing attached.
-
-
-
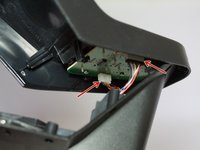
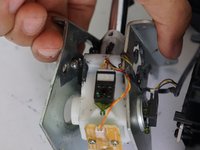
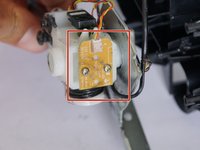
You will now have access to the two potentiometers on the sides of the assembly. Make sure they are properly connected and if need be, replace them by removing.
-


To reassemble your device, follow these instructions in reverse order.
Cancelar: não concluí este guia.
20 outras pessoas executaram este guia.
Equipe

Cal Poly, Team 15-4, Amido Spring 2015 Membro de Cal Poly, Team 15-4, Amido Spring 2015
CPSU-AMIDO-S15S15G4
4 Membros
Autoria de 25 guias
16Comentários do guia
Where can I buy replacement pots?
Great guide, thanks a lot for the effort. It turned out that one of the cables connecting the pot to the pcb had snapped. Just going to test now.....fingers crossed. :-)
Cheers. Andy M.
Hey did It work?
I didn't even have to replace them. Only cleaning with electronic cleaning spray and move the pots fully was enough to fix it. However, and I think that was the real problem, one of the pots was damaged because the plastic pointer it has to be inplace in the assembly was broken. Only one half was in place. I used something here we call "type cleaner clay", some sort of clay not use to play but to fix things to the wall or clenaning old typewriters. Comonly blue. Other forums says damaged pots are not common, only dirty or may be, as mine broken. Easy to fix
Has anybody found a source for these pots? I'm guessing they're proprietary? Possibly some version of CTS 252 series? Anything they can be replaced with? I've worked on a couple of these where people opened up the shifter pots trying to clean them and damaged them, and I cannot for the life of me find any replacements and I've searched high and low through every joystick potentiometer source I could find.