Introdução
This is the comprehensive guide for replacing the heatsink in your Lenovo Legion Y520-15IKBN laptop. If you're encountering issues such as overheating, throttling, or system instability, a malfunctioning heatsink could be the culprit. Follow this step-by-step guide to effectively replace the heatsink and restore optimal thermal performance to your device.
The heatsink plays a critical role in dissipating heat generated by your laptop's internal components, ensuring they operate within safe temperature thresholds. Over time, factors such as dust accumulation or thermal paste degradation can impede the heatsinks effectiveness, leading to thermal issues.
Before initiating the replacement process outlined in this guide, it's advisable to conduct a thorough inspection of your laptop's cooling system. Clear any visible dust or debris from the heatsink and fan assembly using compressed air or a soft brush. Additionally, monitor your system's temperatures and performance to confirm that the heatsink is indeed the source of the problem.
Please note that replacing the heatsink involves disassembling your laptop and may require handling sensitive components.
Before commencing the replacement process, ensure your laptop is powered off, disconnected from any external power sources, and the battery is removed or disconnected from the motherboard. Additionally, take anti-static precautions such as using an anti-static wristband and mat to prevent damage to electronic components. When you replace your heatsink it's a good idea to also replace the thermal paste to keep your system cool.
O que você precisa
-
-
Remove the thirteen 6.5 mm screws from the base plate using a Phillips #00 screwdriver.
-
-
-
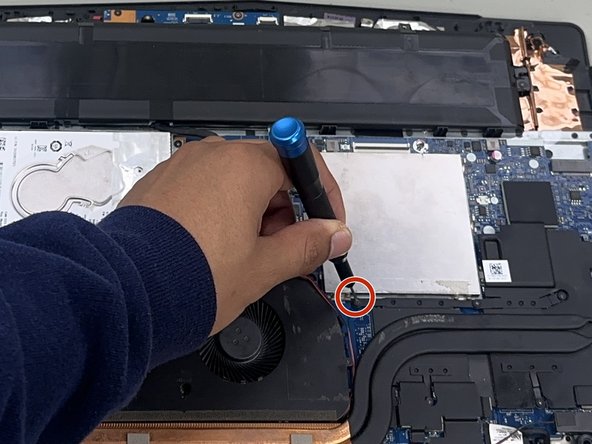
Unplug the battery then, you will need to remove the four 4 mm screws around the fan using a Phillips #00 screwdriver.
-
-
-
-
Use a Phillips #00 screwdriver to remove the five 6.5 mm screws securing the heat sink.
-


To reassemble your device, follow these instructions in reverse order. Take your e-waste to an R2 or e-Stewards certified recycler.
To reassemble your device, follow these instructions in reverse order. Take your e-waste to an R2 or e-Stewards certified recycler.
Equipe

University of North Texas, Team 1-6, Coppersmith Spring 2024 Membro de University of North Texas, Team 1-6, Coppersmith Spring 2024
UNT-COPPERSMITH-S24S1G6
Membros da 4
Autoria de 3 guias