Introdução
If your LG G8 ThinQ is having trouble holding a charge or staying turned on, use this guide to replace the battery. The battery is the main source of life for the device, and therefore can cause several issues if damaged. Refer to the troubleshooting page to decide if this is the repair you need.
Before disassembling your device, discharge the battery below 25%.
Swollen batteries can be very dangerous, so wear eye protection and exercise caution.
This phone uses a strong adhesive on the battery and back panel; iFixit’s adhesive remover or high concentration (90% or higher) of isopropyl alcohol can be used to make the process easier.
Adhesive can be replaced to closer replicate factory fit and finish.
O que você precisa
-
-
Unplug and power off your phone before you begin.
-
Insert the SIM card eject tool into the pinhole in the lower right side of the phone.
-
Remove the SIM card and tray.
-
-
-
Place the phone so that the screen is facing down.
-
Insert opening cards between the back panel and frame of the phone to loosen the clips and adhesive.
-
Using equal pressure, carefully pry the back panel away from the phone.
-
Once enough space has been created, use an opening tool to completely separate the back panel from the phone.
-
-
-
Remove all 14 screws from the midframe using a Phillips #000 screwdriver.
-
Work an opening tool around the perimeter of the midframe to pry and remove it from the phone.
-
-
-
-
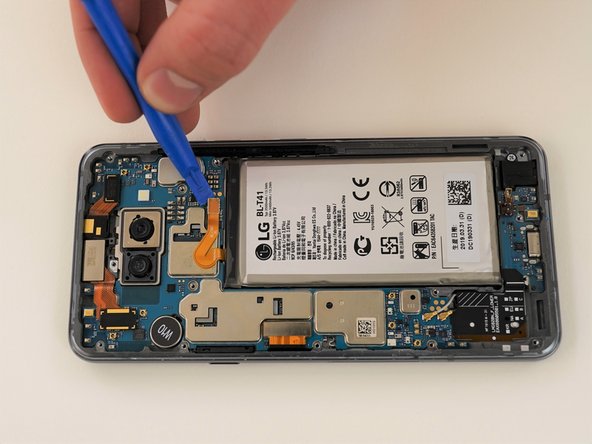
Using an opening tool, carefully pry out remove the speaker system from the phone.
-
-
-
Flip phone so that screen is facing up.
-
Using a heating pad, hairdryer, or heat gun, apply heat to loosen the adhesive beneath the battery.
-


To reassemble your device, follow these instructions in reverse order.
To reassemble your device, follow these instructions in reverse order.
Cancelar: não concluí este guia.
5 outras pessoas executaram este guia.
Equipe

Western Carolina University, Team 1-4, Virtue Fall 2021 Membro de Western Carolina University, Team 1-4, Virtue Fall 2021
WCU-VIRTUE-F21S1G4
Membros da 4
Autoria de 5 guias
5 comentários
Yep need heat to remove the back. Glass shattered on mine. Ifixit needs to fix this guide.
Success! I documented the process using ifixit tools on https://waynedavis.com
thanks for your tutorial man it helped me a lot
Very helpful tutorials guys. Im in need of replacing my battery in my g8. 2 questions. Do you need to remove the speaker component at the bottom left in order to replace the battery? Some videos i watched they didnt remove it. 2nd question is how to i get the back cover back on after replacing the battery? Is there a specific adhesive i can get?