Ir para o conteúdo principal
Participe da comunidade de reparos - Criar conta

Kindle Paperwhite 2nd Generation Motherboard Replacement

O que você precisa

    1. Kindle Paperwhite 2nd Generation Motherboard Replacement, Battery: passo 1, imagem 1 %32 Kindle Paperwhite 2nd Generation Motherboard Replacement, Battery: passo 1, imagem 2 %32
      • Insert plastic opening tool into the corners of the Paperwhite and slide around the edge perimeter to remove bezel.

      • Be sure to begin prying along the outer edges , these are the optimal points for removing the bezel.

      • Be careful and do not slide prying tool deeper than 3-4 mm under the side bezel or you could peel off screen protector film.

      Pergunte ao FixBot

      Comentar

    2. Kindle Paperwhite 2nd Generation Motherboard Replacement: passo 2, imagem 1 %32 Kindle Paperwhite 2nd Generation Motherboard Replacement: passo 2, imagem 2 %32
      • Using a Screw Driver, Remove the eleven 3.2 mm Phillips 000 screws from corners of the mid-frame and from behind the black strip as shown.

      • Do not forget the screw in the middle of the black adhesive strip.

      Pergunte ao FixBot

      Comentar

    3. Kindle Paperwhite 2nd Generation Motherboard Replacement: passo 3, imagem 1 %32
      • Carefully remove the mid-frame from the back cover.

      Pergunte ao FixBot

      Comentar

    4. Kindle Paperwhite 2nd Generation Motherboard Replacement: passo 4, imagem 1 %32 Kindle Paperwhite 2nd Generation Motherboard Replacement: passo 4, imagem 2 %32
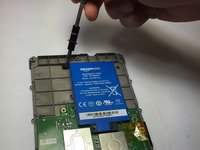
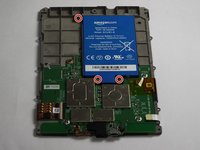
      • Use a screwdriver to remove the three 3.0 mm Phillips 000 screws that are holding the battery in place as shown.

      Pergunte ao FixBot

      Comentar

    5. Kindle Paperwhite 2nd Generation Motherboard Replacement: passo 5, imagem 1 %32
      • Carefully lift the battery and remove it from the device.

      Pergunte ao FixBot

      Comentar

    1. Kindle Paperwhite 2nd Generation Motherboard Replacement, Motherboard: passo 6, imagem 1 %32 Kindle Paperwhite 2nd Generation Motherboard Replacement, Motherboard: passo 6, imagem 2 %32
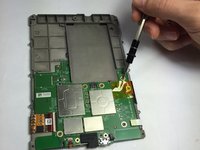
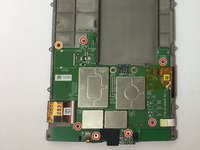
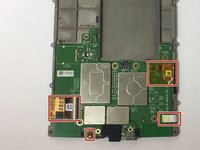
      • Use a screwdriver to remove the seven 3.0 mm Phillips 000 screws that are holding the motherboard in place as shown.

      • Don't lose the washer that is highlighted with an orange marker as shown. It is a necessary component to protect the screw.

      Pergunte ao FixBot

      Comentar

    2. Kindle Paperwhite 2nd Generation Motherboard Replacement: passo 7, imagem 1 %32 Kindle Paperwhite 2nd Generation Motherboard Replacement: passo 7, imagem 2 %32
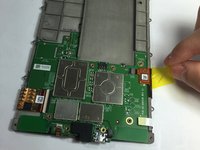
      • Gently disconnect the zif connectors.

      • Some of these connectors are very thin and fragile, handle with care!

      Pergunte ao FixBot

      Comentar

    3. Kindle Paperwhite 2nd Generation Motherboard Replacement: passo 8, imagem 1 %32 Kindle Paperwhite 2nd Generation Motherboard Replacement: passo 8, imagem 2 %32 Kindle Paperwhite 2nd Generation Motherboard Replacement: passo 8, imagem 3 %32
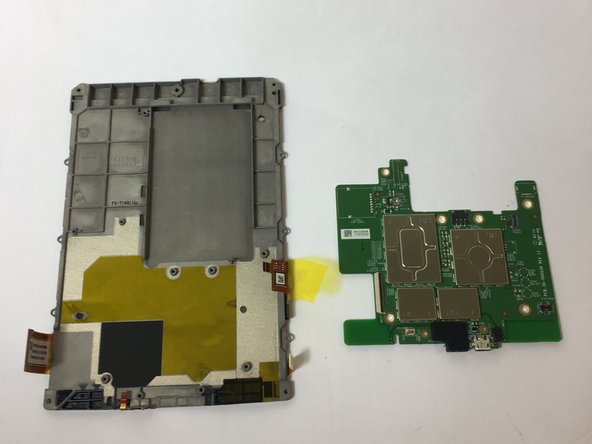
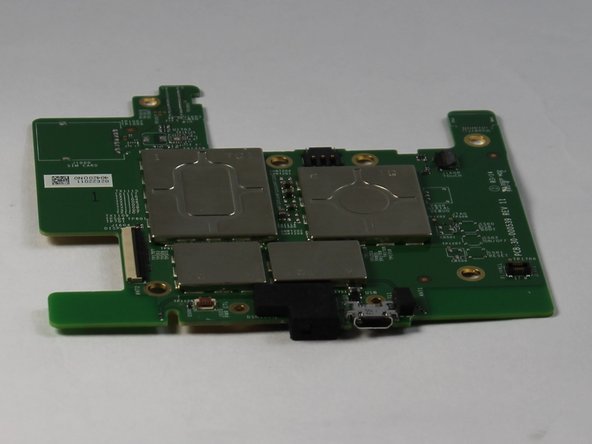
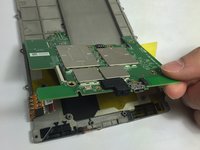
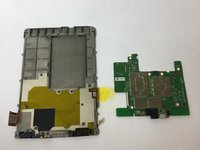
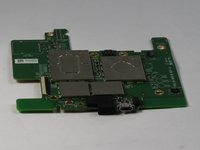
      • Gently remove the motherboard.

      Pergunte ao FixBot

      Comentar

Conclusão

To reassemble your device, follow these instructions in reverse order.

Cancelar: não concluí este guia.

3 outras pessoas executaram este guia.

Tyler Davis

Membro desde: 09/15/16

2.007 Reputação

Autoria de 5 guias

Equipe

USF Tampa, Team 11-2, Blackwell Fall 2016 Membro de USF Tampa, Team 11-2, Blackwell Fall 2016

USFT-BLACKWELL-F16S11G2

4 Membros

Autoria de 31 guias

0Comentários do guia

Comentar

Visualizações:

Últimas 24 horas: 2

Últimos 7 dias: 20

Últimos 30 dias: 80

Ao todo: 4,874