Ir para o conteúdo principal

Jabra CRUISER2 Status Display Replacement

O que você precisa

  1. Jabra CRUISER2 Status Display Replacement, Front Plate: passo 1, imagem 1 %32
    • Use the iOpener tool to unglue the adhesive of the device. The link to the iOpener instructions are listed below.

    • iOpener Instructions

  2. Jabra CRUISER2 Status Display Replacement: passo 2, imagem 1 %32
    • Place the flat head of the bigger plastic opening tool in between the front plate and back plate.

    • Pull the tool toward the back of the device to pry it open.

    • Repeat this process over all edges of the device.

  3. Jabra CRUISER2 Status Display Replacement: passo 3, imagem 1 %32
    • Open up the device by pulling the front plate straight up from the back plate.

  4. Jabra CRUISER2 Status Display Replacement, Motherboard: passo 4, imagem 1 %32 Jabra CRUISER2 Status Display Replacement, Motherboard: passo 4, imagem 2 %32
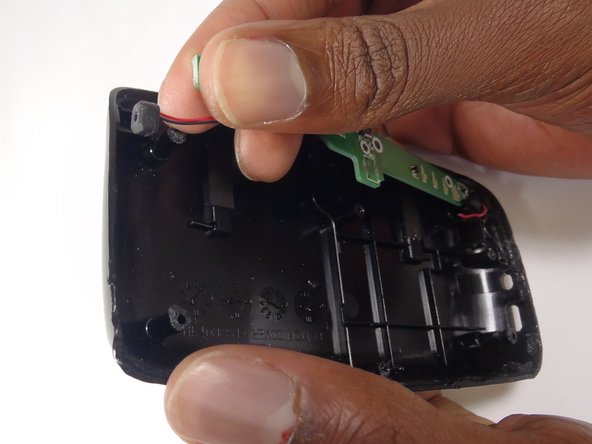
    • Carefully detach the wire running from the speaker to the motherboard by unplugging it from the white socket.

  5. Jabra CRUISER2 Status Display Replacement: passo 5, imagem 1 %32
    • Using the PH000, unscrew the three 4.55 mm screws in the motherboard.

    • The names of the screwdriver heads are listed on the sides of each head.

  6. Jabra CRUISER2 Status Display Replacement: passo 6, imagem 1 %32
    • Remove the motherboard from the device by lifting it up from the back plate.

  7. Jabra CRUISER2 Status Display Replacement, Status Display: passo 7, imagem 1 %32
    • Using the PH000, unscrew the three 4.6mm screws in the status display.

  8. Jabra CRUISER2 Status Display Replacement: passo 8, imagem 1 %32 Jabra CRUISER2 Status Display Replacement: passo 8, imagem 2 %32
    • Disconnect the wires connecting the status display to the back plate. Do this by pulling the wire from the black socket.

    • Do this with the wires on both sides of the status board.

  9. Jabra CRUISER2 Status Display Replacement: passo 9, imagem 1 %32
    • Remove the status display by lifting it off of the back plate.

Conclusão

To reassemble your device, follow these instructions in reverse order.

Uma outra pessoa concluiu este guia.

Spartacus

Membro desde: 10/17/14

636 Reputação

Autoria de 5 guias

Equipe

Baylor, Team 8-13, Williams Fall 2014 Membro de Baylor, Team 8-13, Williams Fall 2014

BU-WILLIAMS-F14S8G13

Membros da 3

Autoria de 5 guias

0 comentários

Adicione um comentário

Exibir estatísticas:

Últimas 24 horas: 0

Últimos 7 dias: 0

Últimos 30 dias: 1

Duração total: 482