Introdução
If the monitor screen isn’t properly displaying images or camera feed from the Infant Optics DXR-8 cameras, it may be time to replace the screen. Follow these instructions to replace the screen in the monitor of the Infant Optics DXR-8.
O que você precisa
-
-
-
Using the plastic opening tool, remove screen protector from front of monitor.
 Pergunte ao FixBot
-
-
-
Remove the six 4mm screws using a Phillips #00 screwdriver.
-
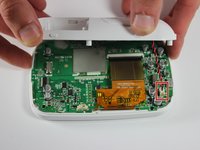
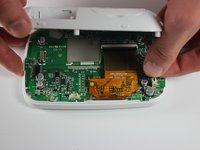
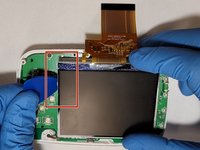
Remove the screen, exposing the circuit board.
-
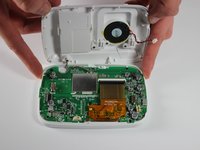
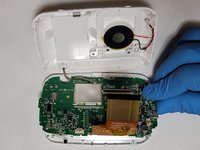
Turn device over to expose rear circuit board.
-
-
-
Disconnect speaker from monitor for ease of access by unplugging wire.
-
-
-
-
-
-
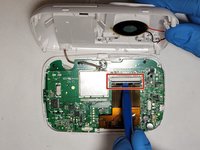
Using a plastic opening tool, disconnect the ribbon cable connector.
-
Gently separate the ribbon cable from the motherboard.
-
-
-
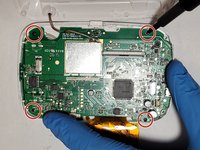
Using a Phillips #000 screwdriver, remove the four 4mm screws around the edge of the motherboard.
-
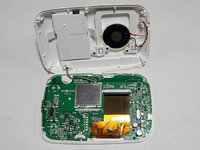
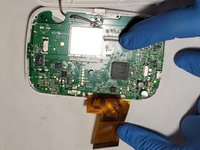
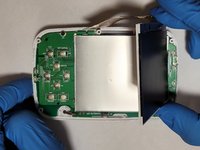
Flip the motherboard away from the front case to reveal the screen on the other side.
-
-
-
Using a plastic opening tool, carefully pry the top retaining frame off of the screen. Start in one corner and work around the bottom of the frame.
-
-
-
Using a plastic opening pick, carefully pry a corner of the screen away from the motherboard.
-
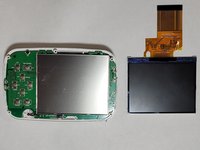
Lift the screen off of the motherboard.
-
-








To reassemble your device, follow these instructions in reverse order.
Cancelar: não concluí este guia.
2 outras pessoas executaram este guia.

Equipe

The Citadel Military College of South Carolina, Team S3-G1, Eggleston Spring 2021 Membro de The Citadel Military College of South Carolina, Team S3-G1, Eggleston Spring 2021
CMCSC-EGGLESTON-S21S3G1
3 Membros
Autoria de 3 guias
7Comentários do guia
Hey Daniel!
Thanks for sharing ??
Where did you get the replacement part?
On Amazon is the quickest option.
Hilitand LQ035NC111 LCD Display, 3.5inch TFT RGB LCD Display Module 320 x 240 Display Panel LQ035NC111 54pin LCD
Just completed the screen change, it works great! Thanks so much for this step by step guide.
The screen I ordered came with the metal brackets. Since the base was glued to the motherboard, it took a few extra steps of de-casing the one I got and re-casing onto the board. But worked fine.
I ordered: https://www.amazon.com/dp/B07NYN5PK2?psc...
Does this improve the brightness of the screen or is it essentially an OEM replacement? I have found the monitor to be basically unusable in daylight conditions (like every midday nap) so I’m hoping to add some anti glare and boost the screen brightness/contrast.
Thanks for the information!
Excellent guide! Followed the step by step here and it went super smooth, new screen installed with no issues whatsoever!!
Thanks Daniel for putting it up and other authors for tweaking!
I hadn’t seen this website yet, but I’m glad I found it now!! This is awesome!!
