Ir para o conteúdo principal

Ibanez 5 String Bass Model SR405QM Potentiometer Replacement

O que você precisa

  1. Ibanez 5 String Bass Model SR405QM Potentiometer Replacement, Battery: passo 1, imagem 1 %32
    • Gently place the instrument upside-down on a soft surface.

    • Locate the battery cavity cap and screws.

  2. Ibanez 5 String Bass Model SR405QM Potentiometer Replacement: passo 2, imagem 1 %32
    • Use a Phillips #2 head screwdriver to unscrew both screws. Two #1 1mm long screws.

  3. Ibanez 5 String Bass Model SR405QM Potentiometer Replacement: passo 3, imagem 1 %32 Ibanez 5 String Bass Model SR405QM Potentiometer Replacement: passo 3, imagem 2 %32
    • Remove the cap by lifting upwards to reveal the battery.

  4. Ibanez 5 String Bass Model SR405QM Potentiometer Replacement: passo 4, imagem 1 %32 Ibanez 5 String Bass Model SR405QM Potentiometer Replacement: passo 4, imagem 2 %32 Ibanez 5 String Bass Model SR405QM Potentiometer Replacement: passo 4, imagem 3 %32
    • Gently lift the battery from the cavity.

    • Detach the battery completely by firmly pulling the fabric connector from the conducting end of the battery.

  5. Ibanez 5 String Bass Model SR405QM Potentiometer Replacement, Backplate: passo 5, imagem 1 %32 Ibanez 5 String Bass Model SR405QM Potentiometer Replacement, Backplate: passo 5, imagem 2 %32
    • Use a Phillips #2 screwdriver to remove the four screws on the backplate.

  6. Ibanez 5 String Bass Model SR405QM Potentiometer Replacement: passo 6, imagem 1 %32 Ibanez 5 String Bass Model SR405QM Potentiometer Replacement: passo 6, imagem 2 %32
    • Remove the cap by lifting upwards, revealing the circuitry of the instrument.

  7. Ibanez 5 String Bass Model SR405QM Potentiometer Replacement, Potentiometer: passo 7, imagem 1 %32 Ibanez 5 String Bass Model SR405QM Potentiometer Replacement, Potentiometer: passo 7, imagem 2 %32
    • Turn the instrument over.

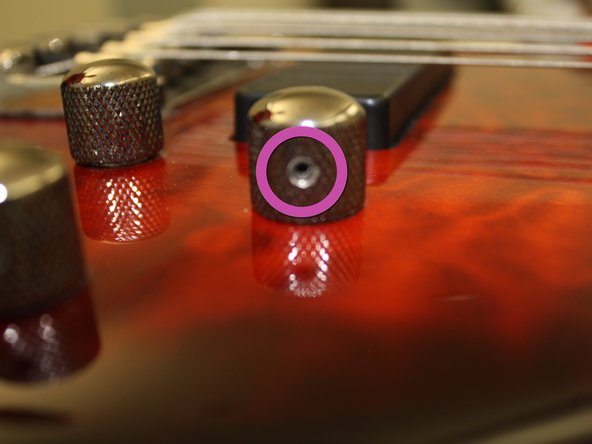
    • Locate the potentiometer knob.

    • Locate the allen screw socket on the knob.

  8. Ibanez 5 String Bass Model SR405QM Potentiometer Replacement: passo 8, imagem 1 %32 Ibanez 5 String Bass Model SR405QM Potentiometer Replacement: passo 8, imagem 2 %32
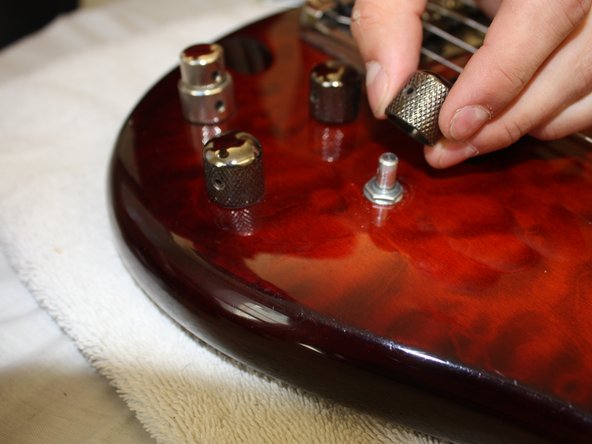
    • Use a 1/16" allen wrench to loosen the allen screw.

    • After the screw is loosened, lift the knob off of the instrument.

  9. Ibanez 5 String Bass Model SR405QM Potentiometer Replacement: passo 9, imagem 1 %32 Ibanez 5 String Bass Model SR405QM Potentiometer Replacement: passo 9, imagem 2 %32
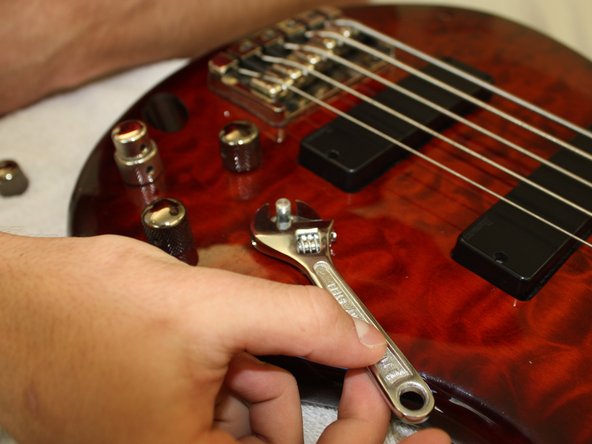
    • Locate the potentiometer nut, at the base of the potentiometer piston.

    • Use the adjustable wrench to remove the nut from the potentiometer.

  10. Ibanez 5 String Bass Model SR405QM Potentiometer Replacement: passo 10, imagem 1 %32 Ibanez 5 String Bass Model SR405QM Potentiometer Replacement: passo 10, imagem 2 %32
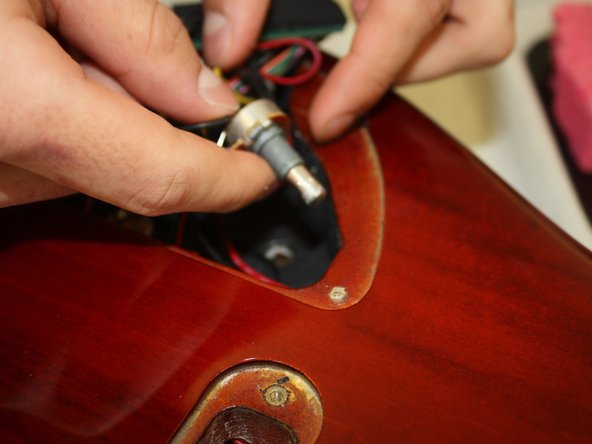
    • Carefully turn the instrument over.

    • Remove the potentiometer from the instrument by gently pulling it upward.

  11. Ibanez 5 String Bass Model SR405QM Potentiometer Replacement: passo 11, imagem 1 %32 Ibanez 5 String Bass Model SR405QM Potentiometer Replacement: passo 11, imagem 2 %32 Ibanez 5 String Bass Model SR405QM Potentiometer Replacement: passo 11, imagem 3 %32
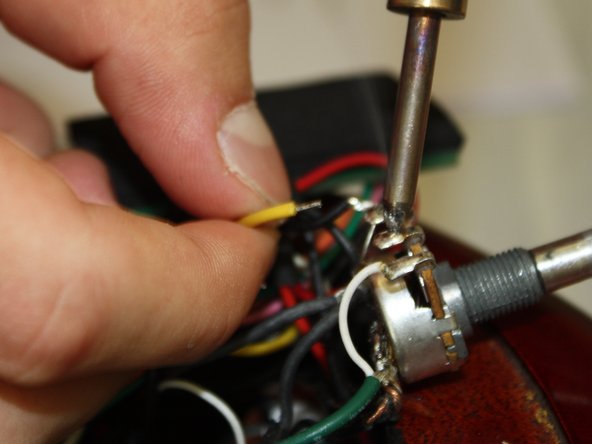
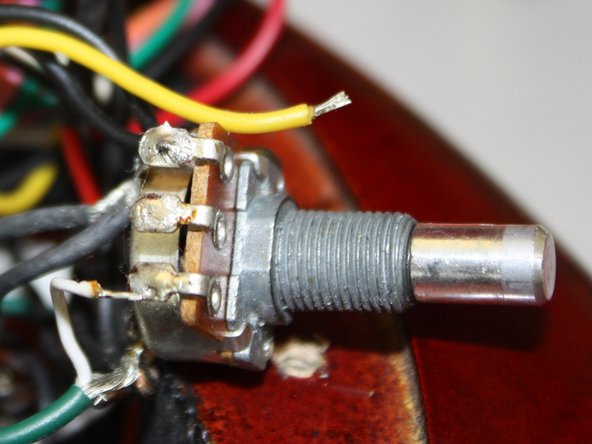
    • Use the soldering iron to release the black, yellow, and white wires from the side of the potentiometer.

    • The soldering iron is extremely hot. Avoid contact with skin, fabric or the body of the instrument. When soldering iron is not in use, rest it on the soldering iron stand.

  12. Ibanez 5 String Bass Model SR405QM Potentiometer Replacement: passo 12, imagem 1 %32 Ibanez 5 String Bass Model SR405QM Potentiometer Replacement: passo 12, imagem 2 %32 Ibanez 5 String Bass Model SR405QM Potentiometer Replacement: passo 12, imagem 3 %32
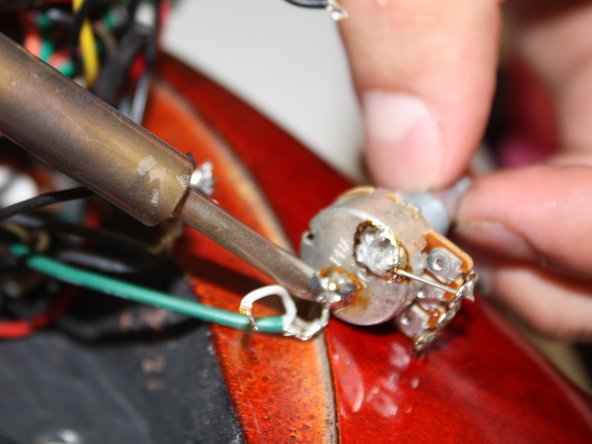
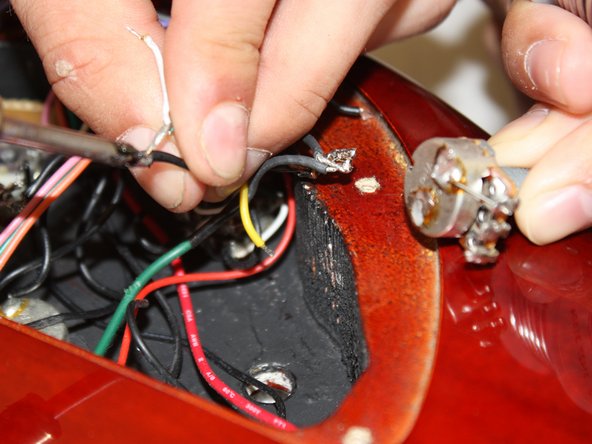
    • Use the soldering iron to release the black and green wires from the bottom of the potentiometer.

    • The soldering iron is extremely hot. Avoid contact with skin, fabric or the body of the instrument. When soldering iron is not in use, rest it on the soldering iron stand.

Conclusão

To reassemble your device, follow these instructions in reverse order with a new potentiometer.

Uma outra pessoa concluiu este guia.

Chris Pittner

Membro desde: 01/11/13

220 Reputação

Autoria de 7 guias

Equipe

Cal Poly, Team 5-18, Forte Winter 2013 Membro de Cal Poly, Team 5-18, Forte Winter 2013

CPSU-FORTE-W13S5G18

Membros da 4

Autoria de 9 guias

0 comentários

Adicione um comentário

Exibir estatísticas:

Últimas 24 horas: 1

Últimos 7 dias: 4

Últimos 30 dias: 9

Duração total: 3,629