Esta versão pode conter edições incorretas. Mude para o último instantâneo verificado.
O que você precisa
-
Este passo não foi traduzido. Ajude a traduzi-lo
-
Before you begin, switch off your phone.
-
Apply a heated iOpener to the back of the phone to loosen the adhesive beneath the back cover. Apply the iOpener for at least two minutes.
-
-
Este passo não foi traduzido. Ajude a traduzi-lo
-
Secure a suction handle to the bottom of the back cover, as close to the edge as possible.
-
Lift the back cover with the suction handle to create a small gap between the cover and the frame.
-
Insert an opening pick into the gap.
-
If you have trouble, apply more heat to further soften the adhesive. Follow the iOpener instructions to avoid overheating.
-
Slide the opening pick to the bottom right corner.
-
-
Este passo não foi traduzido. Ajude a traduzi-lo
-
Insert a second opening pick and slide it to the bottom left corner to cut the adhesive.
-
Leave the opening picks in place to prevent the adhesive from resealing.
-
-
Este passo não foi traduzido. Ajude a traduzi-lo
-
Insert a third opening pick at the bottom left corner.
-
Start to slide the tip of the opening pick from the bottom left corner along the side of the phone to cut the adhesive.
-
Leave the opening pick in its place at the top left corner to prevent the adhesive from resealing.
-
-
Este passo não foi traduzido. Ajude a traduzi-lo
-
If the adhesive becomes hard to cut it most likely cooled down. Use your iOpener to reheat it.
-
Insert a fourth opening pick under the top left corner of the back cover.
-
Slide the opening pick along the top edge of the phone to cut the adhesive.
-
Leave the opening pick in the top right corner to prevent the adhesive from resealing.
-
-
Este passo não foi traduzido. Ajude a traduzi-lo
-
Insert a fifth opening pick at the top right corner of the phone.
-
Slide the opening pick along the right side to cut the remaining adhesive.
-
-
Este passo não foi traduzido. Ajude a traduzi-lo
-
Lift and remove the back cover.
-
Before installing fresh adhesive and reassembling, remove any remaining adhesive from the phone, and clean the glued areas with isopropyl alcohol and a lint-free cloth.
-
-
Este passo não foi traduzido. Ajude a traduzi-lo
-
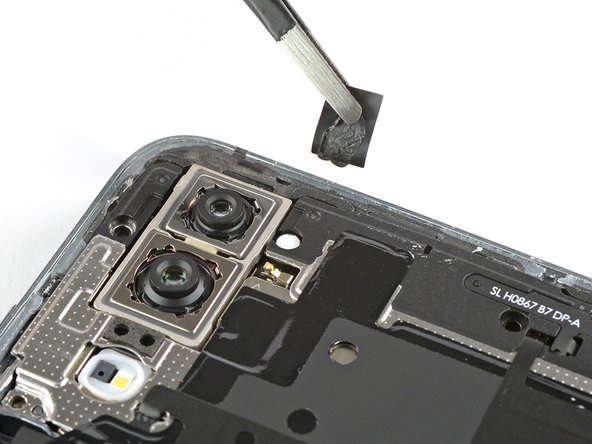
Use a pair of tweezers to peel the black tape next to the rear camera off the motherboard cover.
-
-
Este passo não foi traduzido. Ajude a traduzi-lo
-
Remove the eight Phillips #00 screws (3.1 mm length).
-
-
Este passo não foi traduzido. Ajude a traduzi-lo
-
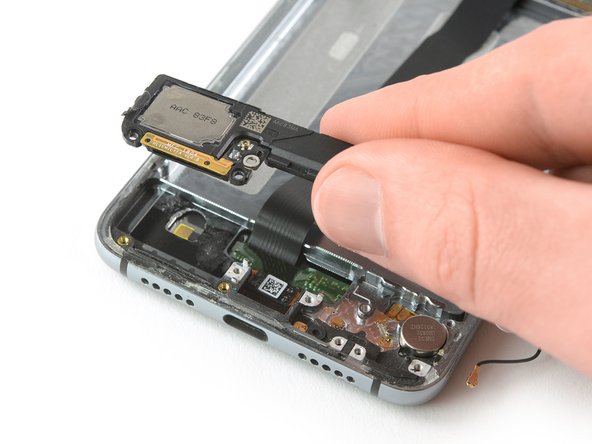
Use a pair of tweezers to peel the black foil at the bottom end of the phone off the loudspeaker.
-
-
Este passo não foi traduzido. Ajude a traduzi-lo
-
Slide an opening pick under the right side of the motherboard cover.
-
Rotate the opening pick slightly to pry up the motherboard cover.
-
-
Este passo não foi traduzido. Ajude a traduzi-lo
-
Use a spudger to pry up and disconnect the battery connector.
-
-
Este passo não foi traduzido. Ajude a traduzi-lo
-
Remove the three Phillips #00 screws (3.2 mm length).
-
-
Este passo não foi traduzido. Ajude a traduzi-lo
-
Use a pair of tweezers to remove the daughterboard cover.
-
-
Este passo não foi traduzido. Ajude a traduzi-lo
-
Remove the two Phillips #00 screws (3.2 mm length).
-
-
-
Este passo não foi traduzido. Ajude a traduzi-lo
-
Use a spudger to pry up and disconnect the main daughterboard connector from the daughterboard.
-
-
Este passo não foi traduzido. Ajude a traduzi-lo
-
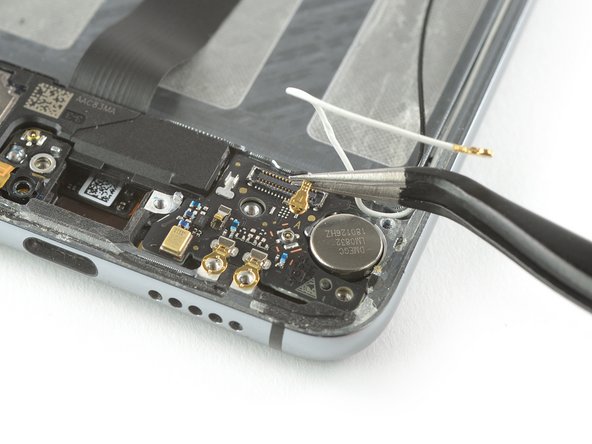
Use a pair of tweezers to pry up and disconnect the connector of the white coax cable from the motherboard.
-
Unroute the white coax cable from the metal clips on the daughterboard and fold it to the side.
-
-
Este passo não foi traduzido. Ajude a traduzi-lo
-
Use a spudger to disconnect the main flex cable connector from the motherboard.
-
-
Este passo não foi traduzido. Ajude a traduzi-lo
-
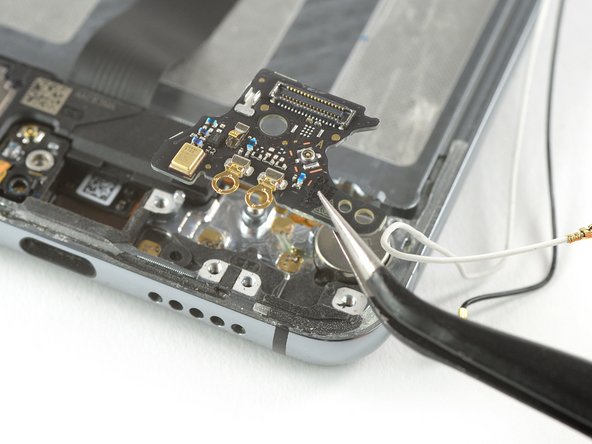
Remove the charging port and main flex cable by lifting it upwards and then pulling it in the direction of the motherboard.
-
-
Este passo não foi traduzido. Ajude a traduzi-lo
-
Use a spudger to pry up and disconnect the power and volume button flex connector.
-
-
Este passo não foi traduzido. Ajude a traduzi-lo
-
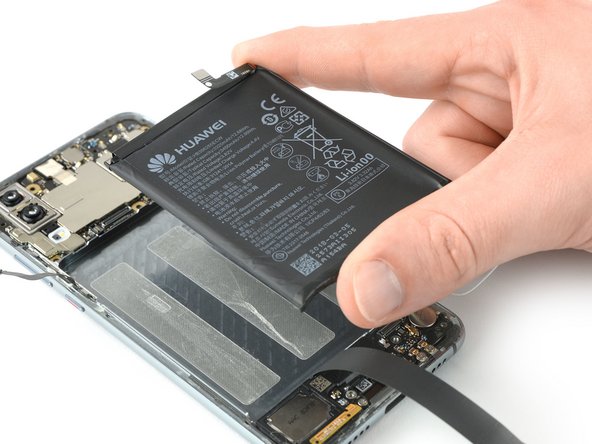
Use a spudger to pry up and disconnect the display flex connector and fold the display cable out of your way to remove the battery.
-
-
Este passo não foi traduzido. Ajude a traduzi-lo
-
Apply a heated iOpener to the screen to loosen the adhesive beneath the battery. Apply the iOpener for at least two minutes.
-
-
Este passo não foi traduzido. Ajude a traduzi-lo
-
Start to slide a plastic card under the bottom right corner of the battery to cut the adhesive.
-
Slide the plastic card along the right side of the battery to further release the adhesive. Gently start to pry up the battery while doing so.
-
-
Este passo não foi traduzido. Ajude a traduzi-lo
-
Slide the plastic card under the whole upper part of the battery and cut the adhesive with it.
-
Slide the plastic card down to the bottom end of the battery to cut the remaining adhesive.
-
Use the plastic card to pry up the battery.
-
-
Este passo não foi traduzido. Ajude a traduzi-lo
-
Remove the two Phillips #00 screws (3.4 mm length).
-
-
Este passo não foi traduzido. Ajude a traduzi-lo
-
Use a pair of tweezers to disconnect the black coax cable and fold it out of your way.
-
-
Este passo não foi traduzido. Ajude a traduzi-lo
-
Use a pair of tweezers to remove the daughterboard.
-
-
Este passo não foi traduzido. Ajude a traduzi-lo
-
Remove the two Phillips #00 screws (3.2 mm length).
-
-
Este passo não foi traduzido. Ajude a traduzi-lo
-
Apply a heated iOpener to the bottom end of the screen to loosen the adhesive underneath the loudspeaker. Apply the iOpener for at least two minutes.
-
-
Este passo não foi traduzido. Ajude a traduzi-lo
-
Use one arm of a pair of tweezers to peel up the contact cable of the loudspeaker.
-
-
Este passo não foi traduzido. Ajude a traduzi-lo
-
Insert a spudger between the midframe and the right side of the loudspeaker.
-
Use the spudger to pry up the loudspeaker.
-
-
Este passo não foi traduzido. Ajude a traduzi-lo
-
Apply a heated iOpener to the screen and all edges of the phone to loosen the adhesive beneath the edges of the LCD screen and digitizer. Apply the iOpener for at least two minutes.
-
-
Este passo não foi traduzido. Ajude a traduzi-lo
-
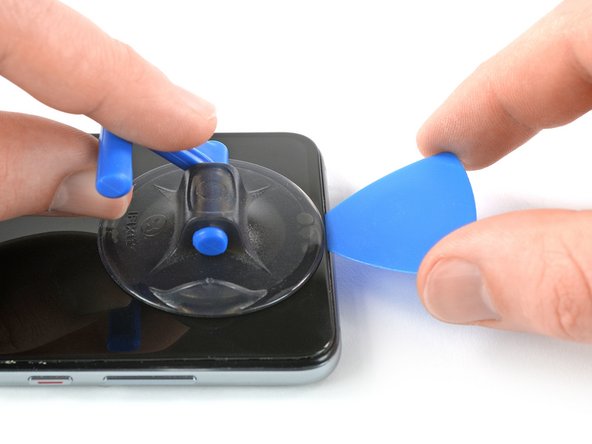
Once the screen is warm to the touch, apply a suction cup to the upper edge of the phone.
-
Pull the suction cup upwards and insert an opening pick in the gap between the display glass and the plastic bezel. Start to cut the adhesive by sliding the opening pick to the top left corner.
-
-
Este passo não foi traduzido. Ajude a traduzi-lo
-
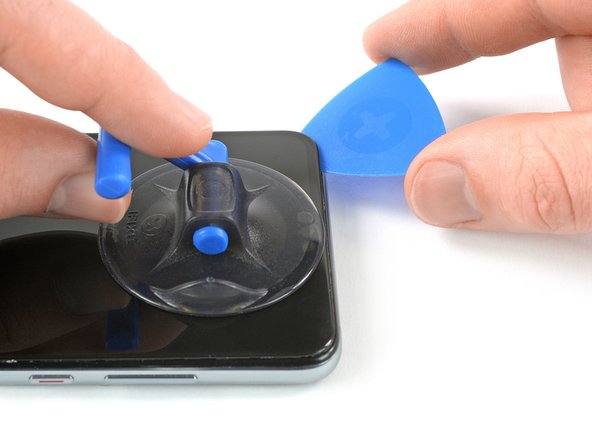
Insert a second opening pick and slide it to the top right corner of the phone.
-
Leave the picks in their place to prevent the adhesive from resealing.
-
-
Este passo não foi traduzido. Ajude a traduzi-lo
-
Insert a third opening pick under the top right corner of the phone.
-
Slide the opening pick down to the bottom right corner to cut the adhesive. Leave it at the bottom right corner to prevent the adhesive from resealing.
-
If cutting becomes too difficult, reheat and reapply the iOpener.
-
-
Este passo não foi traduzido. Ajude a traduzi-lo
-
Insert the tip of a fourth opening pick at the bottom right corner.
-
Slide the opening pick along the bottom edge of the phone to cut the adhesive.
-
Leave the opening pick in the bottom left corner to prevent the adhesive from resealing.
-
-
Este passo não foi traduzido. Ajude a traduzi-lo
-
Insert a fifth opening pick and slide it along the left edge of the phone to cut the remaining adhesive.
-
-
Este passo não foi traduzido. Ajude a traduzi-lo
-
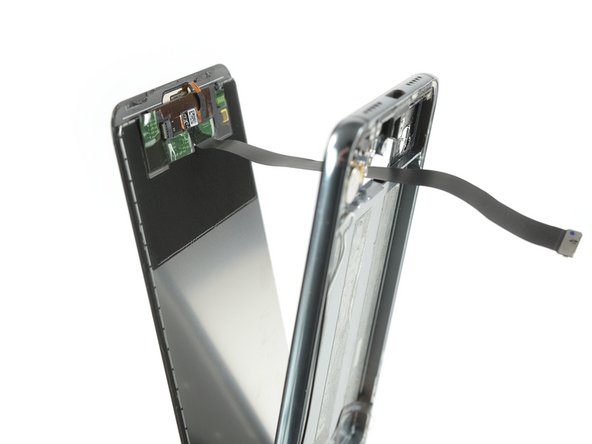
Thread the display flex cable through the gap in the midframe and remove the display.
-
-
Este passo não foi traduzido. Ajude a traduzi-lo
-
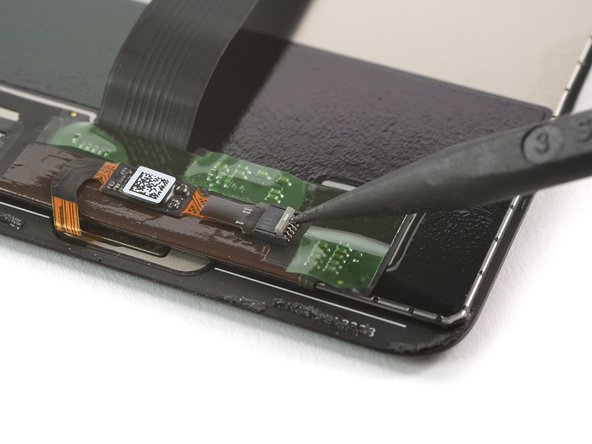
Use the pointed end of a spudger to open the ZIF connector of the home button.
-
-
Este passo não foi traduzido. Ajude a traduzi-lo
-
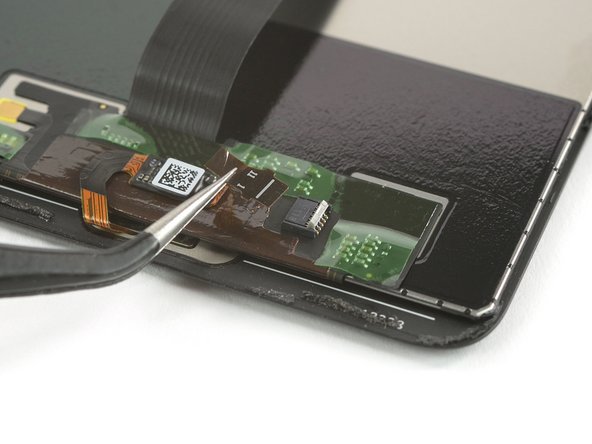
Use a pair of tweezers to pull the home button flex cable out of its ZIF connector.
-
-
Este passo não foi traduzido. Ajude a traduzi-lo
-
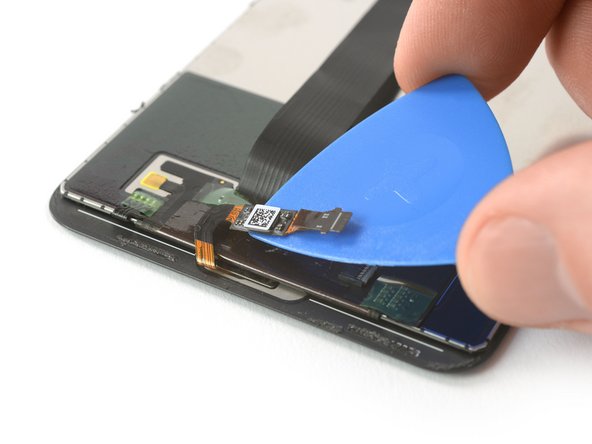
Carefully slide an opening pick under the home button cable to loosen the adhesive underneath.
-
-
Este passo não foi traduzido. Ajude a traduzi-lo
-
Apply a spudger to the backside of the home button and push it out towards the front until it comes off the screen.
-
-
Este passo não foi traduzido. Ajude a traduzi-lo
-
Carefully grab the home button with a pair of tweezers and thread its flex cable through the gap in the screen.
-
Remove the home button.
-


Cancelar: não concluí este guia.
8 outras pessoas executaram este guia.


3 comentários
In order to reassemble the phone, is it a difference between the double sided tape and the glue?
Good guide. Hardest part is to soften the adhesive, especially for the display-step. I don't have an iOpener, so instead tried to use a rice bag. From a helpful comment in the iOpener guide I've got the idea to use the 3d printer heating bed. Set it to ~60°C and put the p20 on for ~>10mins several times and it worked. I did not needed to replace the screen but instead just unhooked the fingerprint sensor from the zif connector, due to it getting very hot and draining the battery since an official huawei update. Not the only one with that problem, but no fix, so this might be a valuable solution. Thanks to the author of the guide.