Esta versão pode conter edições incorretas. Mude para o último instantâneo verificado.
O que você precisa
-
-
Use uma bolsa térmica iOpener para amolecer o adesivo que se encontra debaixo do display, focando nas partes superior e inferior do display.
-
Use uma palheta de abrir ou iFlex para desfazer a união adesiva em todos os lados do display.
-
-
-
Posicione uma ventosa de sucção ou uma iSclack na parcela superior do smartphone e levante o display da estrutura intermediária.
-
Não remova o display, o cabo está preso debaixo de um suporte aparafusado ao smartphone. Você pode virar o display para acomodá-lo sem forçar o cabo ou simplesmente segurá-lo durante os próximos passos.
-
-
Este passo não foi traduzido. Ajude a traduzi-lo
-
Remove the 3.3 mm-long Phillips screw securing the display flex connector bracket.
-
-
-
-
Remova os 15 parafusos Phillips tipo #00.
-
Remova a blindagem metálica que segura o conector flex do display.
-
-
Este passo não foi traduzido. Ajude a traduzi-lo
-
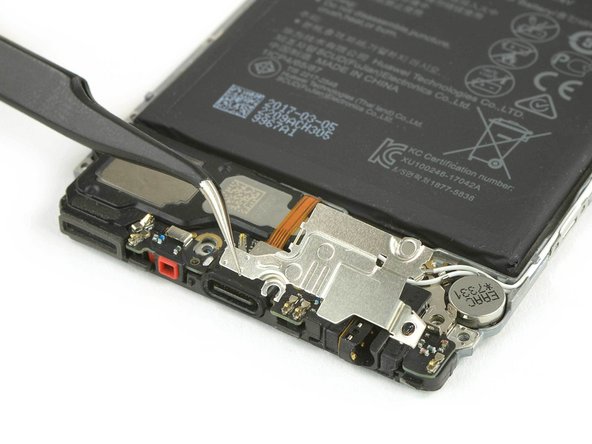
Remove the three Phillips #000 screw.
-
Remove the metal shield covering the charging board with tweezers.
-
-
Este passo não foi traduzido. Ajude a traduzi-lo
-
Use a spudger to disconnect the headphone jack flex cable, the loudspeaker flex cable and the main flex cable.
-
-
Este passo não foi traduzido. Ajude a traduzi-lo
-
Unplug both antenna cables with tweezers.
-
Carefully remove the headphone jack.
-
-
Este passo não foi traduzido. Ajude a traduzi-lo
-
Use the pointed end of a spudger to pry off the charging board.
-
Remove the charging board.
-


Cancelar: não concluí este guia.
3 outras pessoas executaram este guia.


2 comentários
Just a comment to say that when you remove the midframe, there’s a catch at the bottom of the phone which slots under other components, and this can make removal challenging
Can anyone help me? My new charging board doesn’t come with the heat shield as it does on the original old ones. Anyone knows how to remove the old ones to transfer it to the new ones?