Introdução
The lower tray on the WORX Pegasus is a substantial part of the assembly as it prevents the legs of the bench from spreading apart while adding stability.
Sometimes these trays become accidentally detached from each other, either partially or completely, preventing you from fully opening the bench.
Fortunately, there is an easy and permanent fix for this.
O que você precisa
-
-
If yours became detached, make sure you begin by manually re-assembling the tray as it came from factory.
-
-
-
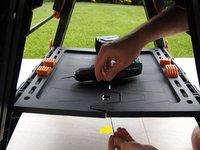
Drill a small hole, the smallest possible but large enough to allow a zip tie to go through. I used a 1.5mm drill bit.
-
-
-
-
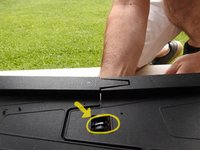
Route a Zip Tie through the hole you just drilled and around the hinge barrel.
-
Cut the excess with scissors or wire cutters.
-
Do this procedure at least on two hinges: the leftmost and rightmost. For best results, address all six hinges.
-
-
-
If done correctly, the tray is not going to fail again.
-
This fix also adds a little bit more strength to the lower tray.
-
Enjoy!
-


Cancelar: não concluí este guia.
Uma outra pessoa concluiu este guia.

2Comentários do guia
Nice job. Only critique is a better or close up of where you drill the holes for the zip ties. Hard to see from your pics. I figured it out and added all 6 to my hinges as that tray falls off non-stop. Thanks! I also added 4 other zip ties to the 4 small exterior holes on the outside of the tray that lock the perimeter attachment hinges into place as well.
It wood be good to have some instructions on fitting and securing the outer hinges of the bottom tray