Ir para o conteúdo principal

Honda 3000 Watt Inverter Generator EU3000IS1AWK Inverter Replacement

O que você precisa

  1. Honda 3000 Watt Inverter Generator EU3000IS1AWK Inverter Replacement, Disconnect the spark plug: passo 1, imagem 1 %32 Honda 3000 Watt Inverter Generator EU3000IS1AWK Inverter Replacement, Disconnect the spark plug: passo 1, imagem 2 %32
    • Before you begin, make sure the generator is off and cool to the touch.

    • Use a large flathead screwdriver to unlock the maintenance cover.

    • Open the maintenance cover.

  2. Honda 3000 Watt Inverter Generator EU3000IS1AWK Inverter Replacement: passo 2, imagem 1 %32 Honda 3000 Watt Inverter Generator EU3000IS1AWK Inverter Replacement: passo 2, imagem 2 %32
    • Use a Phillips screwdriver to remove the screw securing the spark plug cover.

    • Remove the spark plug cover.

  3. Honda 3000 Watt Inverter Generator EU3000IS1AWK Inverter Replacement: passo 3, imagem 1 %32 Honda 3000 Watt Inverter Generator EU3000IS1AWK Inverter Replacement: passo 3, imagem 2 %32
    • Grab the plastic housing at the end of the spark plug wire.

    • Pull firmly to disconnect the wire from the spark plug.

  4. Honda 3000 Watt Inverter Generator EU3000IS1AWK Inverter Replacement, Engage the fuel cutoff: passo 4, imagem 1 %32 Honda 3000 Watt Inverter Generator EU3000IS1AWK Inverter Replacement, Engage the fuel cutoff: passo 4, imagem 2 %32
    • Turn the fuel valve to the cutoff position.

  5. Honda 3000 Watt Inverter Generator EU3000IS1AWK Inverter Replacement, Remove the front cover: passo 5, imagem 1 %32 Honda 3000 Watt Inverter Generator EU3000IS1AWK Inverter Replacement, Remove the front cover: passo 5, imagem 2 %32 Honda 3000 Watt Inverter Generator EU3000IS1AWK Inverter Replacement, Remove the front cover: passo 5, imagem 3 %32
    • Use a 10 mm socket to remove the four capped nuts securing the front cover.

    • Remove the front cover.

  6. Honda 3000 Watt Inverter Generator EU3000IS1AWK Inverter Replacement, Remove the battery: passo 6, imagem 1 %32
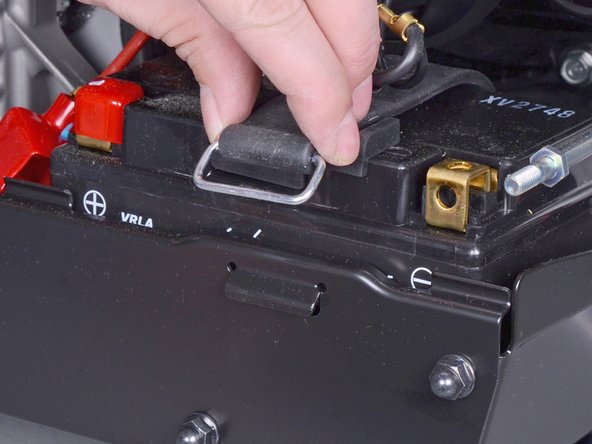
    • Use an 8 mm socket to disconnect the battery wires from the battery terminals.

    • Disconnect the black negative cable first to prevent the risk of shorting the battery.

    • During reassembly, connect the black negative cable first. Make sure you reconnect the wires in the correct polarity.

  7. Honda 3000 Watt Inverter Generator EU3000IS1AWK Inverter Replacement: passo 7, imagem 1 %32 Honda 3000 Watt Inverter Generator EU3000IS1AWK Inverter Replacement: passo 7, imagem 2 %32
    • Unclip the battery strap from the lower plate.

  8. Honda 3000 Watt Inverter Generator EU3000IS1AWK Inverter Replacement: passo 8, imagem 1 %32
    • Remove the battery.

  9. Honda 3000 Watt Inverter Generator EU3000IS1AWK Inverter Replacement, Remove the lower plate: passo 9, imagem 1 %32 Honda 3000 Watt Inverter Generator EU3000IS1AWK Inverter Replacement, Remove the lower plate: passo 9, imagem 2 %32
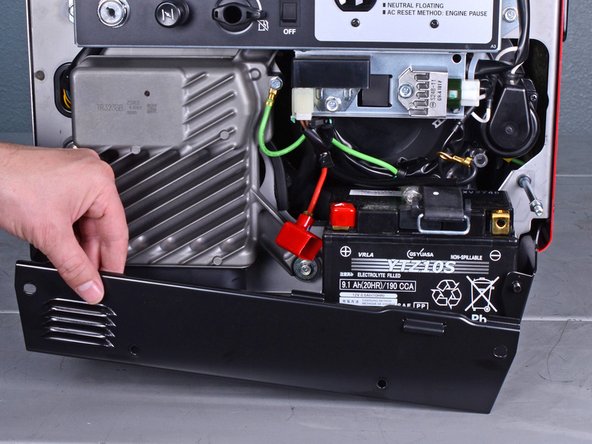
    • Use a 10 mm socket to remove the four capped nuts securing the lower plate.

    • Set these capped nuts apart. They look similar, but are smaller than the front cover nuts.

    • Remove the lower plate.

  10. Honda 3000 Watt Inverter Generator EU3000IS1AWK Inverter Replacement, Unclip the fuse holder: passo 10, imagem 1 %32 Honda 3000 Watt Inverter Generator EU3000IS1AWK Inverter Replacement, Unclip the fuse holder: passo 10, imagem 2 %32
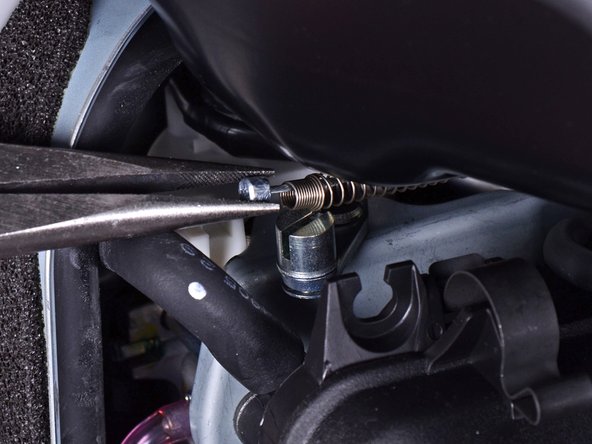
    • Insert a flathead screwdriver into the top of the brown fuse clip in order to release the fuse holder.

    • Detach the fuse holder from the brown clip.

  11. Honda 3000 Watt Inverter Generator EU3000IS1AWK Inverter Replacement, Disconnect the choke cable: passo 11, imagem 1 %32 Honda 3000 Watt Inverter Generator EU3000IS1AWK Inverter Replacement, Disconnect the choke cable: passo 11, imagem 2 %32
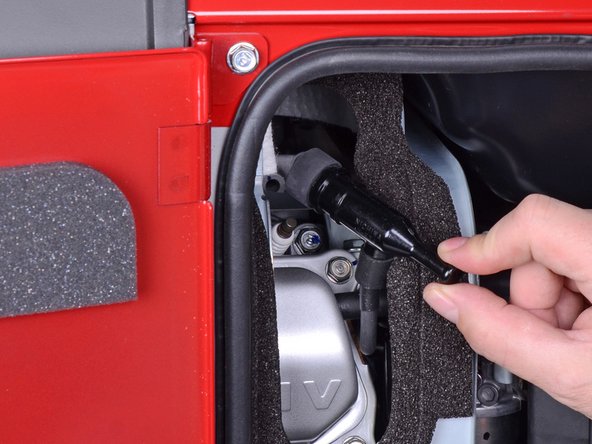
    • Use pliers to lift and disconnect the choke cable from the choke stay.

    • During reassembly, be sure to test the choke to ensure that it is properly connected.

  12. Honda 3000 Watt Inverter Generator EU3000IS1AWK Inverter Replacement, Remove the fuel cutoff switch: passo 12, imagem 1 %32
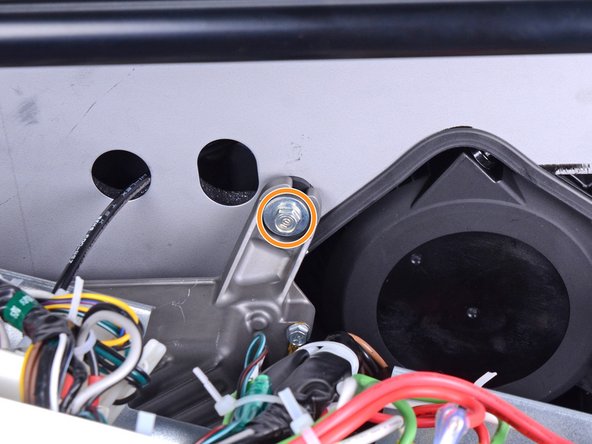
    • Use a long shaft Phillips screwdriver to remove the deeply recessed screw securing the fuel cutoff switch.

    • Be careful not to turn the fuel cutoff switch while you remove the screw.

  13. Honda 3000 Watt Inverter Generator EU3000IS1AWK Inverter Replacement: passo 13, imagem 1 %32 Honda 3000 Watt Inverter Generator EU3000IS1AWK Inverter Replacement: passo 13, imagem 2 %32
    • Remove the fuel cutoff switch.

    • During reassembly, be sure to test the switch to ensure that it is properly installed.

  14. Honda 3000 Watt Inverter Generator EU3000IS1AWK Inverter Replacement, Loosen the control panel: passo 14, imagem 1 %32
    • Use a 10 mm socket to remove the four bolts securing the control panel.

  15. Honda 3000 Watt Inverter Generator EU3000IS1AWK Inverter Replacement: passo 15, imagem 1 %32 Honda 3000 Watt Inverter Generator EU3000IS1AWK Inverter Replacement: passo 15, imagem 2 %32
    • Carefully tilt the control panel downwards.

    • The control panel will still be connected to many wires and cables. Be careful not to strain any of the connected wires.

  16. Honda 3000 Watt Inverter Generator EU3000IS1AWK Inverter Replacement, Remove the inverter: passo 16, imagem 1 %32 Honda 3000 Watt Inverter Generator EU3000IS1AWK Inverter Replacement, Remove the inverter: passo 16, imagem 2 %32
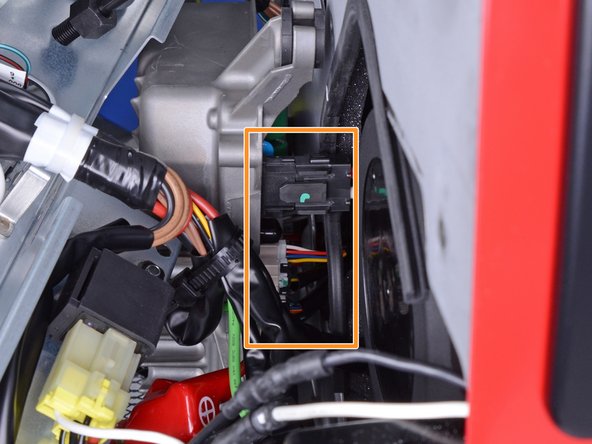
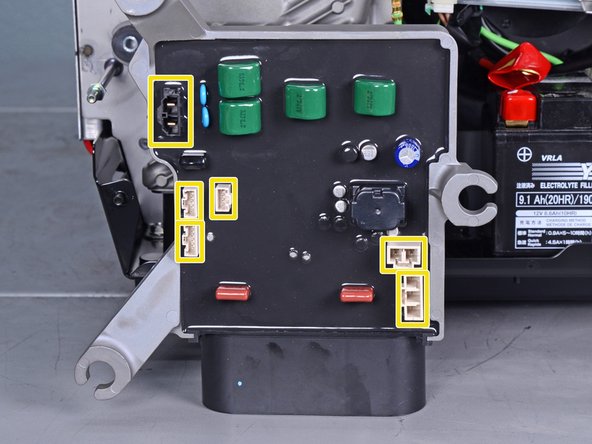
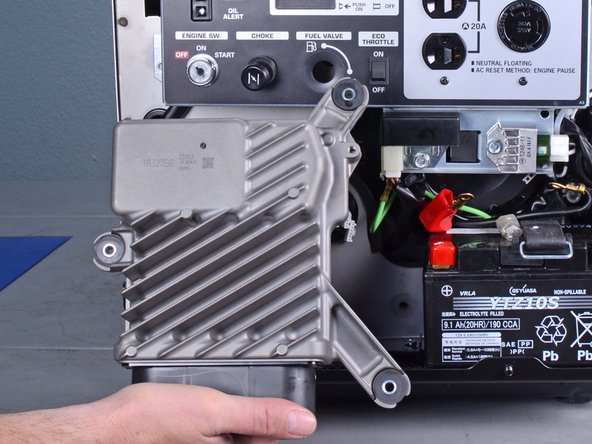
    • Remove the following bolts securing the inverter:

    • One 8 mm ground bolt

    • Three 10 mm bolts (one behind the control panel)

  17. Honda 3000 Watt Inverter Generator EU3000IS1AWK Inverter Replacement: passo 17, imagem 1 %32 Honda 3000 Watt Inverter Generator EU3000IS1AWK Inverter Replacement: passo 17, imagem 2 %32 Honda 3000 Watt Inverter Generator EU3000IS1AWK Inverter Replacement: passo 17, imagem 3 %32
    • Reach behind the inverter along the edges and disconnect the six connectors from the back of the inverter.

    • All the connectors use locking tabs, so you will have to squeeze them in order to release them.

    • The third image shows the locations of all six sockets on the inverter.

    • Reassembly tip: Every socket on the inverter is different, so you can't plug something into the wrong place. Do not force the connectors into their sockets.

  18. Honda 3000 Watt Inverter Generator EU3000IS1AWK Inverter Replacement: passo 18, imagem 1 %32 Honda 3000 Watt Inverter Generator EU3000IS1AWK Inverter Replacement: passo 18, imagem 2 %32
    • Remove the inverter.

  19. Honda 3000 Watt Inverter Generator EU3000IS1AWK Inverter Replacement, Transfer the rubber mounts: passo 19, imagem 1 %32 Honda 3000 Watt Inverter Generator EU3000IS1AWK Inverter Replacement, Transfer the rubber mounts: passo 19, imagem 2 %32
    • If you are replacing the inverter and the replacement did not come with rubber mounts, follow the next two steps to transfer them over.

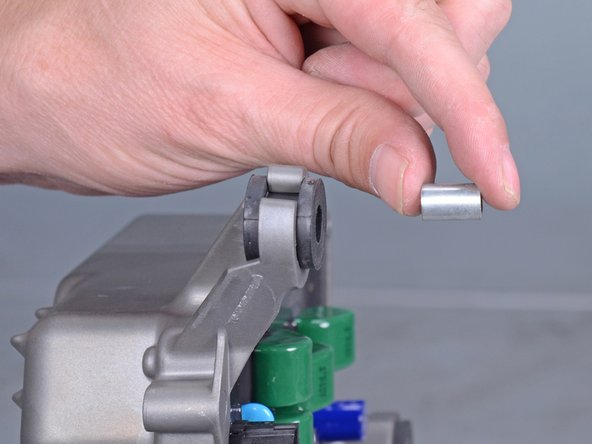
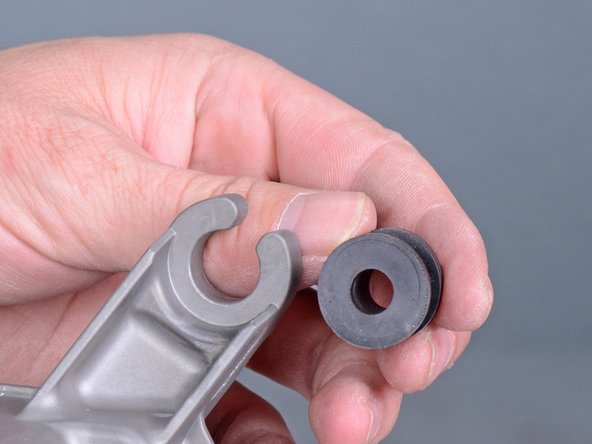
    • Use a screwdriver to push the metal collar out of the center of the rubber mount.

  20. Honda 3000 Watt Inverter Generator EU3000IS1AWK Inverter Replacement: passo 20, imagem 1 %32 Honda 3000 Watt Inverter Generator EU3000IS1AWK Inverter Replacement: passo 20, imagem 2 %32
    • Squeeze the mount and remove it from the inverter.

    • Repeat the procedure with the remaining mounts and transfer them to the replacement inverter.

Conclusão

To reassemble your device, follow these instructions in reverse order.

Arthur Shi

Membro desde: 01/03/18

254.032 Reputação

Autoria de 529 guias

Equipe

iFixit Membro de iFixit

Staff

Membros da 135

Autoria de 17.267 guias

0 comentários

Adicione um comentário

Exibir estatísticas:

Últimas 24 horas: 4

Últimos 7 dias: 10

Últimos 30 dias: 82

Duração total: 4,283