Esta versão pode conter edições incorretas. Mude para o último instantâneo verificado.
O que você precisa
-
Este passo não foi traduzido. Ajude a traduzi-lo
-
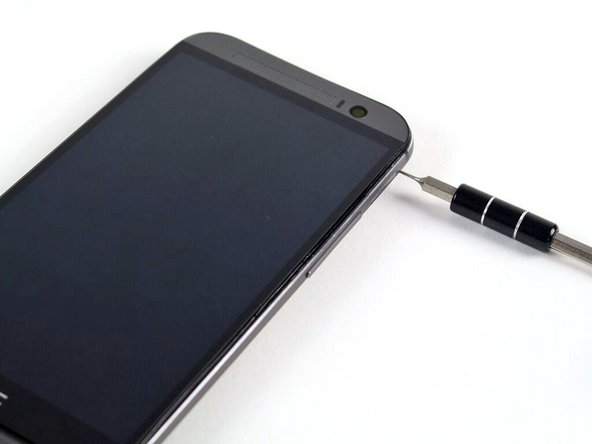
Insert a SIM card eject tool or a paperclip into the small hole in the SIM card tray, located on the upper left hand side of the phone.
-
Press to eject the tray.
-
-
Este passo não foi traduzido. Ajude a traduzi-lo
-
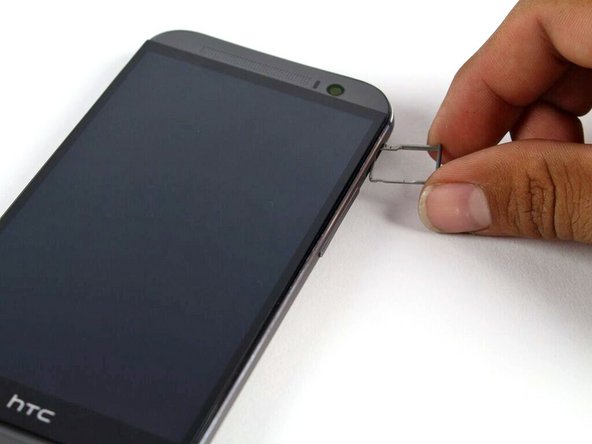
Remove the SIM card tray assembly from the HTC One M8.
-
-
Este passo não foi traduzido. Ajude a traduzi-lo
-
Insert a SIM card eject tool or a paperclip into the small hole in the microSD card tray, located on the upper right hand side of the phone.
-
Press to eject the tray.
-
-
-
Este passo não foi traduzido. Ajude a traduzi-lo
-
Remove the microSD card tray assembly from the HTC One M8.
-
-
Este passo não foi traduzido. Ajude a traduzi-lo
-
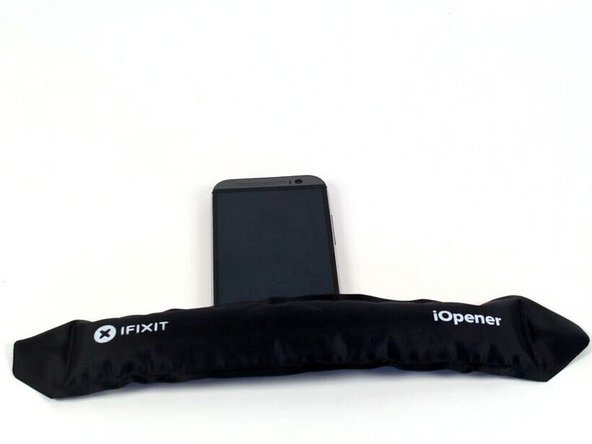
Use an iOpener or heat gun to loosen the adhesive on the upper and lower speaker grilles.
-
-
Este passo não foi traduzido. Ajude a traduzi-lo
-
Use a plastic opening tool to gently peel up the lower speaker grille.
-
-
Este passo não foi traduzido. Ajude a traduzi-lo
-
Use a plastic opening tool to gently peel up the upper speaker grille.
-
-
Este passo não foi traduzido. Ajude a traduzi-lo
-
Remove the two silver 3 mm Phillips #00 screws from the top.
-
Remove the four black 4 mm T5 Torx screws from the bottom.
-
-
Este passo não foi traduzido. Ajude a traduzi-lo
-
Work your way around the perimeter of the phone with a spudger and plastic opening picks to free the clips that secure the rear case to the display assembly.
-


Cancelar: não concluí este guia.
12 outras pessoas executaram este guia.

Equipe

Cal Poly, Team 5-9, Maness Spring 2015 Membro de Cal Poly, Team 5-9, Maness Spring 2015
CPSU-MANESS-S15S5G9
Membros da 4
Autoria de 18 guias