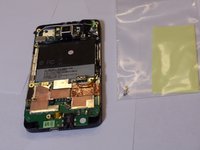
Ir para o conteúdo principal

HTC HD2 Screen Replacement

O que você precisa

  1. HTC HD2 Screen Replacement, Battery: passo 1, imagem 1 %32
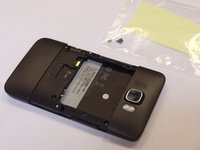
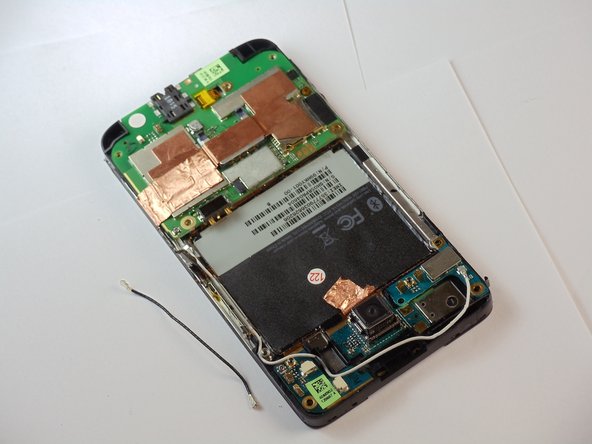
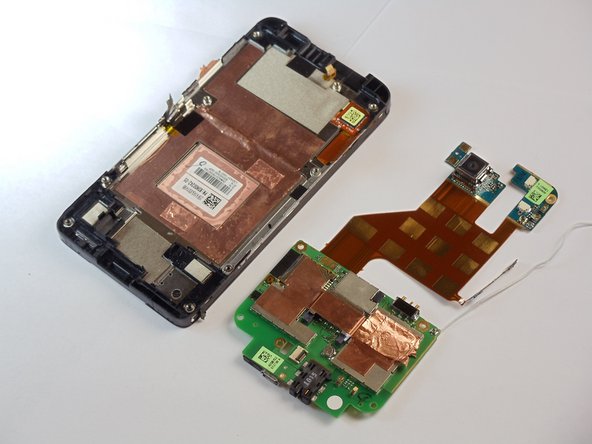
    • Carefully pull the rear cover from the back of the phone.

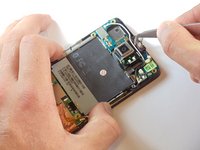
    • Place a finger beneath the small lip on the left side of the battery.
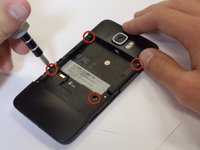
  2. HTC HD2 Screen Replacement: passo 2, imagem 1 %32 HTC HD2 Screen Replacement: passo 2, imagem 2 %32
    • Lay the phone down on it's screen.

    • Lift up on the lip and pull the battery from the phone.

  3. HTC HD2 Screen Replacement, Midframe: passo 3, imagem 1 %32 HTC HD2 Screen Replacement, Midframe: passo 3, imagem 2 %32
    • Remove the four black 3.5mm T5 screws from the back of the phone.

  4. HTC HD2 Screen Replacement: passo 4, imagem 1 %32 HTC HD2 Screen Replacement: passo 4, imagem 2 %32
    • Insert the flat end of a spudger between the midframe and the display.

    • Slide the spudger along the seam between the frame and the display.

    • Using the spudger for leverage, carefully pry the midframe away from the display assembly.

    • This process will take some effort. Continue to pry slowly and carefully until the frame begins to detach.

    • As it releases, pull the midframe away from the phone.

    • The volume control tab may fall off during removal. It can be easily reattached.

  5. HTC HD2 Screen Replacement, Vibrator: passo 5, imagem 1 %32 HTC HD2 Screen Replacement, Vibrator: passo 5, imagem 2 %32
    • Set the phone down on its screen.

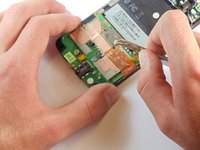
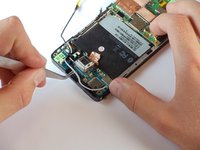
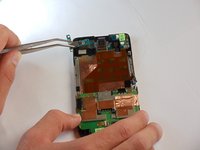
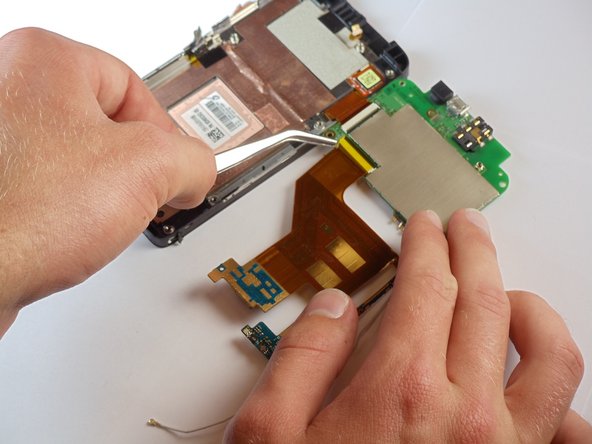
    • Using tweezers, unplug the small vibrator connector from its socket on the motherboard.

  6. HTC HD2 Screen Replacement: passo 6, imagem 1 %32
    • Pull the vibrator motor from the phone.

  7. HTC HD2 Screen Replacement, Earpiece Speaker: passo 7, imagem 1 %32 HTC HD2 Screen Replacement, Earpiece Speaker: passo 7, imagem 2 %32 HTC HD2 Screen Replacement, Earpiece Speaker: passo 7, imagem 3 %32
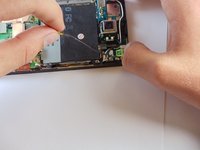
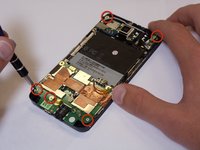
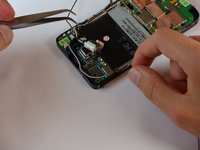
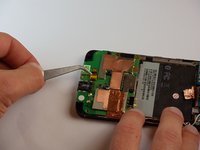
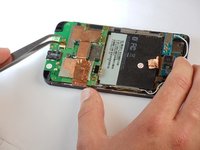
    • Disconnect the small speaker cable from its socket on the motherboard.

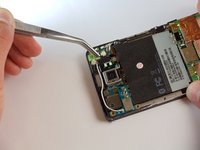
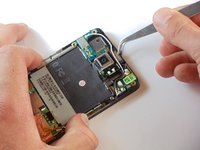
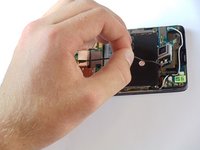
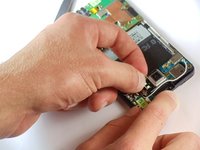
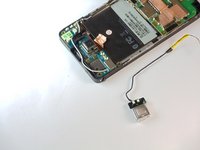
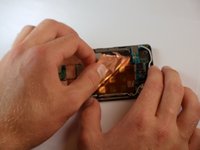
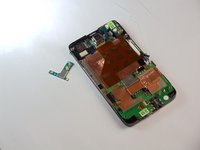
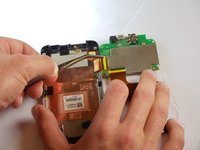
    • Remove the earpiece speaker from the phone.

  8. HTC HD2 Screen Replacement, Camera: passo 8, imagem 1 %32 HTC HD2 Screen Replacement, Camera: passo 8, imagem 2 %32 HTC HD2 Screen Replacement, Camera: passo 8, imagem 3 %32
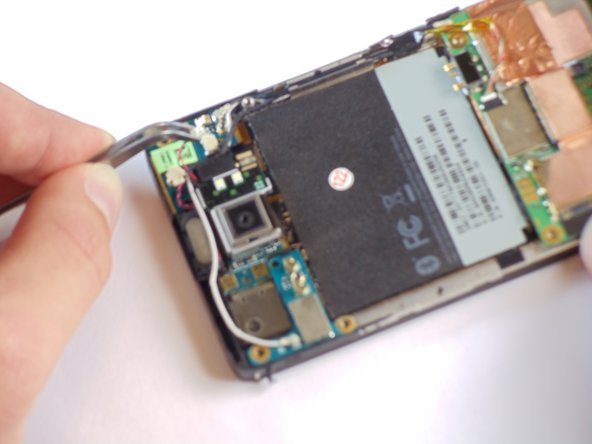
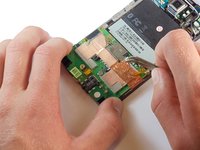
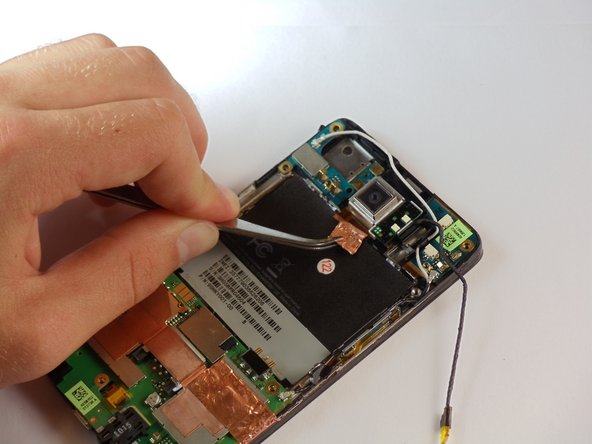
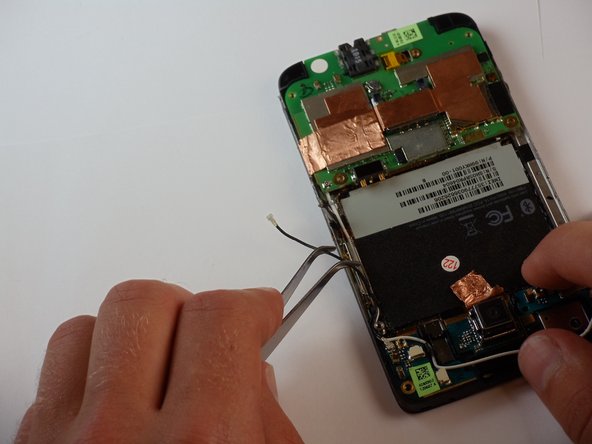
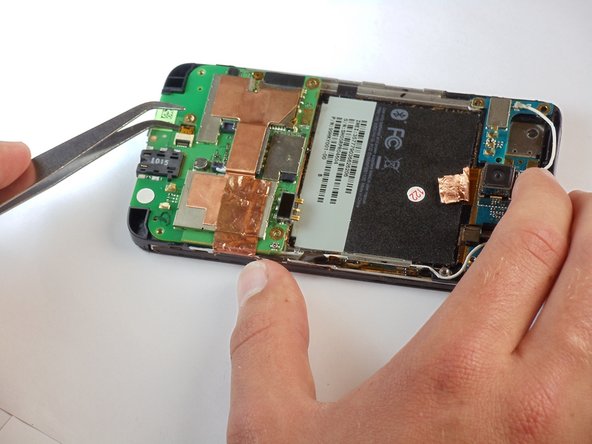
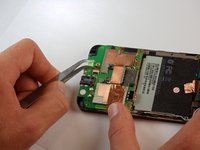
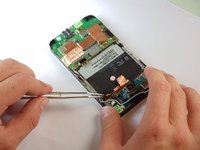
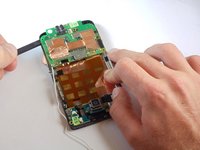
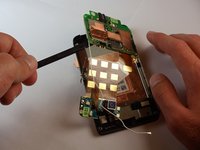
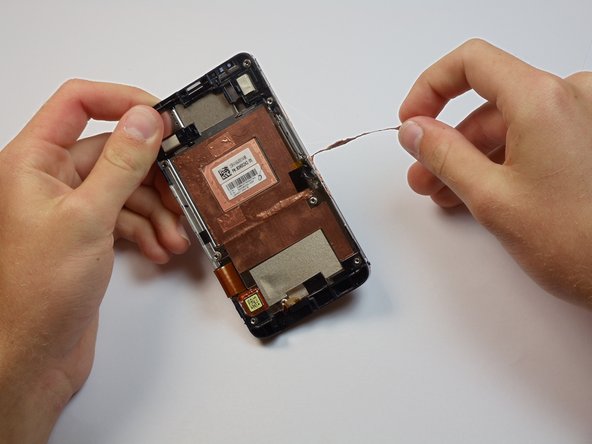
    • Disconnect the flash cable from its socket in the bottom of the motherboard.

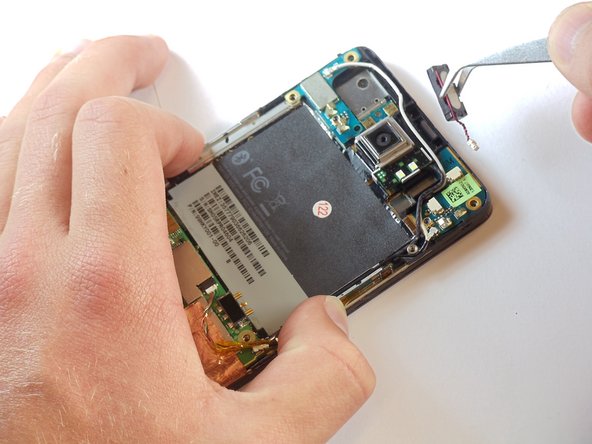
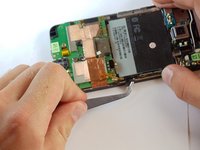
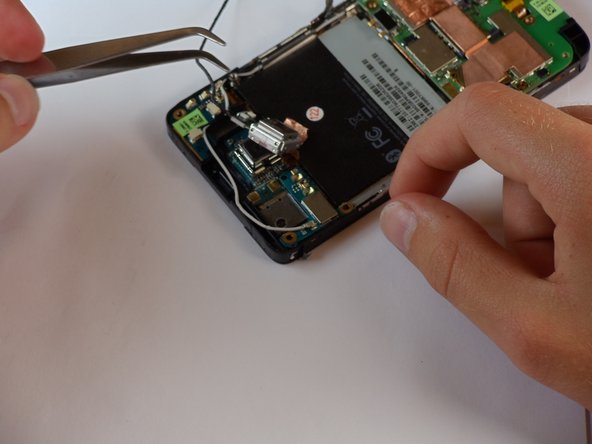
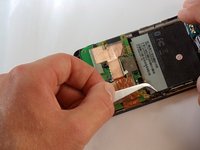
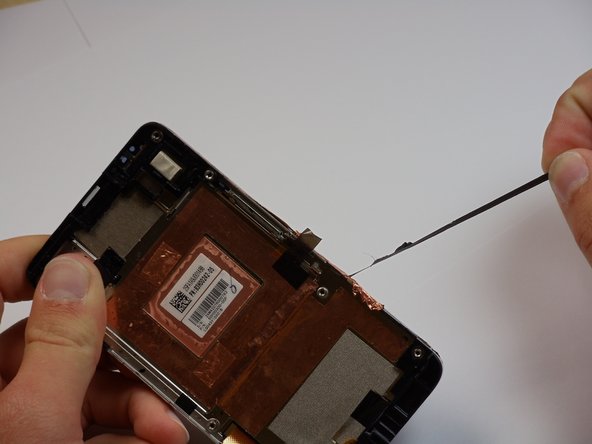
    • Carefully pull the cable from its groove in the frame, working your way back to the camera.

  9. HTC HD2 Screen Replacement: passo 9, imagem 1 %32 HTC HD2 Screen Replacement: passo 9, imagem 2 %32 HTC HD2 Screen Replacement: passo 9, imagem 3 %32
    • Pull the camera flash and cover off of the board.

    • You may need to peel back the sticker that sits behind the battery.

    • Work carefully. Excessive force can damage the camera or motherboard.

  10. HTC HD2 Screen Replacement: passo 10, imagem 1 %32
    • Around the camera is a thin shielding. Remove it with tweezers.

    • Using tweezers, remove the primary camera.

  11. HTC HD2 Screen Replacement, Motherboard: passo 11, imagem 1 %32 HTC HD2 Screen Replacement, Motherboard: passo 11, imagem 2 %32
    • Remove five T5 Torx screws from the motherboard.

  12. HTC HD2 Screen Replacement: passo 12, imagem 1 %32 HTC HD2 Screen Replacement: passo 12, imagem 2 %32 HTC HD2 Screen Replacement: passo 12, imagem 3 %32
    • Disconnect the flash cable from its socket at the bottom of the motherboard.

    • Carefully pull the flash cable from its slot in the side of the phone.

  13. HTC HD2 Screen Replacement: passo 13, imagem 1 %32 HTC HD2 Screen Replacement: passo 13, imagem 2 %32 HTC HD2 Screen Replacement: passo 13, imagem 3 %32
    • Pull the camera flash and cover off of the board.

    • You may need to peel back the sticker that sits behind the battery.

    • Work carefully. Excessive force can damage the camera or motherboard.

  14. HTC HD2 Screen Replacement: passo 14, imagem 1 %32 HTC HD2 Screen Replacement: passo 14, imagem 2 %32 HTC HD2 Screen Replacement: passo 14, imagem 3 %32
    • Now locate the coaxial bluetooth cable that connects the top and bottom boards of the phone.

    • Use tweezers to pop both ends of the cable from the boards and remove it completely.

  15. HTC HD2 Screen Replacement: passo 15, imagem 1 %32 HTC HD2 Screen Replacement: passo 15, imagem 2 %32 HTC HD2 Screen Replacement: passo 15, imagem 3 %32
    • Now find the AP FPC, one of the smallest connectors on the bottom board.

    • Pop the small black tab up using tweezers, then unplug the cable.

  16. HTC HD2 Screen Replacement: passo 16, imagem 1 %32 HTC HD2 Screen Replacement: passo 16, imagem 2 %32 HTC HD2 Screen Replacement: passo 16, imagem 3 %32
    • This step is pretty much irreversible, so do not do this unless you absolutely have to.

    • Remember peeling back part of that big sticker in the middle? Now you get to take it all the way off.

    • This may take some time, and the use of the tweezers, but keep at it until the whole sticker is off.

  17. HTC HD2 Screen Replacement: passo 17, imagem 1 %32
    • Now find the GPS board in the upper left hand corner of the phone.

    • Disconnect the white cable from its socket on the motherboard.

    • The cable does not need to be unplugged from the main bottom board.

    • This cable is connected to the underside of the bottom board. If it is detached, be sure to reconnect it before reassembling the phone.

  18. HTC HD2 Screen Replacement: passo 18, imagem 1 %32 HTC HD2 Screen Replacement: passo 18, imagem 2 %32 HTC HD2 Screen Replacement: passo 18, imagem 3 %32
    • If this step does not progress easily, check to see that there are no screws still holding the board in place.

    • With the cable removed, pop the GPS board out of the phone using tweezers.

  19. HTC HD2 Screen Replacement: passo 19, imagem 1 %32 HTC HD2 Screen Replacement: passo 19, imagem 2 %32 HTC HD2 Screen Replacement: passo 19, imagem 3 %32
    • Using a spudger, begin to pry the copper colored board in the middle away from the phone to loosen it.

    • Also pry the small piece that runs under where the volume selector is on the full phone.

  20. HTC HD2 Screen Replacement: passo 20, imagem 1 %32 HTC HD2 Screen Replacement: passo 20, imagem 2 %32 HTC HD2 Screen Replacement: passo 20, imagem 3 %32
    • There is a connecter cable under the main board, so do not pull it all the way off right away.

    • Gently pop both the top and bottom boards off of the phone, and turn them over to the left

  21. HTC HD2 Screen Replacement: passo 21, imagem 1 %32 HTC HD2 Screen Replacement: passo 21, imagem 2 %32
    • With the back of the main board exposed, flip up the little brown lever at the end of the connector and unplug the final cable that connects it to the main board.

  22. HTC HD2 Screen Replacement, Screen: passo 22, imagem 1 %32 HTC HD2 Screen Replacement, Screen: passo 22, imagem 2 %32
    • Caution: If your screen wasn't already cracked, it is very easy to do so in the next few steps. Proceed very carefully.

    • This step could take several minutes of heating.

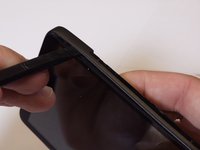
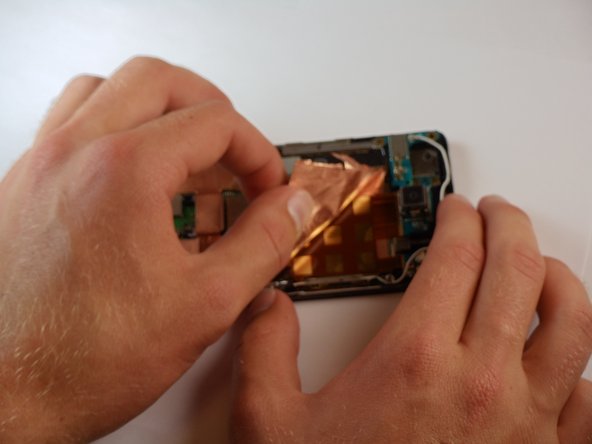
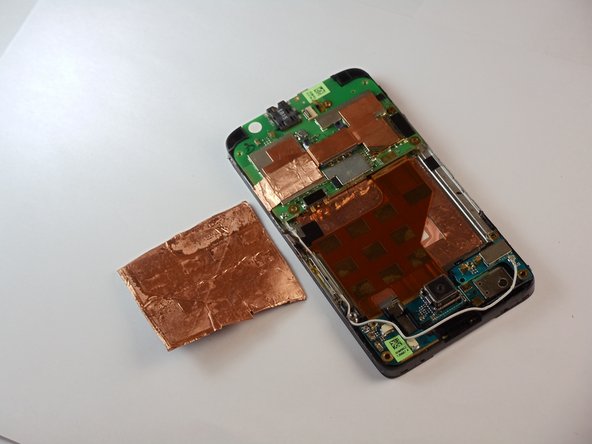
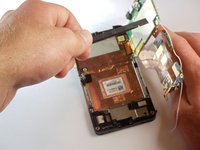
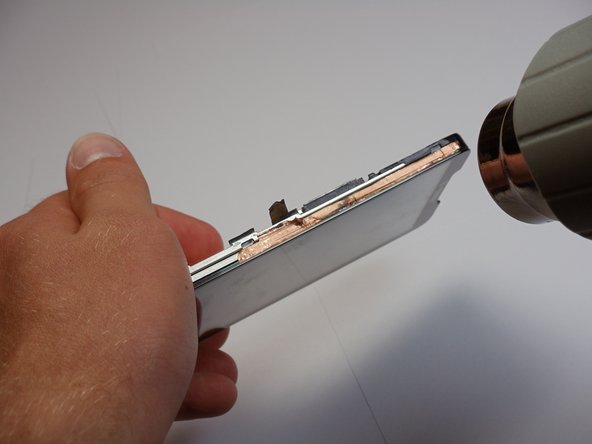
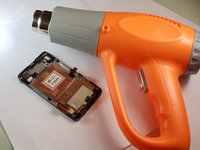
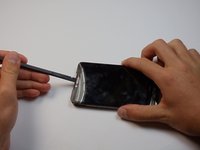
    • Use a heat gun or hair dryer to soften the adhesive between the screen and the chassis

  23. HTC HD2 Screen Replacement: passo 23, imagem 1 %32 HTC HD2 Screen Replacement: passo 23, imagem 2 %32 HTC HD2 Screen Replacement: passo 23, imagem 3 %32
    • Once heating is done, carfully peel the covering along the sides of the phone away.

  24. HTC HD2 Screen Replacement: passo 24, imagem 1 %32 HTC HD2 Screen Replacement: passo 24, imagem 2 %32 HTC HD2 Screen Replacement: passo 24, imagem 3 %32
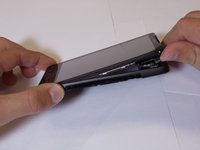
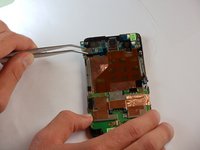
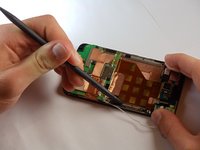
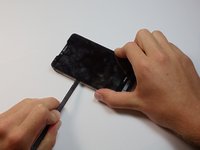
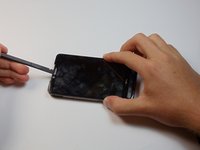
    • insert the spudger into the top closer to the back of the phone and slide along to fully disengage the adhesive. Do this for both sides.

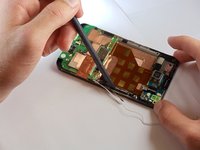
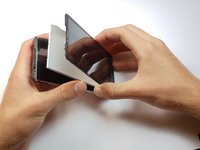
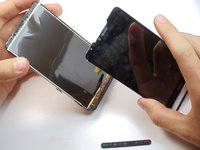
    • Caution. The digitizer is firmly glued to LCD glass screen. Look closely to make sure you separate the digitizer from LCD panel and not part of LCD panel

  25. HTC HD2 Screen Replacement: passo 25, imagem 1 %32
    • Pop the row of buttons out from the bottom of the phone. They should just fall out when the chassis is off.

  26. HTC HD2 Screen Replacement: passo 26, imagem 1 %32 HTC HD2 Screen Replacement: passo 26, imagem 2 %32
    • Congratulations! You have made it to the screen and front cover! Now you can replace your cracked screen.

Conclusão

To reassemble your device, follow these instructions in reverse order.

18 outras pessoas executaram este guia.

Equipe

Cal Poly, Team 24-55, Amido Spring 2011 Membro de Cal Poly, Team 24-55, Amido Spring 2011

CPSU-AMIDO-S11S24G55

Membros da 5

Autoria de 16 guias

3 comentários

*I've used several guides and they're all wonderful. Good work! In this guide, the last section is incomplete. The last two steps are unclear and I think even misleading. There should be a few more steps in there.

*Steph 28 is to remove the LCD Screen and Digitizer from the Chassis, I think. The LCD and Digitizer should be treated as one at this point because they are connected by glue (says the guide) but it fails to mention that they're also connected by a cable.

*Once separated from the chassis, the LCD Screen and Digitizer must be separated--and this is really the part that lacks instruction here. I can see there are three basic components in the picutre. They appear to be the digitizer (clear plastic), the LCD (covered in metal, and something in between (clear plastic? lens?). Where do I separate these things? Do I need to separate them? How should I stick them together again? The images in this section offer no help, while the words confuse slightly. While the words say "be careful not to separate the components of the LCD panel, the pictures indicate that this may have happened...oops, and there's no indication of what to look for. What are all the components in the pictures of step 29-30? Please add a some more instruction to this final section so we know how to get just the digitizer off and replaced.

*Thanks!!

David John - Responder

Thanks. I broke 2 things doing my teardown. The first was the connection between the "under the sticker" stiff sheet and the volume rocker. This is barely mentioned as a side note in the instructions but is very easily broken - it should have a special mention in the notes. I also broke the connector between the mainboard and the screen because the small ribbon didn't come out of it's socket. It was tough to get a tool under it and although I flipped up the black "switch" it didn't pull free and it tore when I pulled the mainboard up. This was catastrophic - you can't do without the screen. This one was my fault becaise I the instructions covered it but I failed to pull it free before pulling up the mainboard. I have a good mainboard in the phone now but the phone is worthless.

P Schulz - Responder

have a Tablet ainoal nova 7 tornado because it used bewail fun for me and Lotfy Abazavi not ship nor understand the fact that Shu Shu Sarlo Sarlo

Noor Zg - Responder

Adicione um comentário

Exibir estatísticas:

Últimas 24 horas: 0

Últimos 7 dias: 1

Últimos 30 dias: 8

Duração total: 66,857