Introdução
Remova o painel frontal de vidro para acessar os componentes internos do seu Evo.
O que você precisa
-
-
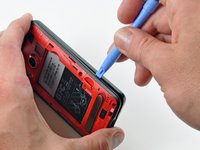
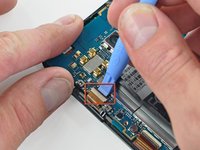
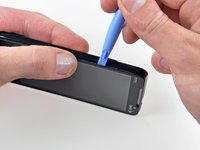
Insira cuidadosamente uma Ferramenta de abertura do iPod entre o painel traseiro e a estrutura traseira interna perto da entrada para fone de ouvido.
-
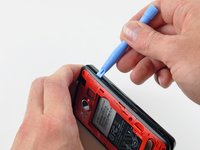
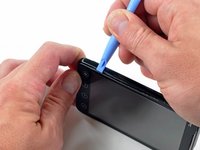
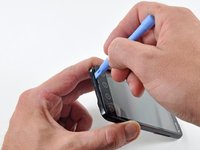
Use a sua Ferramenta de abertura do iPod para levantar a carcaça traseira ao redor do perímetro do Evo.
 Pergunte ao FixBot
-
-
-
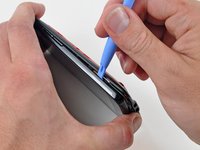
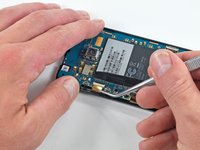
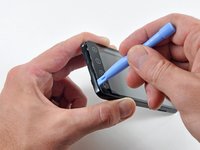
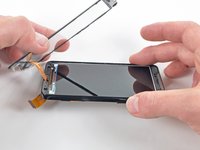
Levante o painel traseiro para separá-lo da estrutura traseira interna.
-
-
-
Com a ponta do dedo, levante a bateria pela extremidade mais próxima da câmera traseira.
-
Remova a bateria da estrutura interna traseira.
-
-
-
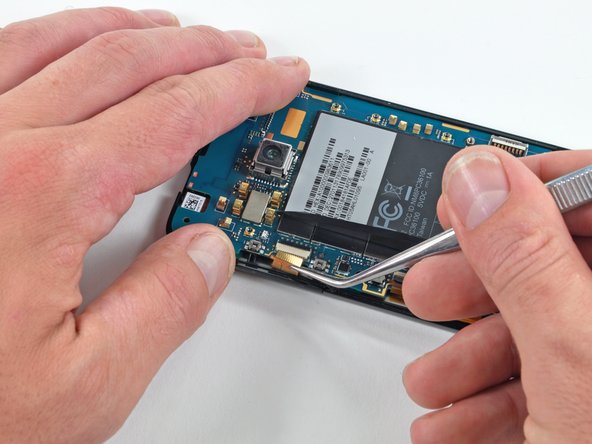
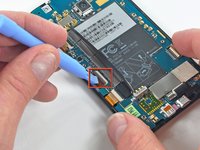
Use a ponta chata de uma espátula para levantar o retentor vermelho do MicroSD preso à estrutura interna.
-
-
Ferramenta utilizada neste passo:Tweezers$4.99
-
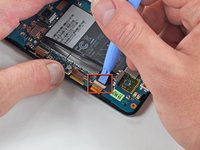
Use uma pinça para puxar cuidadosamente o cartão MicroSD para fora do seu slot na estrutura traseira interna.
-
-
-
Remova seis parafusos Torx T5 que prendem a armação interna traseira à carcaça interna.
-
-
-
Insira cuidadosamente uma ferramenta de abertura de iPod entre a estrutura interna traseira e o contorno plástico próximo à porta Micro HDMI.
-
Com cuidado, separe a borda superior da estrutura interna traseira do contorno frontal do Evo.
-
-
-
Insira a Ferramenta de abertura do iPod entre a estrutura interna traseira e seu contorno de plástico e force para cima em diversos pontos ao longo da borda esquerda do Evo.
-
-
-
Continue o procedimento de alavanca, focando agora em destacar a moldura plástica da parte inferior do Evo.
-
Use a espátula para levantar a estrutura interna traseira ao longo da borda direita, seguindo o método descrito nos passos anteriores.
-
Trabalhe ao redor de todo o perímetro da estrutura interna traseira até que ela esteja levemente levantada da carcaça interna.
-
-
-
Remova a estrutura interna traseira do restante do Evo.
-
-
-
-
Remova o parafuso Phillips que prende a placa-mãe à estrutura interna próximo à entrada para fone de ouvido.
-
-
-
Use a ponta chata de uma espátula para soltar a placa-mãe dos pinos que a prendem à bandeja metálica da tela.
-
-
-
Descole cuidadosamente o adesivo de informações do dispositivo da borda esquerda da placa-mãe e da blindagem EMI para revelar três conectores cobertos com fita.
-
-
-
Remova os pedaços de fita que cobrem os seguintes cabos planos:
-
Câmera frontal
-
Cabo plano do painel frontal
-
Cabo plano do painel do display
-
-
Ferramenta utilizada neste passo:Tweezers$4.99
-
Usando a ponta de uma Ferramenta de abertura de iPod, levante a aba de retenção do cabo plano da câmera frontal.
-
Tenha muito cuidado e delicadeza com essas abas. Elas são muito fáceis de quebrar ou soltar e igualmente difíceis de reinstalar.
-
Use uma pinça para puxar o cabo plano da câmera frontal para fora do seu soquete.
-
-
-
Use a ponta de uma Ferramenta de abertura de iPod para levantar a aba de retenção do cabo plano do painel frontal.
-
Use uma pinça para puxar o cabo plano do painel frontal para fora do seu soquete.
-
-
-
Usando a ponta de uma ferramenta de abertura de iPod, levante a aba de retenção do cabo plano do display.
-
Segure o cabo plano do display com uma pinça e puxe-o para fora do soquete.
-
-
-
Levante cuidadosamente a placa-mãe para fora da caixa interna, observando se há cabos que possam prender.
-
-
-
Levante suavemente a câmera frontal para fora do seu recesso na carcaça interna e remova-a do Evo.
-
-
-
Com a pistola de ar quente ajustada na temperatura baixa, comece aquecendo a borda preta externa perto do canto superior esquerdo do painel de vidro.
-
Tente não aquecer excessivamente a borda de plástico externa do Evo.
-
-
-
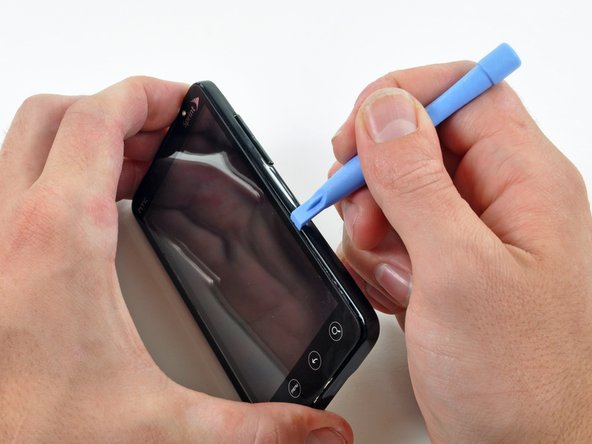
Insira cuidadosamente uma Ferramenta de abertura de iPod entre o painel frontal de vidro e a borda plástica perto do canto superior esquerdo do Evo.
-
Com cuidado, levante o vidro, tomando cuidado para não dobrá-lo excessivamente.
-
-
-
Use uma pistola de ar quente para amolecer o adesivo ao longo do lado esquerdo do painel de vidro frontal.
-
-
-
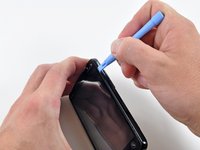
Insira a Ferramenta de abertura do iPod entre o painel frontal e a borda plástica e faça alavanca em vários pontos ao longo da borda esquerda do Evo.
-
-
-
Continue o procedimento de aquecimento e alavancagem, focando agora em soltar a parte inferior do painel frontal da moldura de plástico.
-
Use uma espátula ao longo da borda inferior do Evo para separar ainda mais o painel frontal do restante do dispositivo.
-
-
-
Use uma pistola de ar quente para amolecer o adesivo ao longo do lado direito do painel frontal de vidro.
-
-
-
Alavanque o painel frontal ao longo da borda direita usando o método descrito nos passos anteriores.
-
Trabalhe ao redor de todo o perímetro do painel frontal até que ele esteja levemente levantado da carcaça interna.
-
-
-
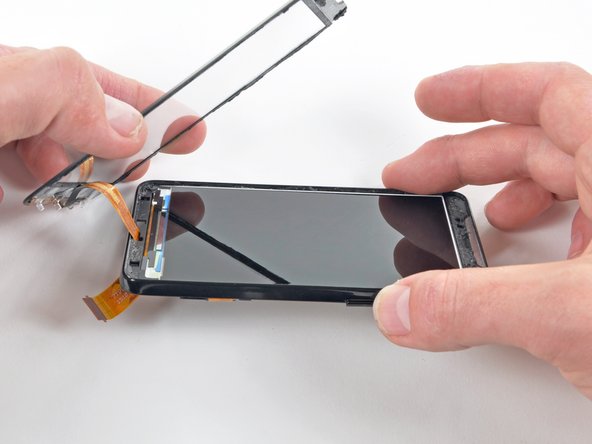
Descole o cabo plano do painel frontal do adesivo que o prende à parte inferior metálica da estrutura interna.
-
-
-
Levante o painel frontal para fora da estrutura interna, cuidando do cabo ainda passado pela parte inferior do Evo.
-
Desencaminhe cuidadosamente o cabo plano do painel frontal através da abertura na estrutura interna.
-
Remova o painel frontal.
-
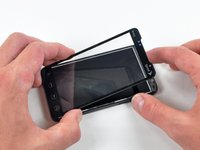
Observe os quatro (4) ganchos de plástico transparente fixados atrás dos botões de menu. Olhe com atenção. Cada um possui um formato diferente e uma orientação específica.
-
Se o painel frontal de substituição ainda não os tiver instalados, remova-os cuidadosamente do painel antigo e transfira-os para o novo.
-


Para a remontagem de seu dispositivo, siga estas instruções na ordem inversa.
Cancelar: não concluí este guia.
65 outras pessoas executaram este guia.
Um agradecimento especial a esses tradutores:
100%

Translation Bot está nos ajudando a consertar o mundo! Quer contribuir?
Comece a traduzir ›
