Introdução
This guide provides instructions on the disassembly of the HP Pavilion tx2500 for fan replacement.
O que você precisa
-
-
Completely turn off and unplug device. Lay the device bottom side up on a soft surface.
 Pergunte ao FixBot
-
-
-
Squeeze the latches on the battery until you hear a click. Slide out the battery.
-
-
-
Using the Phillips #0 screwdriver, remove the 4.5 mm screw from the WLAN model screen.
-
Once unscrewed, lift the right side of the WLAN module compartment cover and swing it to the left.
-
-
-
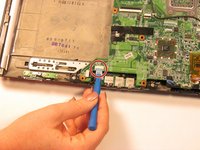
Using the plastic opening tool, disconnect the WLAN antenna cables from the WLAN module.
-
-
-
Using the Phillips #0 screwdriver, unscrew the 4.5 mm screw from the middle section in the battery compartment.
-
-
-
Use the plastic opening tool to disconnect the wires in the upper corners.
-
-
-
-
Flip the laptop front side up and then use your fingers to lift up the keyboard.
-
-
-
Lift up the black latch that connects the film strip to the base of the computer.
-
Use the plastic opening tool to disconnect the film strip from the base of the computer.
-
-
-
Rotate the screen 90 degrees and remove the base under the screen.
-
-
-
Rotate the screen back towards you.
-
Lift up the convertible hinge to unclip it from the base of the computer.
-
-
-
Using the Phillips #0 screwdriver, remove both of the 5.0 mm screws on the base of the rotator.
-
-
-
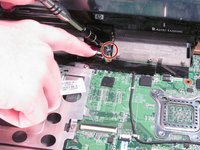
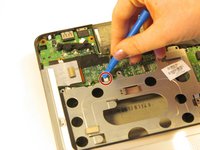
Disconnect the wire from the system board using the plastic opening tool.
-
Disconnect the wire from the optical drive using the plastic opening tool.
-
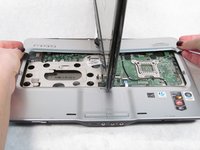
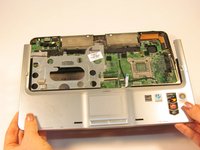
Gently lift the top cover from the tablet.
-
-
-
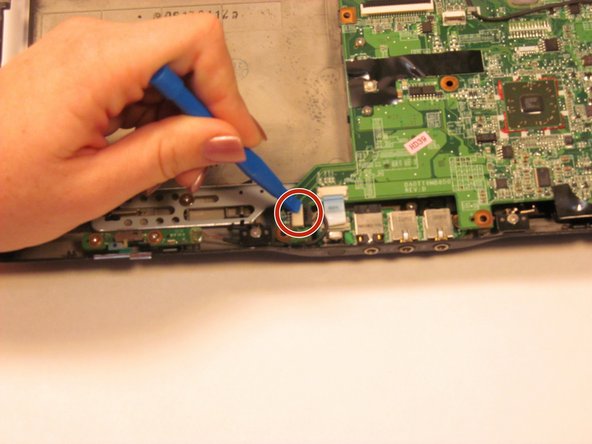
Using the plastic opening tool, disconnect the plastic blue film from the tablet.
-
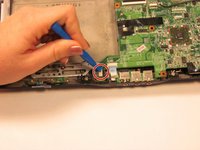
Disconnect the wire using the plastic opening tool.
-
-
-
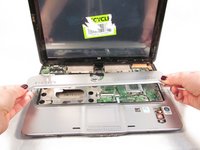
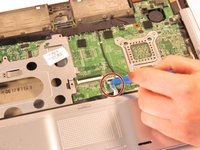
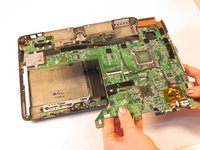
Lift the system board from the tablet.
-
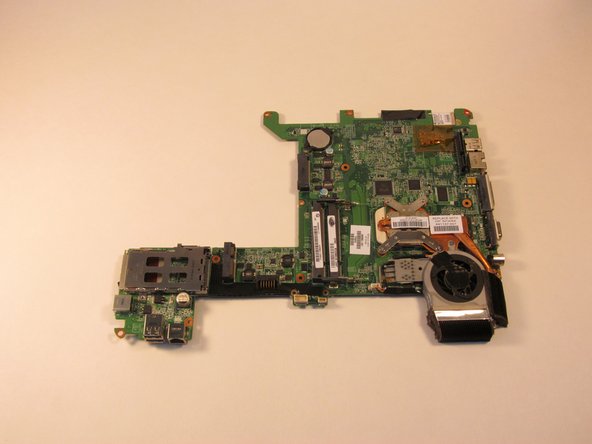
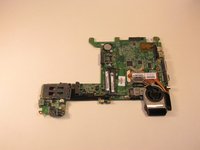
Turn the system board over and lay it flat on a soft surface.
-
-
-
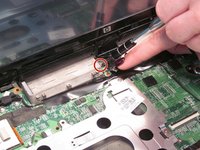
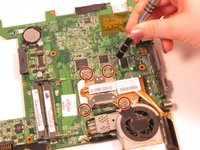
Using a Phillips #00, remove the 4.5 mm screws that connect the fan to the board.
-
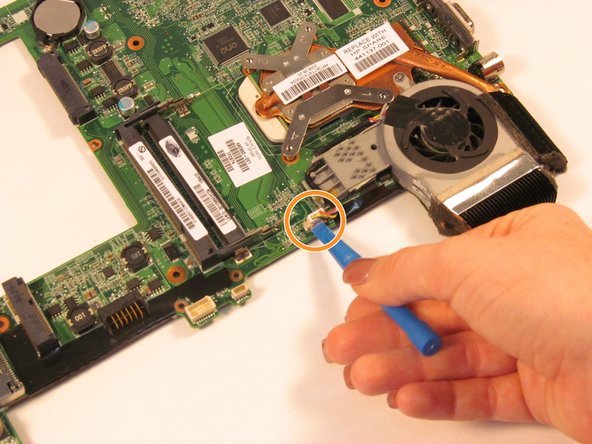
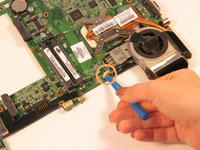
Using a plastic opening tool, disconnect the wire that attached the fan to the board.
-


To reassemble your device, follow these instructions in reverse order.
Cancelar: não concluí este guia.
Uma outra pessoa concluiu este guia.
Equipe

Sam Houston State, Team 1-4, Blackburne Fall 2015 Membro de Sam Houston State, Team 1-4, Blackburne Fall 2015
SHSU-BLACKBURNE-F15S1G4
4 Membros
Autoria de 5 guias