Ir para o conteúdo principal
Participe da comunidade de reparos - Criar conta

HP PSC 2410 Photosmart All In One Printer Encoder Strip Replacement

O que você precisa

    1. HP PSC 2410 Photosmart All In One Printer Encoder Strip Replacement, Remove Back Panel: passo 1, imagem 1 %32
      • Remove the back panel by inserting your fingers into the indentations next to the tabs. Press the tabs inward towards each other while pulling the back panel toward you.

      Pergunte ao FixBot

      Comentar

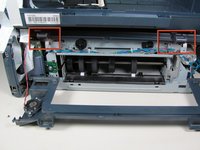
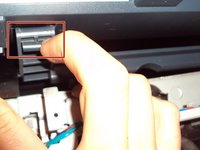
    2. HP PSC 2410 Photosmart All In One Printer Encoder Strip Replacement, Remove Inner Back Pannel: passo 2, imagem 1 %32 HP PSC 2410 Photosmart All In One Printer Encoder Strip Replacement, Remove Inner Back Pannel: passo 2, imagem 2 %32
      • Using the T10 Torx Security Bit Screwdriver, unscrew the screws on the upper left and right corners of the inner panel to remove the inner back panel.

      Pergunte ao FixBot

      Comentar

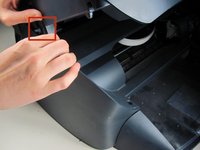
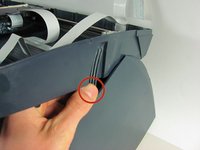
    3. HP PSC 2410 Photosmart All In One Printer Encoder Strip Replacement, Remove Upper Portion: passo 3, imagem 1 %32 HP PSC 2410 Photosmart All In One Printer Encoder Strip Replacement, Remove Upper Portion: passo 3, imagem 2 %32
      • Press down on the two plastic hinges to remove the upper portion of printer.

      Pergunte ao FixBot

      Comentar

    4. HP PSC 2410 Photosmart All In One Printer Encoder Strip Replacement, Unplug Speaker Wire: passo 4, imagem 1 %32
      • Grasp the plastic plug on the end of the speaker wire, then gently pull the plug away from the printer until the wire is removed.

      Pergunte ao FixBot

      Comentar

    5. HP PSC 2410 Photosmart All In One Printer Encoder Strip Replacement, Removing Scanner Tray: passo 5, imagem 1 %32 HP PSC 2410 Photosmart All In One Printer Encoder Strip Replacement, Removing Scanner Tray: passo 5, imagem 2 %32
      • Rotate the printer so the paper tray is facing towards you.

      • Gently lift the scanner tray up and away from the printer.

      • Press the gray plastic tabs inward to release the tabs from the printer.

      Pergunte ao FixBot

      Comentar

    6. HP PSC 2410 Photosmart All In One Printer Encoder Strip Replacement, Removing Scanner Tray - cont.: passo 6, imagem 1 %32
      • Returning to the back of the printer, remove the scanner from the back hinges.

      • With pressure applied, the scanner will detach easily.

      Pergunte ao FixBot

      Comentar

    7. HP PSC 2410 Photosmart All In One Printer Encoder Strip Replacement: passo 7, imagem 1 %32
      • Gently grasp and unplug the two white ribbon cables from the printer body.

      • Be sure to grasp the cable at the connector and not to pull on the wires themselves.

      Pergunte ao FixBot

      Comentar

    8. HP PSC 2410 Photosmart All In One Printer Encoder Strip Replacement: passo 8, imagem 1 %32
      • Unplug the white plastic multi-wire connector (with orange, black, red, and brown wires) from it's port.

      • Be sure to grasp the white connector and not to pull on the wires themselves.

      Pergunte ao FixBot

      Comentar

    9. HP PSC 2410 Photosmart All In One Printer Encoder Strip Replacement, Detaching the Scanner Tray: passo 9, imagem 1 %32
      • Detach the scanner tray from the printer by lifting the scanner tray off the printer body.

      Pergunte ao FixBot

      Comentar

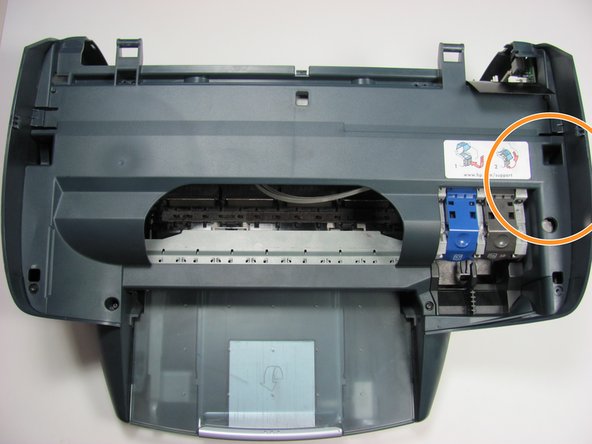
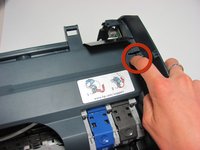
    1. HP PSC 2410 Photosmart All In One Printer Encoder Strip Replacement, Encoder Strip: passo 10, imagem 1 %32 HP PSC 2410 Photosmart All In One Printer Encoder Strip Replacement, Encoder Strip: passo 10, imagem 2 %32
      • Locate the panel labeled with a HP support link sticker.

      • Release the tab by the support link sticker.

      • Remove the black screw below the tab.

      Pergunte ao FixBot

      Comentar

    2. HP PSC 2410 Photosmart All In One Printer Encoder Strip Replacement: passo 11, imagem 1 %32
      • Remove the two black screws closest to the printer tray.

      Pergunte ao FixBot

      Comentar

    3. HP PSC 2410 Photosmart All In One Printer Encoder Strip Replacement: passo 12, imagem 1 %32
      • Unhook the encoder strip from its small silver hooks and remove it from the printer.

      • To replace, feed the new encoder strip through the silver hooks.

      Pergunte ao FixBot

      Comentar

Conclusão

To reassemble your device, follow these instructions in reverse order.

Cancelar: não concluí este guia.

4 outras pessoas executaram este guia.

Jeremy Mahrt

Membro desde: 05/08/11

286 Reputação

Autoria de 2 guias

Equipe

Cal Poly, Team 12-31, Maness Spring 2011 Membro de Cal Poly, Team 12-31, Maness Spring 2011

CPSU-MANESS-S11S12G31

5 Membros

Autoria de 27 guias

0Comentários do guia

Comentar

Visualizações:

Últimas 24 horas: 0

Últimos 7 dias: 12

Últimos 30 dias: 47

Ao todo: 30,067