Introdução
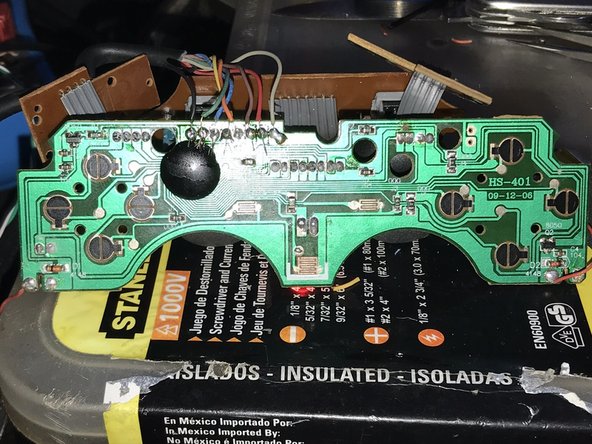
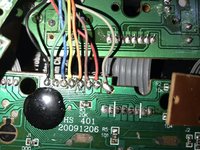
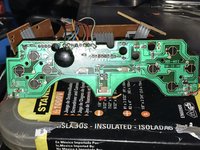
I have this DualShock controller that had broken wires, but I couldn't find how to connect each cable on this board that seems to be a CHS-401, so I went to the trouble of finding how and here it is.
Hope to help somebody.
O que você precisa
-
-
-
First, check that the connection port of your controller (whether wireless or not) has all the pins.
-
If you have a wired controller (a controller with a cable that connects directly to your console) try bending it in different directions. This may reconnect broken connections within the controller cable and could be a temporary fix.
 Pergunte ao FixBot
-
-
-
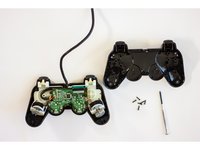
Flip Over Controller and remove all 6 screws from the bottom of the controller.
-
-
-
Once the screws are removed, carefully pry the controller open with your hands.
-
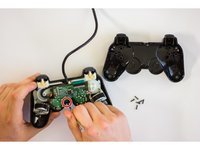
Remove the screw holding the circuit board in place.
-
-
-
Carefully remove the circuit board from the front cover of the controller.
-
-
-
-
Analyze the rubber pads for any debris that may be getting in the way of the black pads. These make an electrical connection on the pad and may not be contacting properly.
-
-
-
Examine the flexible trigger board itself for any dirt or debris that could get in the rubber button pad's way.
-
-
-
Check the connection of the flexible trigger board to the main circuit board of your controller.
-
-
-
If the previous steps are all covered and you are still facing difficulties in getting your buttons to work, consider replacing the main circuit board or flexible trigger board.
-
-
-
Reverse the disassembly steps until the controller is back to its original state. Plug the controller into the console and test whether the fix worked.
-
-
-




To reassemble your device, follow these instructions in reverse order.
Cancelar: não concluí este guia.
3 outras pessoas executaram este guia.

