Ir para o conteúdo principal
Participe da comunidade de reparos - Criar conta

Game Boy Micro Battery Replacement

O que você precisa

  1. Game Boy Micro Battery Replacement, Remove the Cover: passo 1, imagem 1 %32 Game Boy Micro Battery Replacement, Remove the Cover: passo 1, imagem 2 %32
    • Remove the Phillips #00 screw on the side of the Game Boy closest to the directional pad.

    • Once the screw has been loosened, lift the cover off the back of the device.

  2. Game Boy Micro Battery Replacement, Remove battery: passo 2, imagem 1 %32 Game Boy Micro Battery Replacement, Remove battery: passo 2, imagem 2 %32 Game Boy Micro Battery Replacement, Remove battery: passo 2, imagem 3 %32
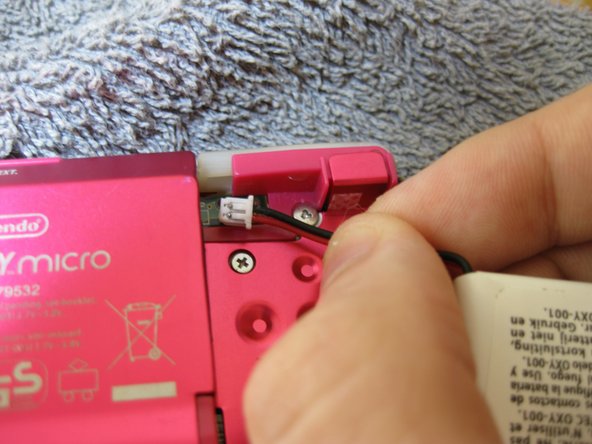
    • Grip, and gently pull outwards on the cable as close to the battery connector as you can

    • Pull in level with the back cover in the direction as indicated by the arrow (not upwards, and not sideways), otherwise you could damage the connector, the cable, or just rip everything off.

    • When plugging the battery back in, make sure to use a non-conductive tool with a flat head to push the battery plug back into the connector, to avoid shorting the battery pins in the plug.

Conclusão

To reassemble your device, follow these instructions in reverse order.

Uma outra pessoa concluiu este guia.

SonoSooS

Membro desde: 07/30/24

242 Reputação

Autoria de 2 guias

0Comentários do guia

Comentar

Visualizações:

Últimas 24 horas: 4

Últimos 7 dias: 35

Últimos 30 dias: 165

Ao todo: 2,606