Introdução
Use this guide to replace the fresh food thermistor on your GE side-by-side refrigerator.
The thermistor enables the refrigerator control to monitor air temperature inside the refrigerator.
If the fresh food thermistor fails, the refrigerator will not maintain a proper temperature in the fresh food compartment.
This guide was created using a GE model GSH25KGMB BB side-by-side refrigerator. Other GE side-by-side units should be similar.
-
-
Unplug your refrigerator before you begin your repair.
-
Condenser fan motor
-
Compressor motor and thermal overload device
-
Water supply valve assembly
-
-
-
Lift the front edge of the shelf to release it from the support bracket.
-
Lift the rear of the shelf slightly, while the front edge is lifted, and pull the shelf out toward the front of the compartment
-
Repeat for each shelf as needed.
-
-
-
-
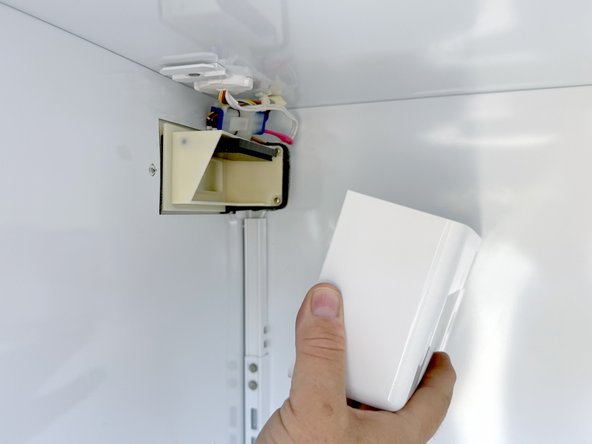
Use a 1/4" nut driver to remove the two screws securing the damper cover to the left wall at the rear of the fresh food compartment.
-
-
-
Remove the damper cover by pulling it straight out from the wall of the fresh food compartment.
-
-
-
Use a 1/4" nut driver to remove the screw securing the thermistor cover.
-
Pull the thermistor cover up and off
-
-
-
If the thermistor is defective, either open circuit, short circuit, or out of specification for a temperature, cut the leads and splice in a new unit.
-
The two red marks in the photo show a suitable part of the wiring for splicing in the new thermistor.
-


To reassemble your device, follow these instructions in reverse order.
Take your e-waste to an R2 or e-Stewards certified recycler.
Repair didn’t go as planned? Try some basic troubleshooting, or ask our Answers community for help.

