O que você precisa
-
-
Remove all the screws that hold the plastic bottom cover on. There are some more screws that cant be seen in the photo.
 Pergunte ao FixBot
-
-
-
-
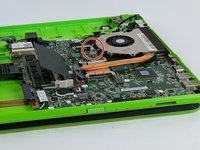
Locate the two strips of cables projecting from the fan to the white holders circled in red.
-
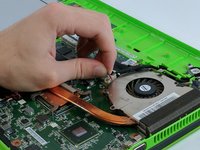
Using your hand carefully remove the two strips of cables from the white sockets. Preferably grabbing the strip by the head(the white section where the cables are engulfed). If unable to gingerly pull on the cables.
-
Make care to not rip the connectors and the cables
-


To reassemble your device, follow these instructions in reverse order.
Cancelar: não concluí este guia.
Uma outra pessoa concluiu este guia.
Equipe

USF Tampa, Team 20-5, Remmell Spring 2017 Membro de USF Tampa, Team 20-5, Remmell Spring 2017
USFT-REMMELL-S17S20G5
3 Membros
Autoria de 12 guias