Ir para o conteúdo principal

Envizen V100M Battery Replacement

O que você precisa

  1. Envizen V100M Battery Replacement, Back Cover: passo 1, imagem 1 %32 Envizen V100M Battery Replacement, Back Cover: passo 1, imagem 2 %32
    • Remove the two screws on the side of the tablet that hold the back cover in place using the ifixit PH00 screwdriver.

    • The two screws for the back cover are: 1.5mm diameter x 3.5mm long

  2. Envizen V100M Battery Replacement: passo 2, imagem 1 %32 Envizen V100M Battery Replacement: passo 2, imagem 2 %32 Envizen V100M Battery Replacement: passo 2, imagem 3 %32
    • Pry along the edge of the device to separate the back cover from the device.

    • The speakers are attached to the back cover and motherboard assembly so remove carefully.

  3. Envizen V100M Battery Replacement, Battery: passo 3, imagem 1 %32 Envizen V100M Battery Replacement, Battery: passo 3, imagem 2 %32 Envizen V100M Battery Replacement, Battery: passo 3, imagem 3 %32
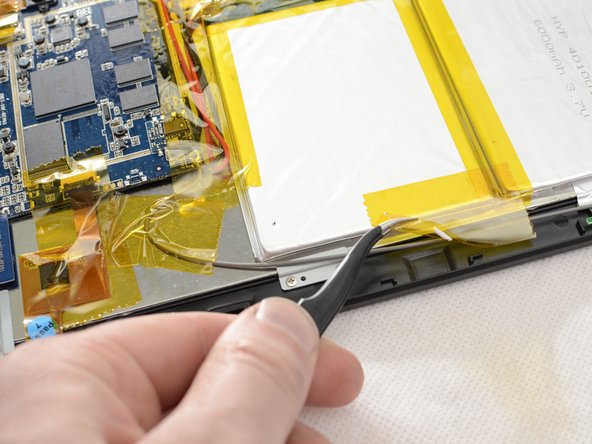
    • Remove the non-conductive tape located on the battery and motherboard assembly.

  4. Envizen V100M Battery Replacement: passo 4, imagem 1 %32 Envizen V100M Battery Replacement: passo 4, imagem 2 %32 Envizen V100M Battery Replacement: passo 4, imagem 3 %32
    • Slide the ifixit spudger under the battery, and work down the side of the battery, releasing it from the adhesive holding it down.

    • Remove battery from the Envizen V100M.

  5. Envizen V100M Battery Replacement: passo 5, imagem 1 %32
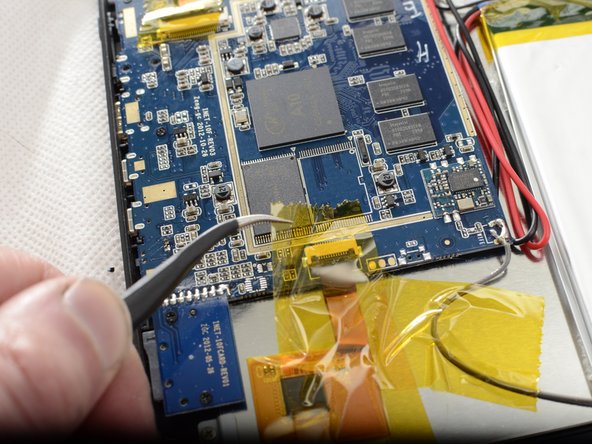
    • Remove the solder from the red and black wires from the battery attached to the motherboard. Here is a guide on how to solder.

    • Remove the red and black wire from the motherboard using tweezers. If tweezers are unable to remove the wires, heat can be used to loosen the solder allowing for the wires to be removed.

  6. Envizen V100M Battery Replacement: passo 6, imagem 1 %32
    • Remove the black and white wires from the motherboard. These wires power the LCD screen. Remove the black and white wires by first trying tweezers and if difficult use heat to loosen the solder allowing for the removal of the wires.

    • Note during final installation remember to match the location of the black and white wires to the picture

Conclusão

To reassemble your device, follow these instructions in reverse order.

Uma outra pessoa concluiu este guia.

nbach

Membro desde: 03/23/15

663 Reputação

Autoria de 6 guias

Equipe

UMass Dartmouth, Team 3-2, Duarte Spring 2015 Membro de UMass Dartmouth, Team 3-2, Duarte Spring 2015

UMASSD-DUARTE-S15S3G2

Membros da 4

Autoria de 12 guias

0 comentários

Adicione um comentário

Exibir estatísticas:

Últimas 24 horas: 0

Últimos 7 dias: 0

Últimos 30 dias: 0

Duração total: 1,593