Introdução
Um problema comum com dispositivos eletrônicos é o fio cortado ou danificado. Seja um cachorro que mastigou o fio, uma criança que cortou o fio ao brincar com uma tesoura ou um eletrodoméstico grande que cortou o fio ao ser passado por cima dele, muitas pessoas já passaram por esse problema. Este guia ensina como remover um plugue danificado e substituí-lo por um novo. A fiação no plugue da lâmpada deve ser feita corretamente para que ela acenda após a conclusão do reparo. Este guia mostra como localizar corretamente as conexões "fase" e "neutro".
O que você precisa
-
-
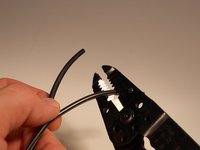
Localize a parte danificada do fio.
-
Corte o plugue danificado do cabo da lâmpada, 2,5 cm abaixo da área danificada
 Pergunte ao FixBot
-
-
-
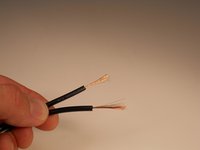
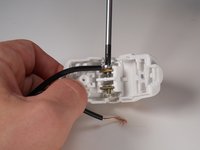
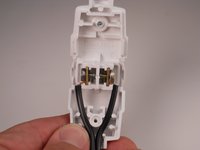
Separe o fio puxando-o delicadamente.
-
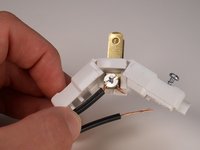
O fio com a nervura em relevo no revestimento é o fio neutro.
-
O fio fase possui um revestimento liso.
-
-
-
-
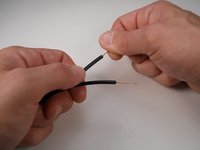
Remova o revestimento do fio.
-
Exponha 1,9 cm do fio de cobre.
-
Torça o fio de cobre exposto para que não haja fiapos.
-
-
-
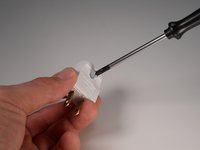
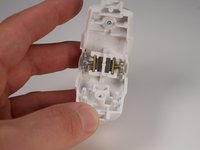
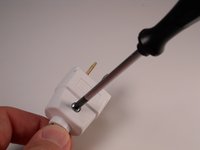
Afrouxe o parafuso e abra o plugue de substituição.
-
O parafuso prateado é a conexão neutra e o parafuso de latão é a conexão fase.
-
-
-
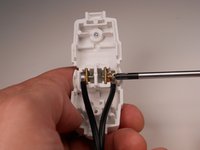
Enrole o fio neutro ao redor do parafuso neutro. Aperte o parafuso para prender o fio.
-
Enrole o fio fase ao redor do parafuso de latão. Aperte o parafuso para prender o fio.
-
-
-
Passe o fio de modo que o plugue feche completamente.
-
Aperte o parafuso externo para fechar o plugue.
-


Se a lâmpada não funcionar após a substituição do plugue, o problema pode estar no soquete da lâmpada ou nas conexões.
Cancelar: não concluí este guia.
19 outras pessoas executaram este guia.
Um agradecimento especial a esses tradutores:
100%

Translation Bot está nos ajudando a consertar o mundo! Quer contribuir?
Comece a traduzir ›
Equipe

Texas Tech, Team 3-2, Rauch SU 2015 Membro de Texas Tech, Team 3-2, Rauch SU 2015
TTU-RAUCH-SU15S3G2
3 Membros
Autoria de 12 guias
7Comentários do guia
Passt - gute Anleitung
A version for 3 prong (North American) would be great
https://www.noveltylights.com/coaxial-6-...
How would you repair a coaxial cord wire right where it enters the screw on part?
what do you do if the replacement plug has no screws to open it?
Buy a plug that can be opened with a screw