Introdução
Este guia mostrará como remover e substituir os motores de vibração de um controle DualShock 4.
O que você precisa
-
-
-
Remova os quatro parafusos Phillips de 2 mm na placa traseira usando a chave Phillips #000.
 Pergunte ao FixBot
-
-
-
-
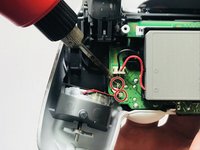
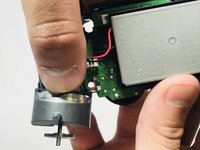
Dessolde as conexões que prendem os motores de vibração à placa-mãe.
-
-
-
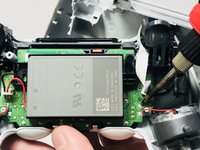
Há um parafuso escondido sob a bateria que prende a placa frontal à placa-mãe.
-
Levante a bateria e remova o parafuso de 10 mm usando a chave Phillips #000.
-
-
-
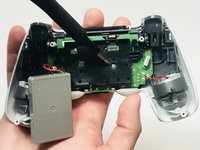
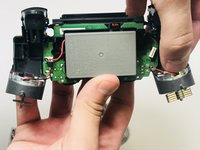
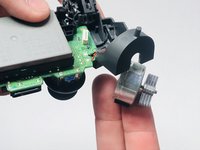
Com um pouco de pressão extra, empurre para baixo e para fora para soltar e remover os motores de vibração do seu soquete.
-
-


Para a remontagem de seu dispositivo, siga estas instruções na ordem inversa.
Cancelar: não concluí este guia.
14 outras pessoas executaram este guia.
Um agradecimento especial a esses tradutores:
100%

Translation Bot está nos ajudando a consertar o mundo! Quer contribuir?
Comece a traduzir ›
Equipe

University of Memphis, Team S5-G4, Baddour Spring 2018 Membro de University of Memphis, Team S5-G4, Baddour Spring 2018
UM-BADDOUR-S18S5G4
2 Membros
Autoria de 11 guias
3Comentários do guia
I’d recommend adding removal instructions for the touchpad also
the rumble packs are stuck with an adhesive on my controller. The best way to remove the rumble pack in this case? thanks
I'm most likely way too late, but if there is an adhesive, I would probably use something that breaks glue down and is safe for electronics